81 - Ultimate Sharpening Station, страница 27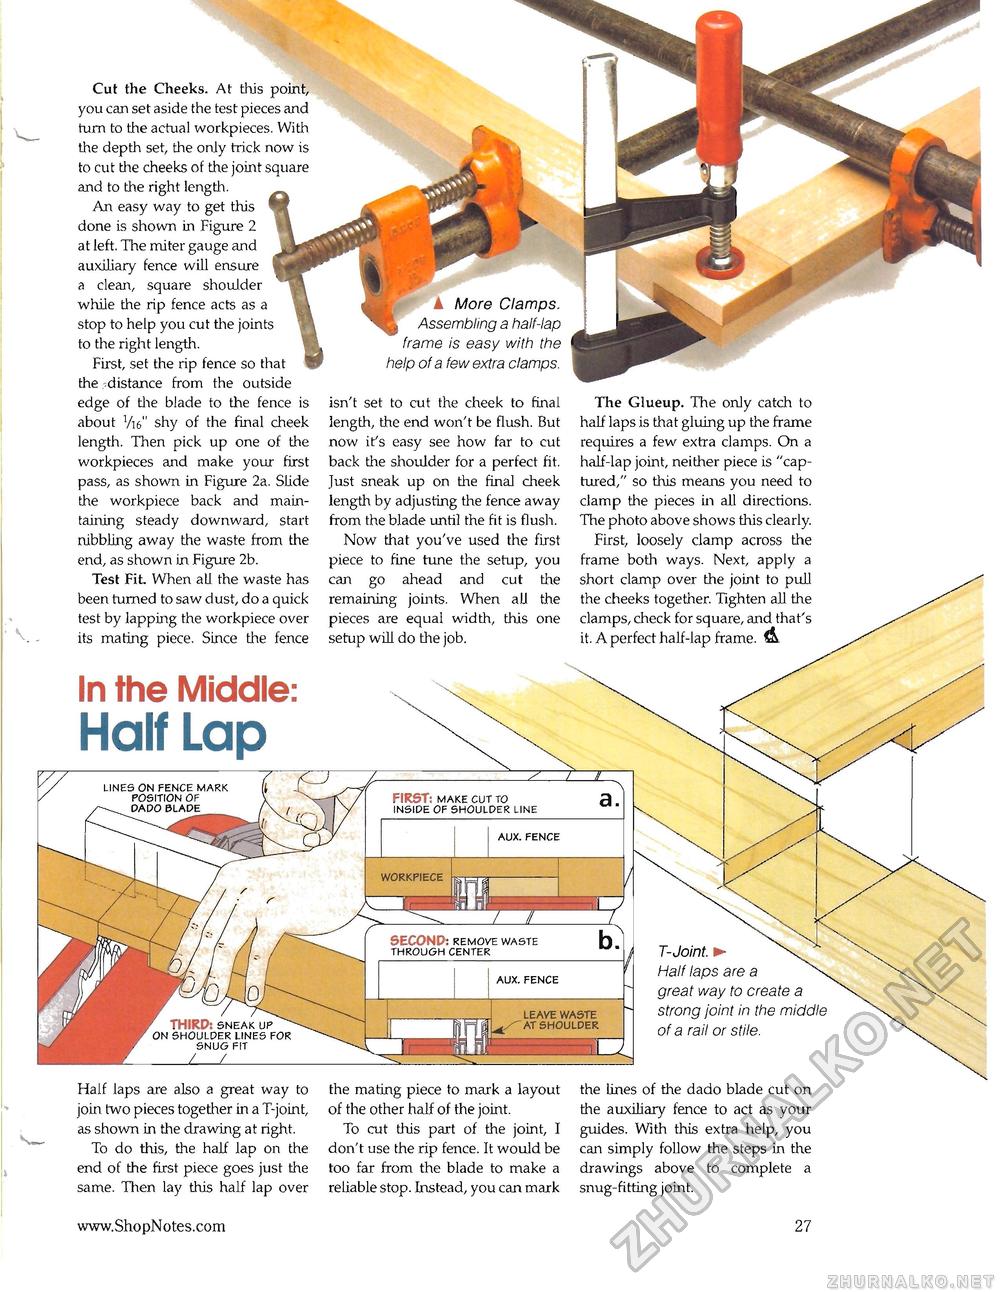
Cut the Cheeks. At this point, you can set aside the test pieces and turn to the actual workpieces. With the depth set, the only trick now is to cut the cheeks of the joint square and to the right length. An easy way to get this done is shown in Figure 2 at left. The miter gauge and auxiliary fence will ensure a clean, square shoulder while the rip fence acts as a stop to help you cut the joints to the right length. First, set the dp fence so that the .distance from the outside edge of the blade to the fence is about Vi6" shy of the final cheek length. Then pick up one of the workpieces and make your first pass, as shown in Figure 2a. Slide the workpiece back and maintaining steady downward, start nibbling away the waste from the end, as shown in Figure 2b. Test Fit When all the waste has been turned to saw dust, do a quick test by lapping the workpiece over its mating piece. Since the fence In the Middle: Half Lap▲ More Clamps. Assembling a half-lap frame is easy with the help of a few extra clamps. isn't set to cut the cheek to final length, the end won't be flush. But now it's easy see how far to cut back the shoulder for a perfect fit. Just sneak up on the final cheek length by adjusting the fence away from the blade until the fit is flush. Now that you've used the first piece to fine tune the setup, you can go ahead and cut the remaining joints. When all the pieces are equal width, this one setup will do the job. The Glueup. The only catch to half laps is that gluing up the frame requires a few extra clamps. On a half-lap joint, neither piece is "captured," so this means you need to clamp the pieces in all directions. The photo above shows this clearly. First, loosely clamp across the frame both ways. Next, apply a short clamp over the joint to pull the cheeks together. Tighten all the clamps, check for square, and that's it. A perfect half-lap frame. & Half laps are also a great way to join two pieces together in a T-joint, as shown in the drawing at right. To do this, the half lap on the end of the first piece goes just the same. Then lay this half lap over the mating piece to mark a layout of the other half of the joint. To cut this part of the joint, I don't use the rip fence. It would be too far from the blade to make a reliable stop. Instead, you can mark the lines of the dado blade cut on the auxiliary fence to act as your guides. With this extra help, you can simply follow the steps in the drawings above to complete a snug-fitting joint. 27 |


