81 - Ultimate Sharpening Station, страница 25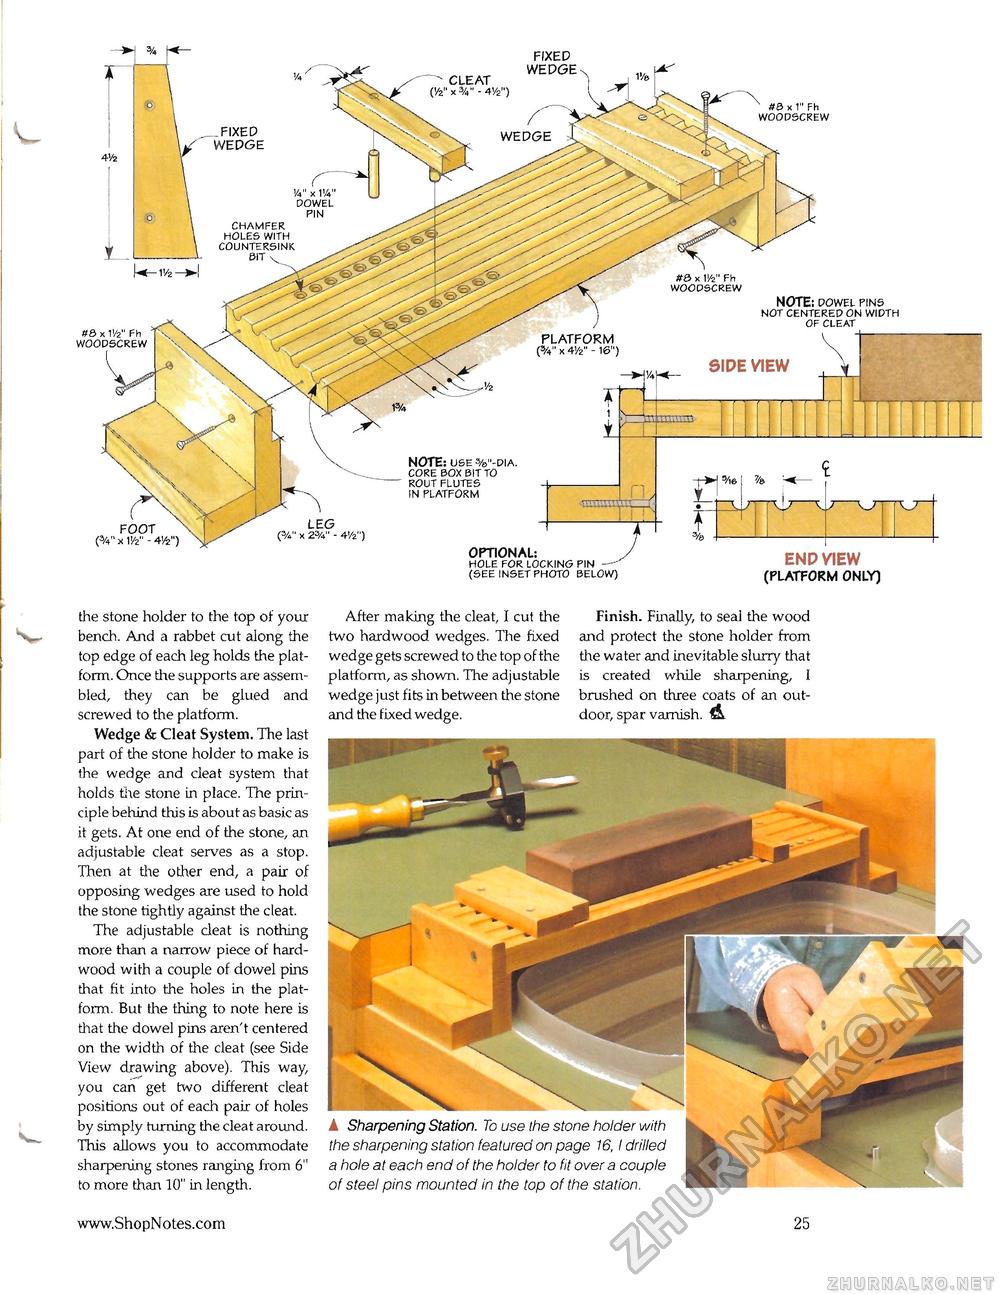
the stone holder to the top of your bench. And a rabbet cut along the top edge of each leg holds the platform. Once the supports are assembled, they can be glued and screwed to the platform. Wedge & Cleat System. The last part of the stone holder to maJke is the wedge and cleat system that holds tlte stone in place. The principle behind this is about as basic as it gets. At one end of the stone, an adjustable cleat serves as a stop. Then at the other end, a pair of opposing wedges are used to hold the stone tightly against the cleat. The adjustable cleat is nothing more than a narrow piece of hardwood with a couple of dowel pins that fit into the holes in the platform. But the thing to note here is that the dowel pins aren't centered on the width of the cleat (see Side View drawing above). This way, you can get two different cleat positions out of each pair of holes by simply turning the cleat around. This allows you to accommodate sharpening stones ranging from 6" to more than 10" in length. OPTIONAL: HOLE FOR LOCKING PIN —' (SEE INSET PHOTO BELOW) enp view (PLATFORM ONLY) After making the cleat, I cut the two hardwood wedges. The fixed wedge gets screwed to the top of the platform, as shown. The adjustable wedge just fits in between the stone and the fixed wedge. Finish. Finally, to seal the wood and protect the stone holder from the water and inevitable slurry that is created while sharpening, I brushed on three coats of an outdoor, spar varnish. A Sharpening Station. To use the stone holder with the sharpening station featured on page 16,1 drilled a hole at each end of the holder to fit over a couple of steel pins mounted in the top of the station. 25 |


