81 - Ultimate Sharpening Station, страница 26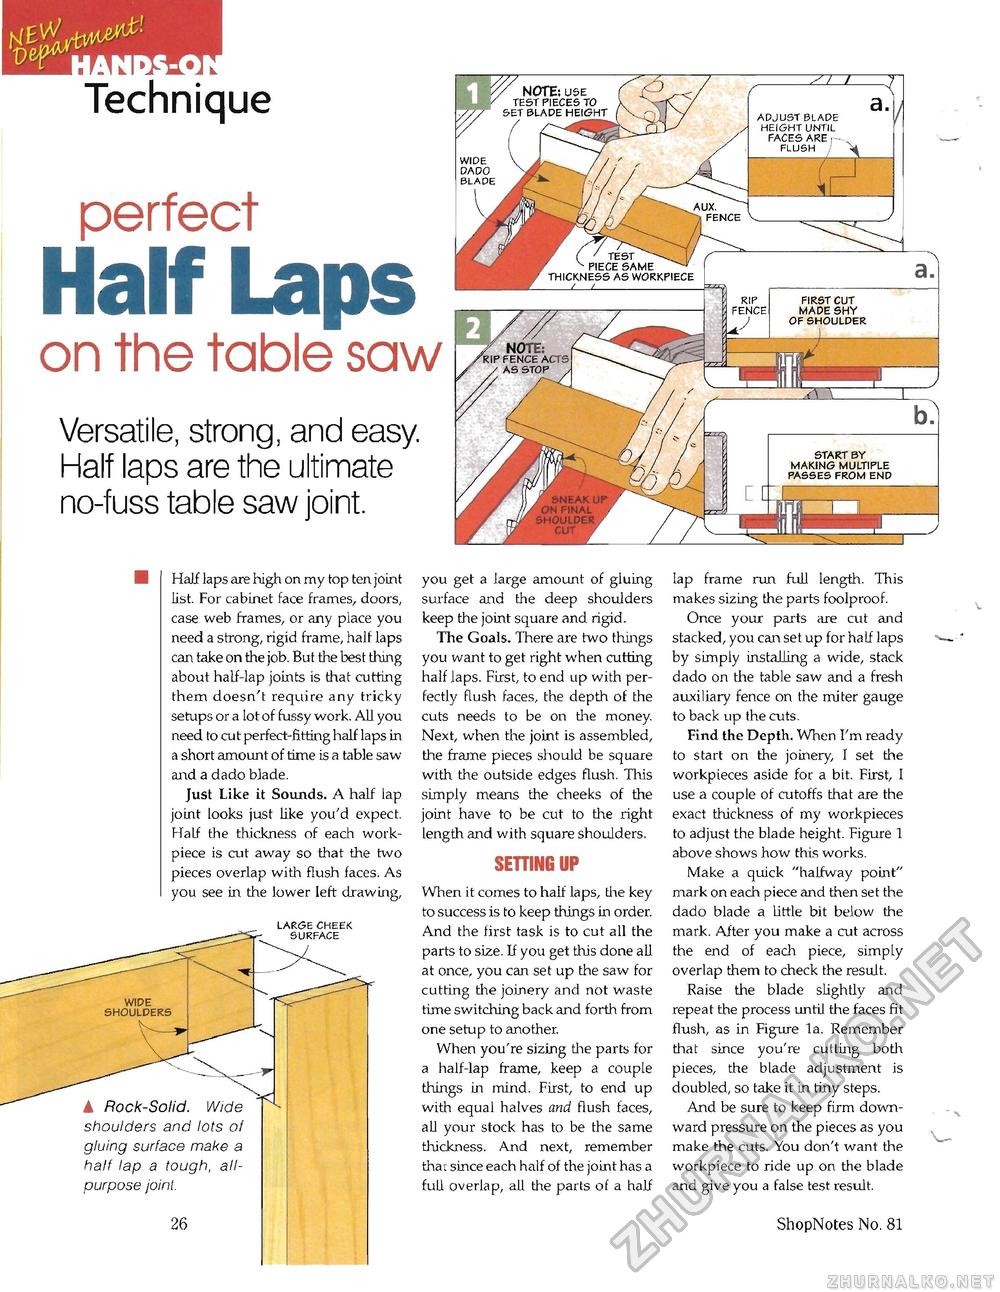
Technique perfect Half Lapson the table saw Versatile, strong, and easy. Half laps are the ultimate no-fuss table saw joint. Half laps are high on my top ten joint list. For cabinet face frames, doors, case web frames, or any place you need a strong, rigid frame, half laps can take on the job. But the best thing about half-lap joints is that cutting them doesn't require any tricky setups or a lot of fussy work. All you need to cut perfect-fitting half laps in a short amount of time is a table saw and a dado blade. Just Like it Sounds. A half lap joint looks just like you'd expect. Half the thickness of each work-piece is cut away so that the two pieces overlap with flush faces. As you see in the lower left drawing, LARGE CHEEK SURFACE ▲ Rock-Solid. Wide shoulders and lots of gluing surface make a half lap a tough, all-purpose joint. 26 you get a large amount of gluing surface and the deep shoulders keep the joint square and rigid. The Goals. There are two things you want to get right when cutting half laps. First, to end up with perfectly flush faces, the depth of the cuts needs to be on the money. Next, when the joint is assembled, the frame pieces should be square with the outside edges flush. This simply means the cheeks of the joint have to be cut to the right length and with square shoulders. SETTING UP When it comes to half laps, the key to success is to keep things in order. And the first task is to cut all the parts to size. If you get this done all at once, you can set up the saw for cutting the joinery and not waste time switching back and forth from one setup to another. When you're sizing the parts for a half-lap frame, keep a couple things in mind. First, to end up with equal halves and flush faces, all your stock has to be the same thickness. And next, remember tha: since each half of the joint has a full overlap, all the parts of a half lap frame run full length. This makes sizing the parts foolproof. Once your parts are cut and stacked, you can set up for half laps by simply installing a wide, stack dado on the table saw and a fresh auxiliary fence on the miter gauge to back up the cuts. Find the Depth. When I'm ready to start on the joinery, I set the workpieces aside for a bit. First, I use a couple of cutoffs that are the exact thickness of my workpieces to adjust the blade height. Figure 1 above shows how this works. Make a quick "halfway point" mark on each piece and then set the dado blade a little bit below the mark. After you make a cut across the end of each piece, simply overlap them to check the result. Raise the blade slightly and repeat the process until the faces fit flush, as in Figure la. Remember that since you're cutting both pieces, the blade adjustment is doubled, so take it in tiny steps. And be sure to keep firm downward pressure on the pieces as you make the cuts. You don't want the workpiece to ride up on the blade and give you a false test result. ShopNotes No. 81 THICKNESS AS WORKPIECE _i._I_ FIRST CUT MADE SHY OF SHOULDER NOTE: use TEST PIECES TO SET BLADE HEIGHT WIDE DADO BLADE ADJUST BLADE HEIGHT UNTIL FACES ARE FLUSH j -a (J _ll |


