81 - Ultimate Sharpening Station, страница 29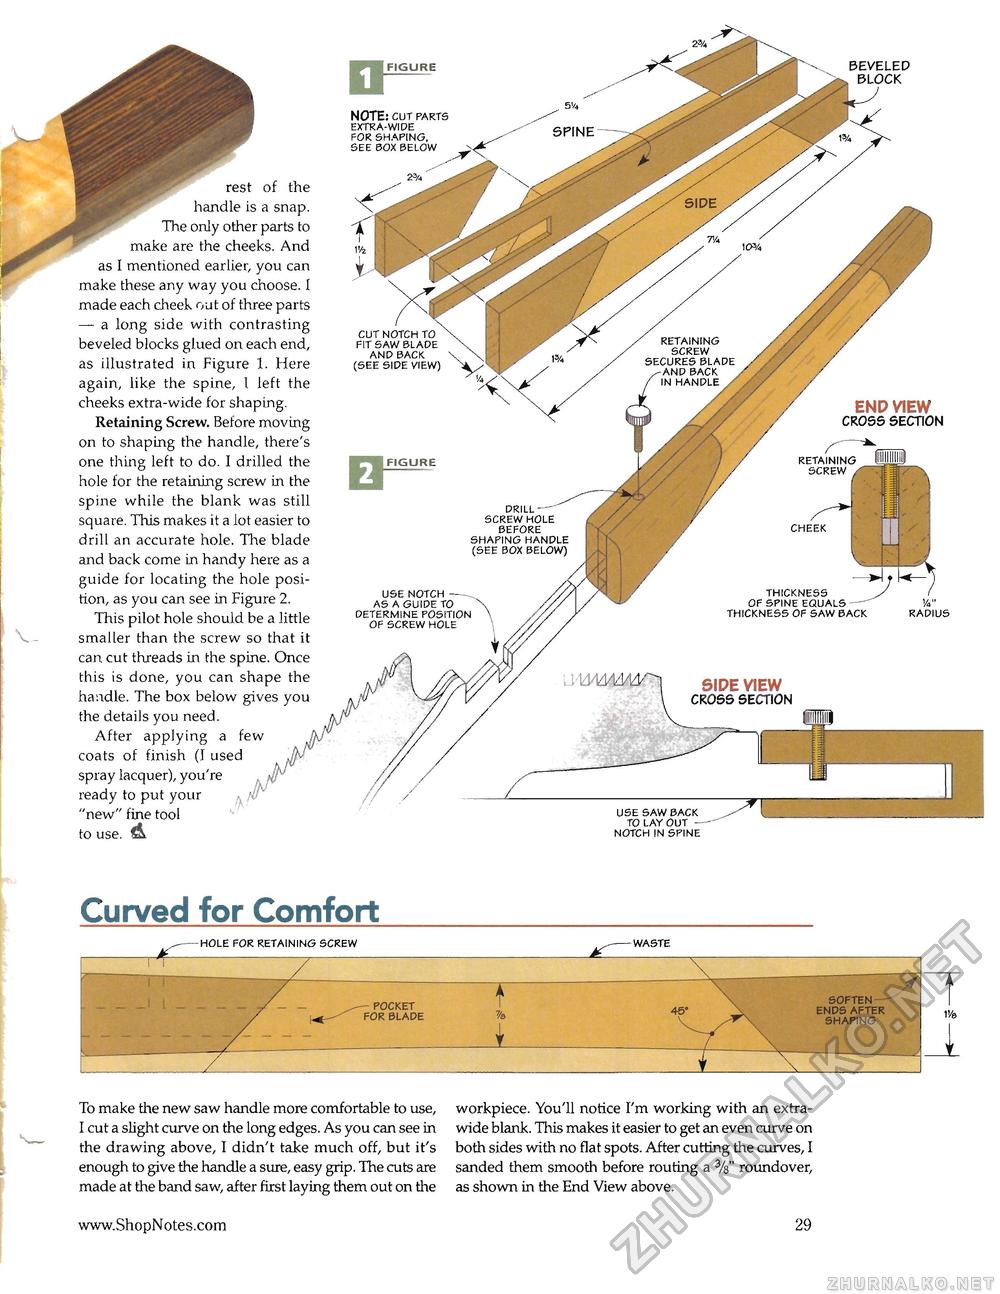
rest of the handle is a snap. The only other parts to make are the cheeks. And as I mentioned earlier, you can make these any way you choose. I made each cheek out of three parts — a long side with contrasting beveled blocks glued on each end, as illustrated in Figure 1. Here again, like the spine, 1 left the cheeks extra-wide for shaping. Retaining Screw. Before moving on to shaping the handle, there's one thing left to do. I drilled the hole for the retaining screw in the spine while the blank was still square. This makes it a lot easier to drill an accurate hole. The blade and back come in handy here as a guide for locating the hole position, as you can see in Figure 2. This pilot hole should be a little smaller than the screw so that it can cut threads in the spine. Once this is done, you can shape the handle. The box below gives you the details you need. After applying a few coats of finish (I used spray lacquer), you're ready to put your "new" fine tool to use. A use saw back to lay out — notch in spine NOTE: cut parts extra-wide for shaping. see box below side view ROSS SECTION FIGURE BEVELED BLOCK end view CROSS SECTION FIGURE retaining screw fit saw blade and back (see side view) retaining screw secures blade drill screw hole before shaping handle (see box below) use notch as a guide to determine position of screw hole cheek thickness of spine equals — thickness of saw back radius Curved for Comfort hole for retaining screw -WASTE f 45" SOFTEN ENDS AFTER SHAPING V/& To make the new saw handle more comfortable to use, I cut a slight curve on the long edges. As you can see in the drawing above, I didn't take much off, but it's enough to give the handle a sure, easy grip. The cuts are made at the band saw, after first laying them out on the workpiece. You'll notice I'm working with an extra-wide blank. This makes it easier to get an even curve on both sides with no flat spots. After cutting the curves, I sanded them smooth before routing a %" roundover, as shown in the End View above. 29 |


