82 - The Complete Miter Saw Workstation, страница 30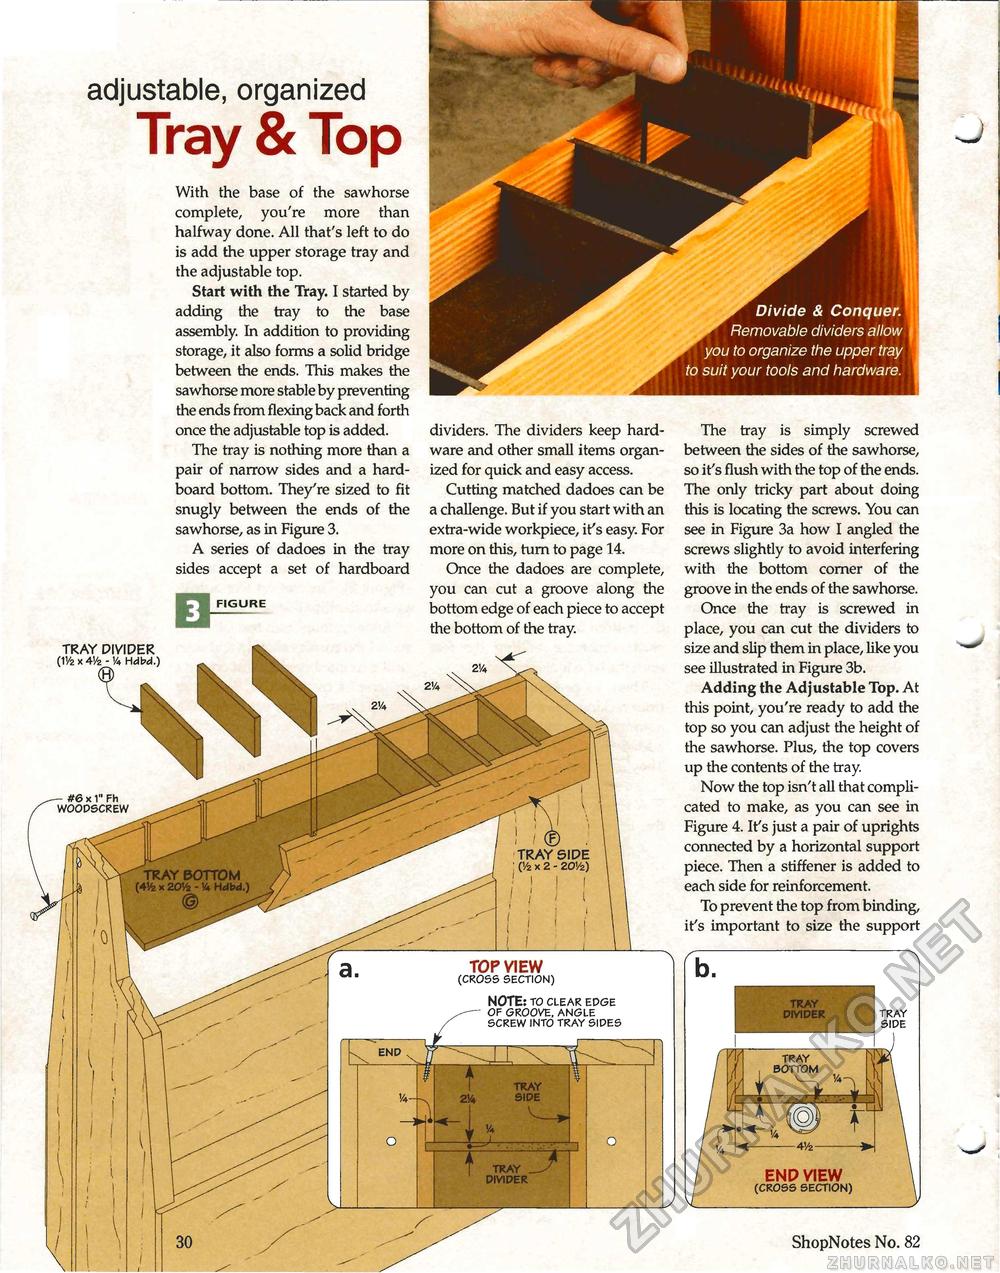
adjustable, organized Tray & Top With the base of the sawhorse complete, you're more than halfway done. All that's left to do is add the upper storage tray and the adjustable top. Start with the Tray. I started by adding the tray to the base assembly. In addition to providing storage, it also forms a solid bridge between the ends. This makes the sawhorse more stable by preventing the ends from flexing back and forth once the adjustable top is added. The tray is nothing more than a pair of narrow sides and a hard-board bottom. They're sized to fit snugly between the ends of the sawhorse, as in Figure 3. A series of dadoes in the tray sides accept a set of hardboard figure dividers. The dividers keep hardware and other small items organized for quick and easy access. Cutting matched dadoes can be a challenge. But if you start with an extra-wide workpiece, it's easy. For more on this, turn to page 14. Once the dadoes are complete, you can cut a groove along the bottom edge of each piece to accept the bottom of the tray. TRAY DIVIDER (1'/2 x 4Va - '/4 Hdbd.) (R The tray is simply screwed between the sides of the sawhorse, so it's flush with the top of the ends. The only tricky part about doing this is locating the screws. You can see in Figure 3a how I angled the screws slightly to avoid interfering with the bottom corner of the groove in the ends of the sawhorse. Once the tray is screwed in place, you can cut the dividers to size and slip them in place, like you see illustrated in Figure 3b. Adding the Adjustable Top. At this point, you're ready to add the top so you can adjust the height of the sawhorse. Plus, the top covers up the contents of the tray. Now the top isn't all that complicated to make, as you can see in Figure 4. It's just a pair of uprights connected by a horizontal support piece. Then a stiffener is added to each side for reinforcement. To prevent the top from binding, it's important to size the support -J 30 ShopNotes No. 82 |


