82 - The Complete Miter Saw Workstation, страница 35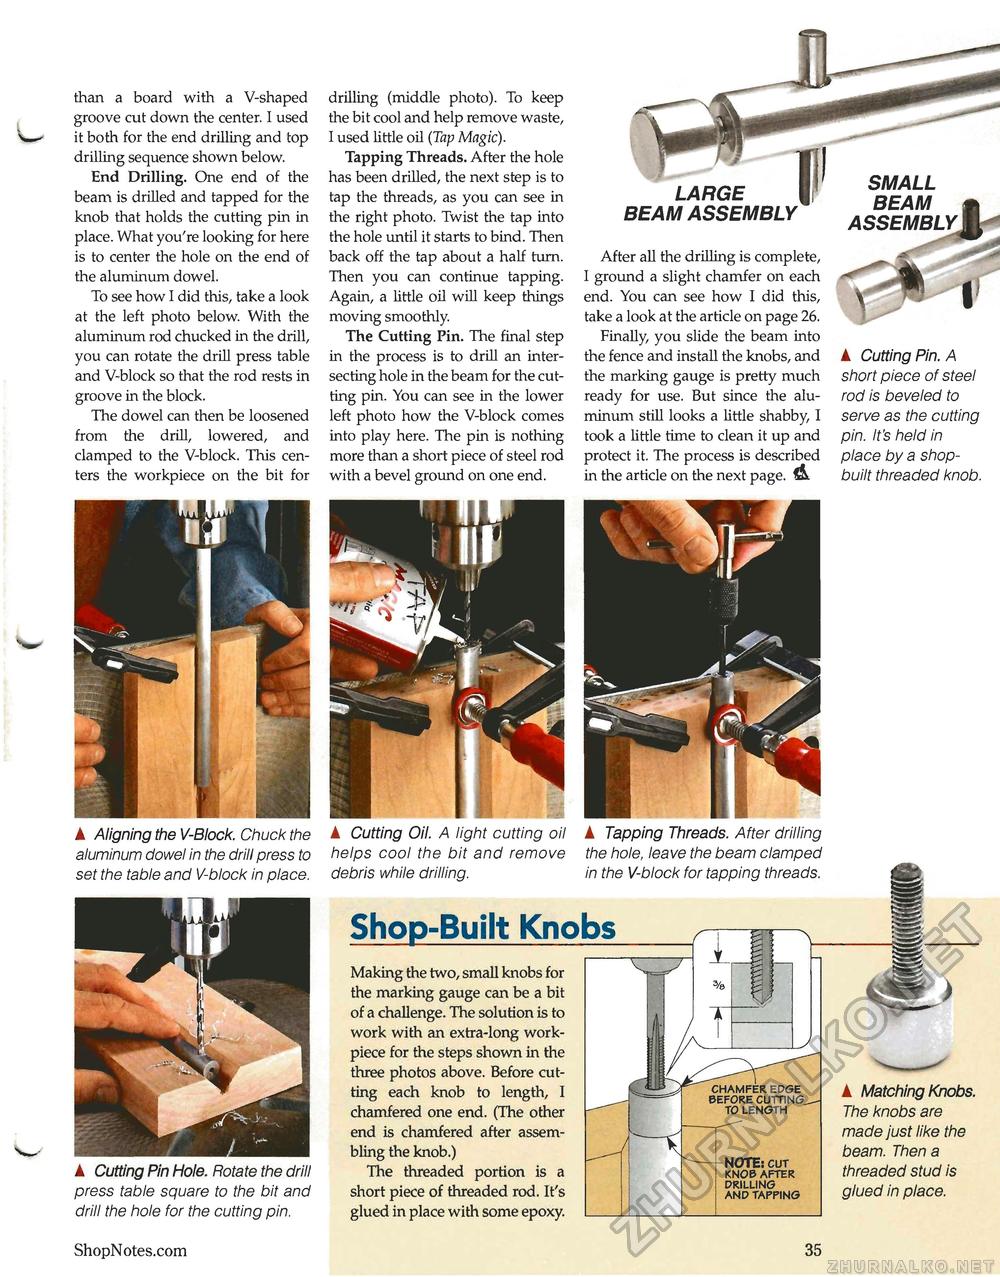
drilling (middle photo). To keep the bit cool and help remove waste, I used little oil (Tap Magic). Tapping Threads. After the hole has been drilled, the next step is to tap the threads, as you can see in the right photo. Twist the tap into the hole until it starts to bind. Then back off the tap about a half turn. Then you can continue tapping. Again, a little oil will keep things moving smoothly. The Cutting Pin. The final step in the process is to drill an intersecting hole in the beam for the cutting pin. You can see in the lower left photo how the V-block comes into play here. The pin is nothing more than a short piece of steel rod with a bevel ground on one end. than a board with a V-shaped groove cut down the center. I used it both for the end drilling and top drilling sequence shown below. End Drilling. One end of the beam is drilled and tapped for the knob that holds the cutting pin in place. What you're looking for here is to center the hole on the end of the aluminum dowel. To see how I did this, take a look at the left photo below. With the aluminum rod chucked in the drill, you can rotate the drill press table and V-block so that the rod rests in groove in the block. The dowel can then be loosened from the drill, lowered, and clamped to the V-block. This centers the workpiece on the bit for ▲ Aligning the V-Block. Chuck the aluminum dowel in the drill press to set the table and V-block in place. A Cutting Pin Hole. Rotate the drill press table square to the bit and drill the hole for the cutting pin. LARGE BEAM ASSEMBLY 1' After all the drilling is complete, I ground a slight chamfer on each end. You can see how I did this, take a look at the article on page 26. Finally, you slide the beam into the fence and install the knobs, and the marking gauge is pretty much ready for use. But since the aluminum still looks a little shabby, I took a little time to clean it up and protect it. The process is described in the article on the next page. A Cutting Pin. A short piece of steel rod is beveled to serve as the cutting pin. It's held in place by a shop-built threaded knob. SMALL BEAM A Cutting Oil. A light cutting oil helps cool the bit and remove debris while drilling. A Tapping Threads. After drilling the hole, leave the beam clamped in the V-block for tapping threads. Shop-Built Knobs A Matching Knobs. The knobs are made just like the beam. Then a threaded stud is glued in place. Making the two, small knobs for the marking gauge can be a bit of a challenge. The solution is to work with an extra-long work-piece for the steps shown in the three photos above. Before cutting each knob to length, I chamfered one end. (The other end is chamfered after assembling the knob.) The threaded portion is a short piece of threaded rod. It's glued in place with some epoxy. NOTE: cut knob after drilling and tapping chamfer edge before cutting to length www.ShopNotes.com 35 |


