82 - The Complete Miter Saw Workstation, страница 37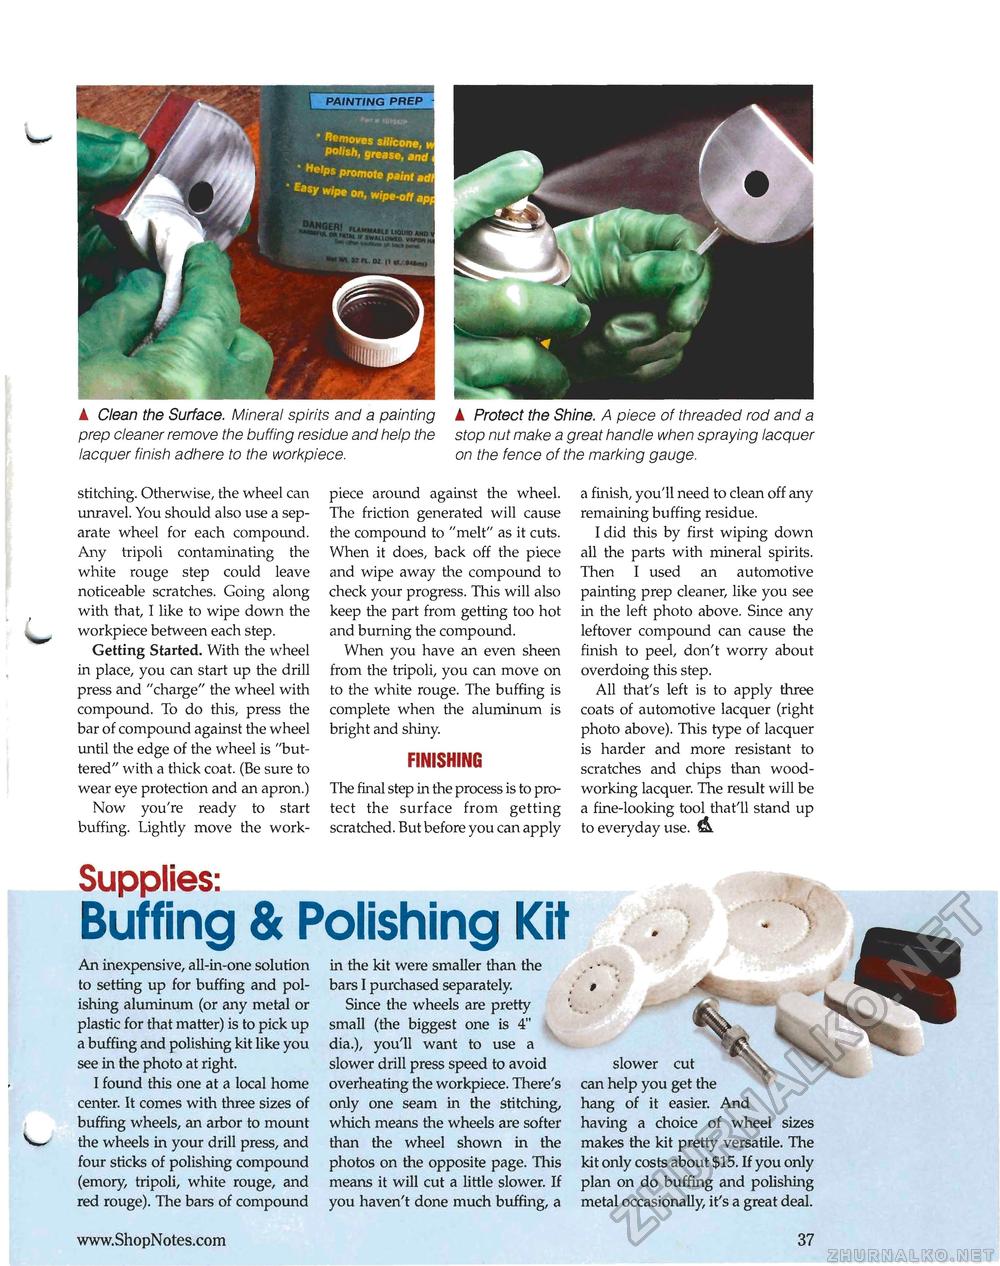
PAINTING PREP A Clean the Surface. Mineral spirits and a painting prep cleaner remove the buffing residue and help the lacquer finish adhere to the workpiece. A Protect the Shine. A piece of threaded rod and a stop nut make a great handle when spraying lacquer on the fence of the marking gauge. a finish, you'll need to clean off any remaining buffing residue. I did this by first wiping down all the parts with mineral spirits. Then I used an automotive painting prep cleaner, like you see in the left photo above. Since any leftover compound can cause the finish to peel, don't worry about overdoing this step. All that's left is to apply three coats of automotive lacquer (right photo above). This type of lacquer is harder and more resistant to scratches and chips than woodworking lacquer. The result will be a fine-looking tool that'll stand up to everyday use. stitching. Otherwise, the wheel can unravel. You should also use a separate wheel for each compound. Any tripoli contaminating the white rouge step could leave noticeable scratches. Going along with that, I like to wipe down the workpiece between each step. Getting Started. With the wheel in place, you can start up the drill press and "charge" the wheel with compound. To do this, press the bar of compound against the wheel until the edge of the wheel is "buttered" with a thick coat. (Be sure to wear eye protection and an apron.) Now you're ready to start buffing. Lightly move the work- piece around against the wheel. The friction generated will cause the compound to "melt" as it cuts. When it does, back off the piece and wipe away the compound to check your progress. This will also keep the part from getting too hot and burning the compound. When you have an even sheen from the tripoli, you can move on to the white rouge. The buffing is complete when the aluminum is bright and shiny. FINISHING The final step in the process is to protect the surface from getting scratched. But before you can apply Supplies: Buffing & Polishing Kit An inexpensive, all-in-one solution to setting up for buffing and polishing aluminum (or any metal or plastic for that matter) is to pick up a buffing and polishing kit like you see in the photo at right. I found this one at a local home center. It comes with three sizes of buffing wheels, an arbor to mount the wheels in your drill press, and four sticks of polishing compound (emory, tripoli, white rouge, and red rouge). The bars of compound in the kit were smaller than the bars I purchased separately. Since the wheels are pretty small (the biggest one is 4" dia.), you'll want to use a slower drill press speed to avoid overheating the workpiece. There's only one seam in the stitching, which means the wheels are softer than the wheel shown in the photos on the opposite page. This means it will cut a little slower. If you haven't done much buffing, a slower cut can help you get the hang of it easier. And having a choice of wheel sizes makes the kit pretty versatile. The kit only costs about $15. If you only plan on do buffing and polishing metal occasionally, it's a great deal. 37 |


