82 - The Complete Miter Saw Workstation, страница 39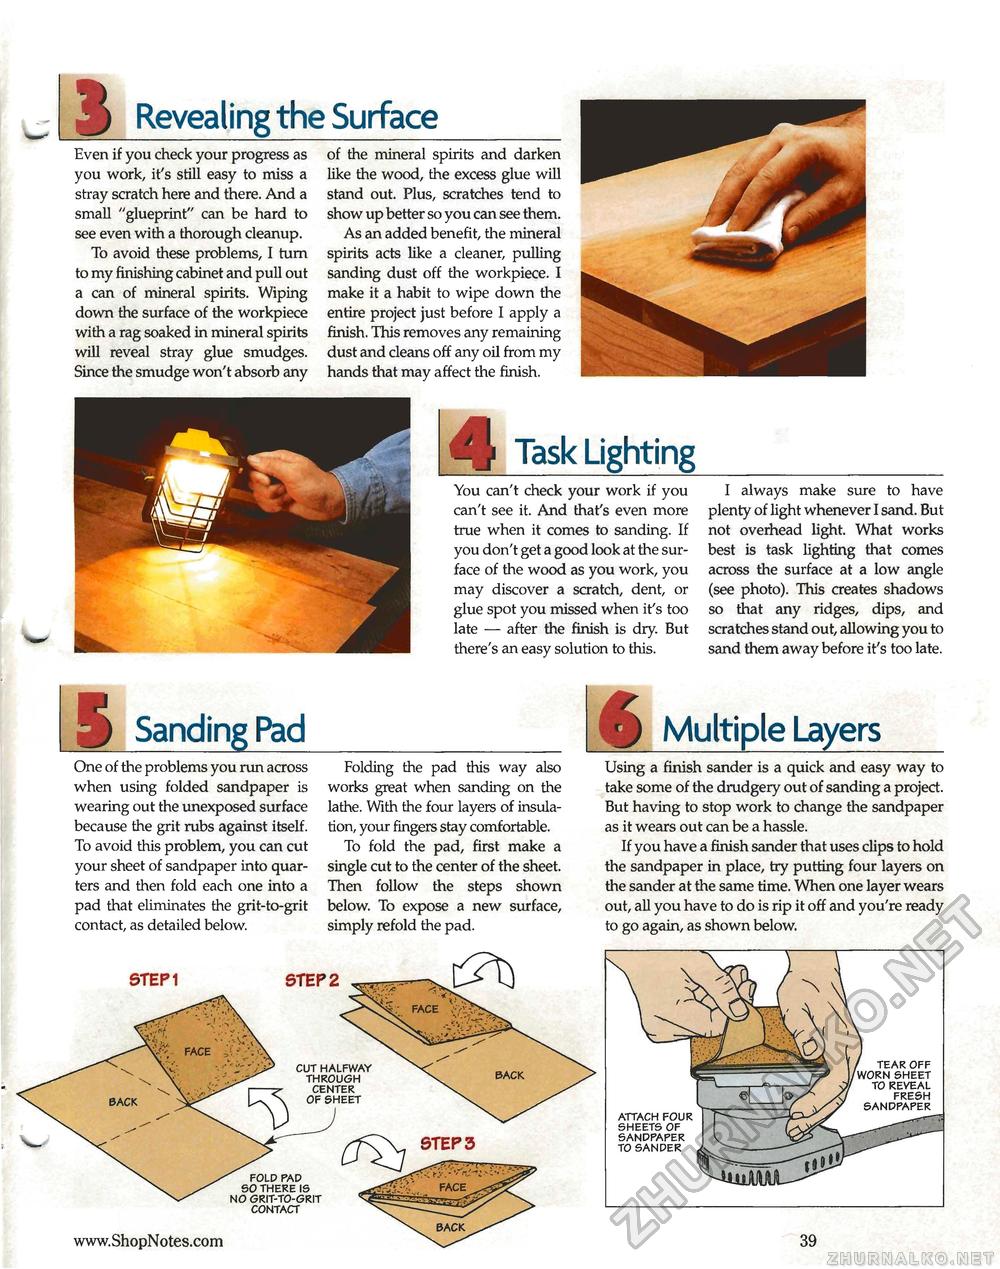
H Revealing the Surface Even if you check your progress as you work, it's still easy to miss a stray scratch here and there. And a small "glueprint" can be hard to see even with a thorough cleanup. To avoid these problems, I turn to my finishing cabinet and pull out a can of mineral spirits. Wiping down the surface of the workpiece with a rag soaked in mineral spirits will reveal stray glue smudges. Since the smudge won't absorb any of the mineral spirits and darken like the wood, the excess glue will stand out. Plus, scratches tend to show up better so you can see them. As an added benefit, the mineral spirits acts like a cleaner, pulling sanding dust off the workpiece. I make it a habit to wipe down the entire project just before I apply a finish. This removes any remaining dust and cleans off any oil from my hands that may affect the finish. ^ Task Lighting You can't check your work if you can't see it. And that's even more true when it comes to sanding. If you don't get a good look at the surface of the wood as you work, you may discover a scratch, dent, or glue spot you missed when it's too late — after the finish is dry. But there's an easy solution to this. I always make sure to have plenty of light whenever I sand. But not overhead light. What works best is task lighting that comes across the surface at a low angle (see photo). This creates shadows so that any ridges, dips, and scratches stand out, allowing you to sand them away before it's too late. Sanding Pad ■6 One of the problems you run across when using folded sandpaper is wearing out the unexposed surface because the grit rubs against itself. To avoid this problem, you can cut your sheet of sandpaper into quarters and then fold each one into a pad that eliminates the grit-to-grit contact, as detailed below. Folding the pad this way also works great when sanding on the lathe. With the four layers of insulation, your fingers stay comfortable. To fold the pad, first make a single cut to the center of the sheet. Then follow the steps shown below. To expose a new surface, simply refold the pad. ^ Multiple Layers Using a finish sander is a quick and easy way to take some of the drudgery out of sanding a project. But having to stop work to change the sandpaper as it wears out can be a hassle. If you have a finish sander that uses clips to hold the sandpaper in place, try putting four layers on the sander at the same time. When one layer wears out, all you have to do is rip it off and you're ready to go again, as shown below. STEP1 STEP 2 CUT HALFWAY THROUGH CENTER OF SHEET FOLD PAD SO THERE IS NO GRIT-TO-GRIT CONTACT STEP 3 ATTACH FOUR SHEETS OF SANDPAPER TO SANDER TEAR OFF SHEET TO REVEAL FRESH SANDPAPER 39 |


