82 - The Complete Miter Saw Workstation, страница 41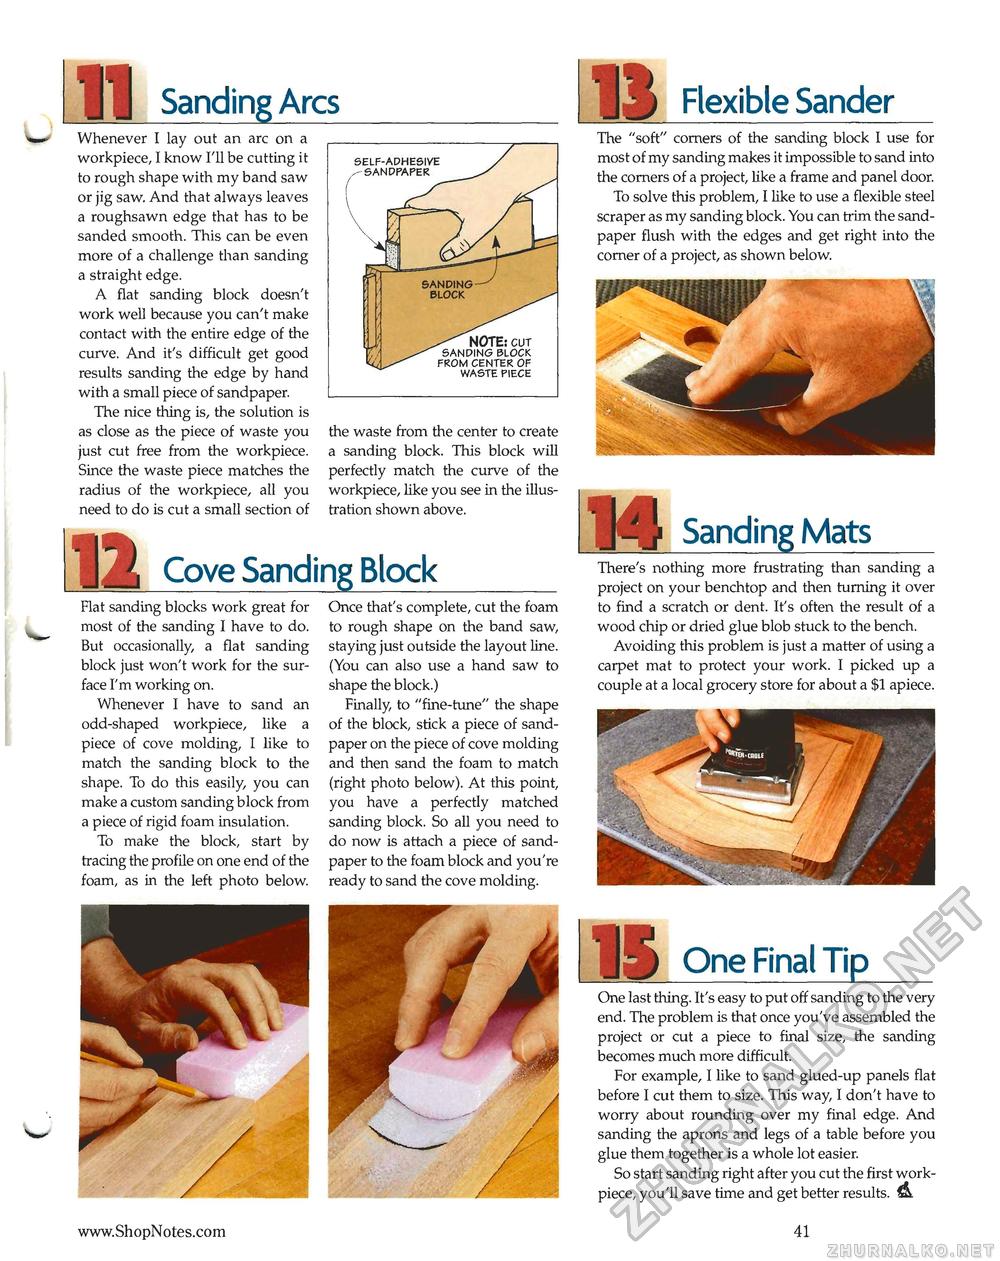
Sanding Arcs Whenever I lay out an arc on a workpiece, I know I'll be cutting it to rough shape with my band saw or jig saw. And that always leaves a roughsawn edge that has to be sanded smooth. This can be even more of a challenge than sanding a straight edge. A flat sanding block doesn't work well because you can't make contact with the entire edge of the curve. And it's difficult get good results sanding the edge by hand with a small piece of sandpaper. The nice thing is, the solution is as close as the piece of waste you just cut free from the workpiece. Since the waste piece matches the radius of the workpiece, all you need to do is cut a small section of the waste from the center to create a sanding block. This block will perfectly match the curve of the workpiece, like you see in the illustration shown above. 12 Cove Sanding Block Flat sanding blocks work great for most of the sanding I have to do. But occasionally, a flat sanding block just won't work for the surface I'm working on. Whenever I have to sand an odd-shaped workpiece, like a piece of cove molding, I like to match the sanding block to the shape. To do this easily, you can make a custom sanding block from a piece of rigid foam insulation. To make the block, start by tracing the profile on one end of the foam, as in the left photo below. Once that's complete, cut the foam to rough shape on the band saw, staying just outside the layout line. (You can also use a hand saw to shape the block.) Finally, to "fine-tune" the shape of the block, stick a piece of sandpaper on the piece of cove molding and then sand the foam to match (right photo below). At this point, you have a perfectly matched sanding block. So all you need to do now is attach a piece of sandpaper to the foam block and you're ready to sand the cove molding. Jli Flexible Sander The "soft" corners of the sanding block I use for most of my sanding makes it impossible to sand into the corners of a project, like a frame and panel door. To solve this problem, I like to use a flexible steel scraper as my sanding block. You can trim the sandpaper flush with the edges and get right into the corner of a project, as shown below. M Sanding Mats There's nothing more frustrating than sanding a project on your benchtop and then turning it over to find a scratch or dent. It's often the result of a wood chip or dried glue blob stuck to the bench. Avoiding this problem is just a matter of using a carpet mat to protect your work. I picked up a couple at a local grocery store for about a $1 apiece. IS One Final Tip One last thing. It's easy to put off sanding to the very end. The problem is that once you've assembled the project or cut a piece to final size, the sanding becomes much more difficult. For example, I like to sand glued-up panels flat before I cut them to size. This way, I don't have to worry about rounding over my final edge. And sanding the aprons and legs of a table before you glue them together is a whole lot easier. So start sanding right after you cut the first work-piece, you'll save time and get better results. iL. 41 SELF-ADHESIVE NOTE: cur SANDING BLOCK FROM CENTER OF WASTE PIECE |


