83, страница 35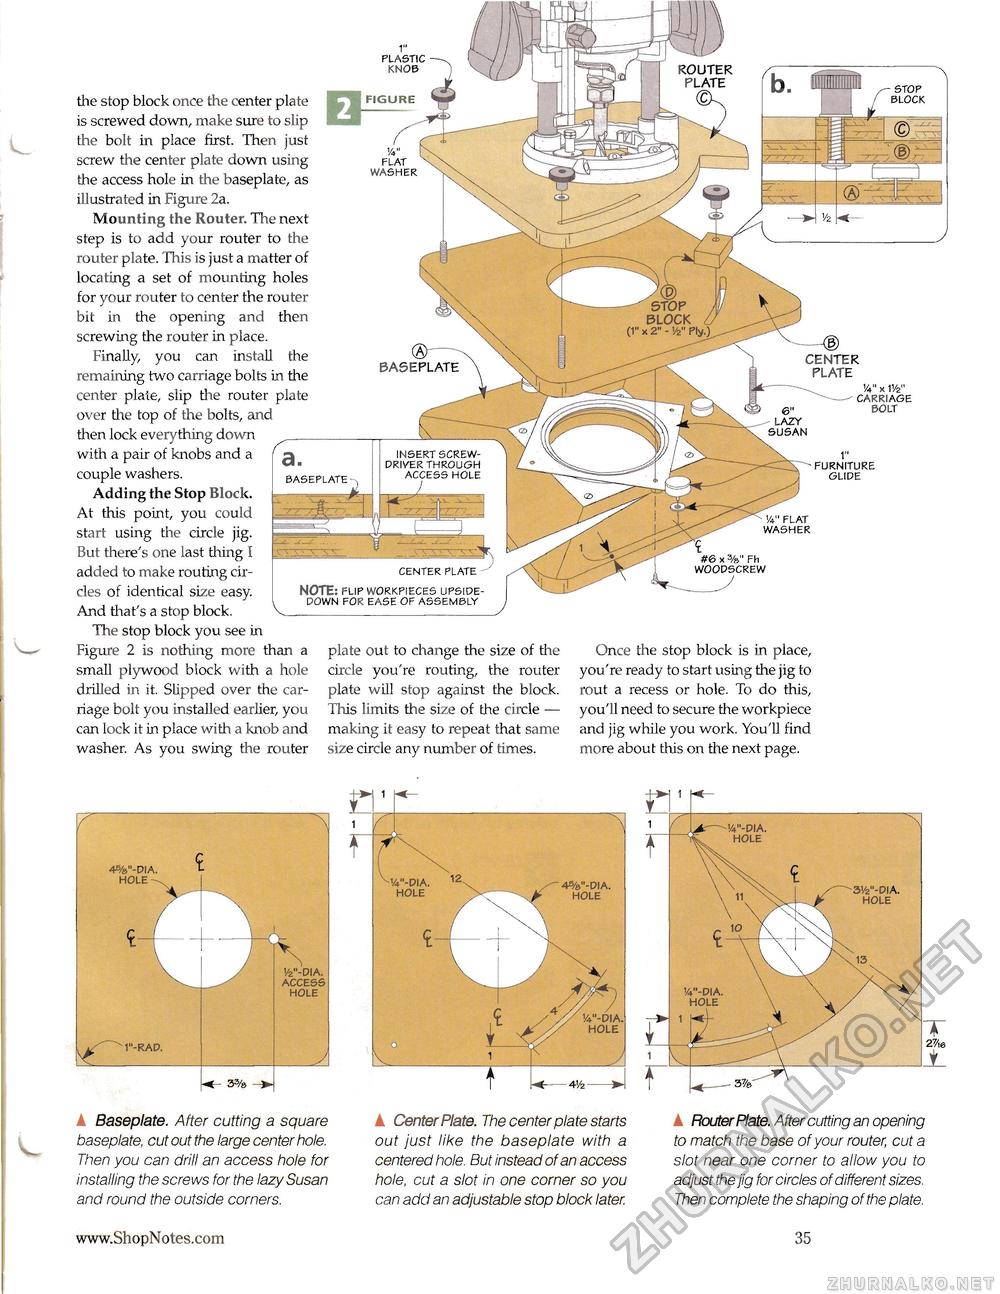
the stop block once the center plate is screwed down, make sure to slip the bolt in place first. Then just screw the center plate down using the access hole in the baseplate, as illustrated in Figure 2a. Mounting the Router. The next step is to add your router to the router plate. This is just a matter of locating a set of mounting holes for your router to center the router bit in the opening and then screwing the router in place. Finally, you can install the remaining two carriage bolts in the center plate, slip the router plate over the top of the bolts, and then lock everything down with a pair of knobs and a couple washers. Adding the Stop Block. At this point, you could start using the circle jig. But there's one last thing I added to make routing circles of identical size easy. And that's a stop block. The stop block you see in Figure 2 is nothing more than a small plywood block with a hole drilled in it. Slipped over the carriage bolt you installed earlier, you can lock it in place with a knob and washer. As you swing the router Va" x IV2" carriage bolt - furniture glide plate out to change the size of the circle you're routing, the router plate will stop against the block. This limits the size of the circle — making it easy to repeat that same size circle any number of times. Once the stop block is in place, you're ready to start using the jig to rout a recess or hole. To do this, you'll need to secure the workpiece and jig while you work. You'll find more about this on the next page.
▲ Baseplate. After cutting a square baseplate, cut out the large center hole. Then you can drill an access hole for installing the screws for the lazy Susan and round the outside corners. k Center Plate. The center plate starts out just like the baseplate with a centered hole. But instead of an access hole, cut a slot in one corner so you can add an adjustable stop block later. k Router Plate. After cutting an opening to match the base of your router, cut a slot near one corner to allow you to adjust the jig for circles of different sizes. Then complete the shaping of the plate. 35 |


