88, страница 35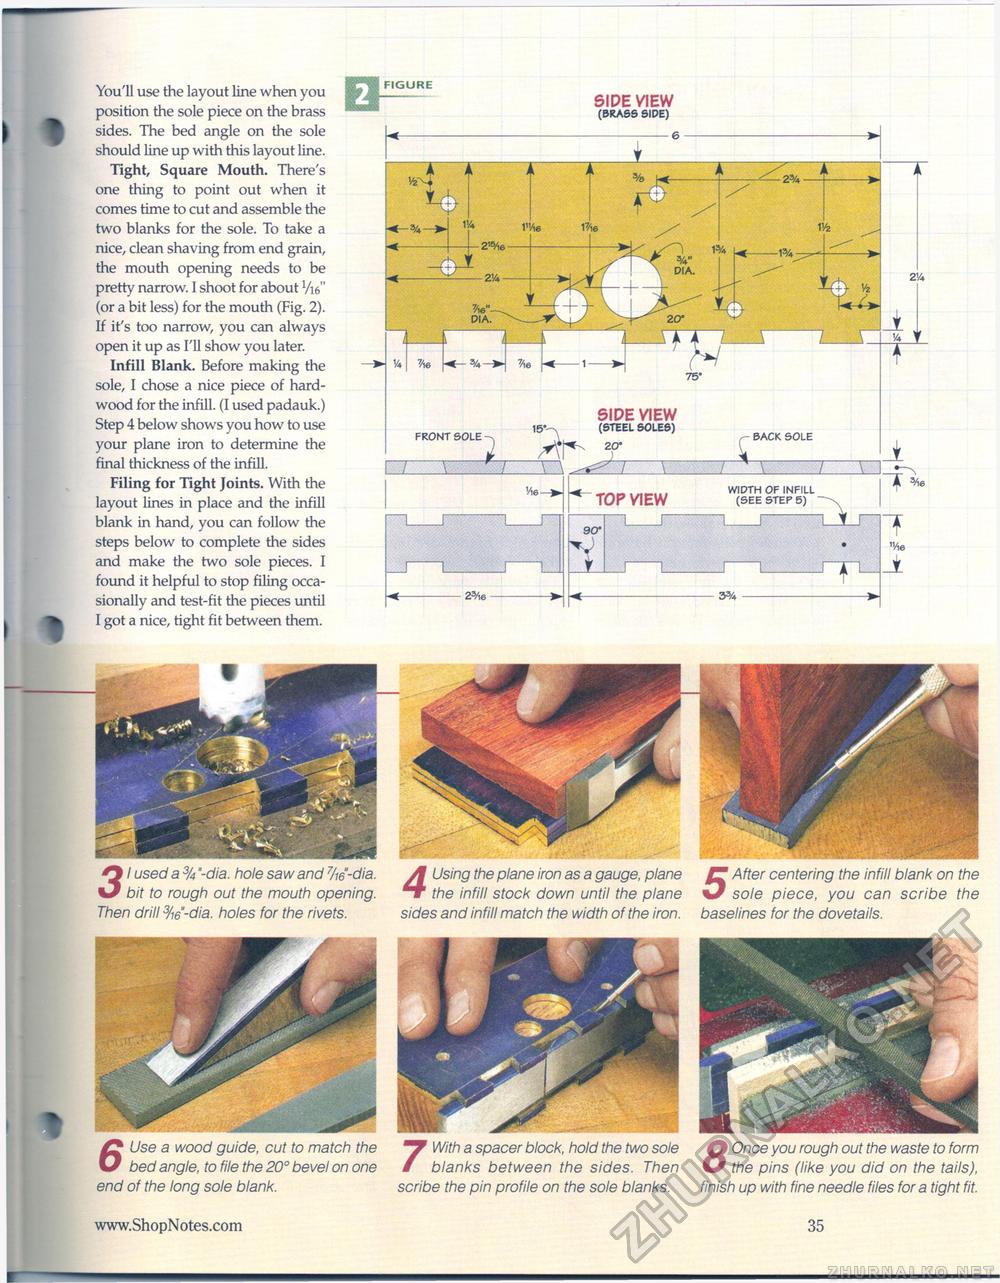
You'll use the layout line when you position the sole piece on the brass sides. The bed angle on the sole should line up with this layout line. Tight, Square Mouth. There's one thing to point out when it comes time to cut and assemble the two blanks for the sole. To take a nice, clean shaving from end grain, the mouth opening needs to be pretty narrow. I shoot for about VW' (or a bit less) for the mouth (Fig. 2). If it's too narrow, you can always open it up as I'll show you later. Infill Blank. Before making the sole, I chose a nice piece of hardwood for the infill. (I used padauk.) Step 4 below shows you how to use your plane iron to determine the final thickness of the infill. Filing for Tight Joints. With the layout lines in place and the infill blank in hand, you can follow the steps below to complete the sides and make the two sole pieces. I found it helpful to stop filing occasionally and test-fit the pieces until I got a nice, tight fit between them. FIGURE SIDE VIEW (brass side) SIDE VIEW (steel soles) FRONT SOLE BACK SOLE WIDTH OF INFILL (SEE STEP 5) TOP VIEW
7 With a spacer block, hold the two sole blanks between the sides. Then scribe the pin profile on the sole blanks. Q Once you rough out the waste to form O the pins (like you did on the tails), finish up with fine needle files for a tight fit. 4 Using the plane iron as a gauge, plane the infill stock down until the plane sides and infill match the width of the iron. 5 After centering the infill blank on the sole piece, you can scribe the baselines for the dovetails. 6 Use a wood guide, cut to match the bed angle, to file the 20° bevel on one end of the long sole blank. 31 used a 3U "-dia. hole saw and 7/w"-dia. bit to rough out the mouth opening. Then drill3/i6-dia. holes for the rivets. 35 |


