88, страница 37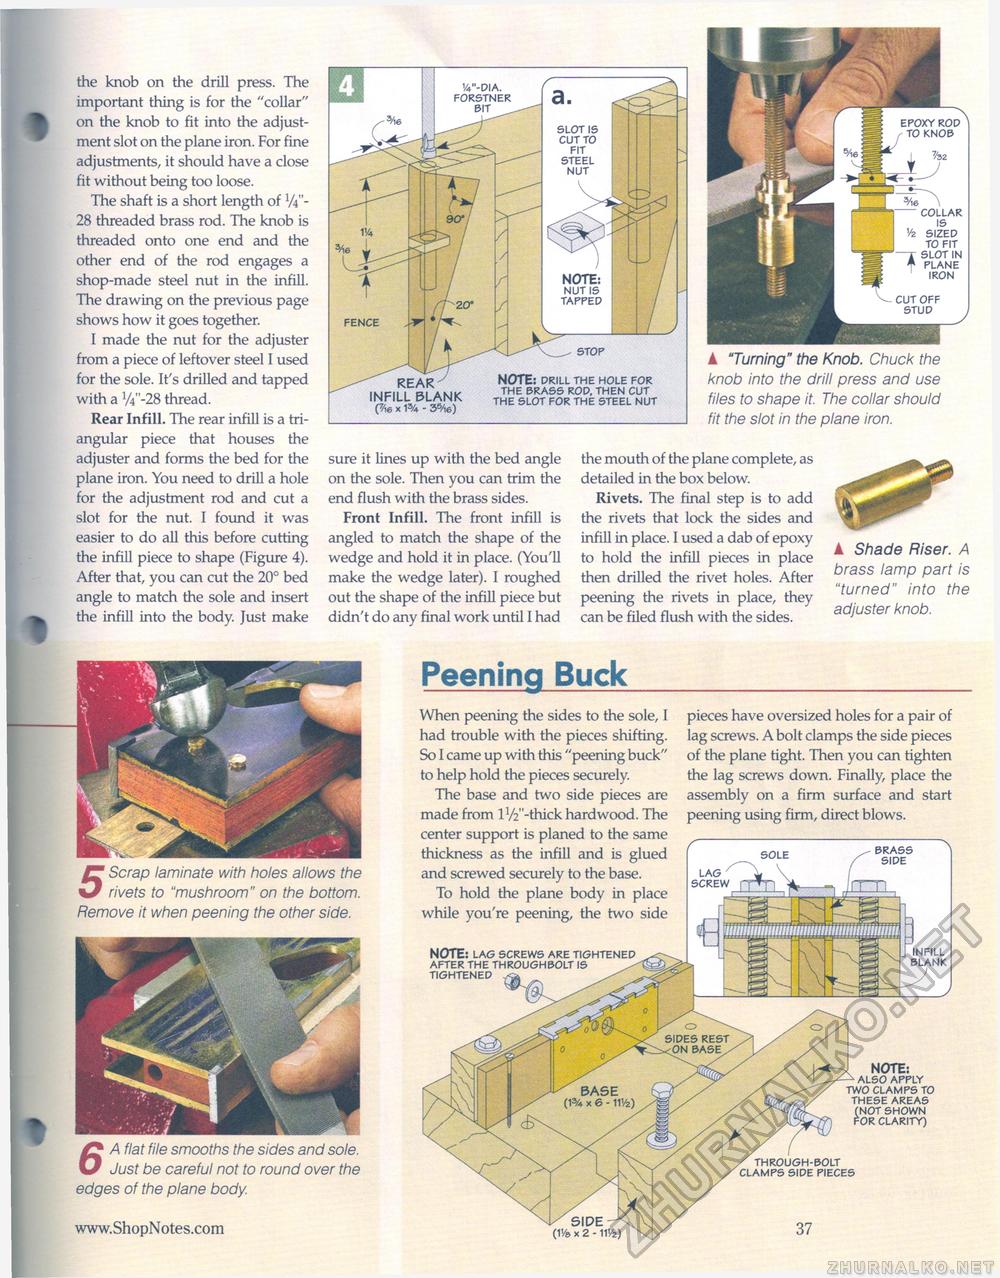
the knob on the drill press. The important thing is for the "collar" on the knob to fit into the adjustment slot on the plane iron. For fine adjustments, it should have a close fit without being too loose. The shaft is a short length of VV'-28 threaded brass rod. The knob is threaded onto one end and the other end of the rod engages a shop-made steel nut in the infill. The drawing on the previous page shows how it goes together. I made the nut for the adjuster from a piece of leftover steel I used for the sole. It's drilled and tapped with a V4M-28 thread. Rear Infill. The rear infill is a triangular piece that houses the adjuster and forms the bed for the plane iron. You need to drill a hole for the adjustment rod and cut a slot for the nut. I found it was easier to do all this before cutting the infill piece to shape (Figure 4). After that, you can cut the 20° bed angle to match the sole and insert the infill into the body. Just make Peening Bucksure it lines up with the bed angle on the sole. Then you can trim the end flush with the brass sides. Front Infill. The front infill is angled to match the shape of the wedge and hold it in place. (You'll make the wedge later). I roughed out the shape of the infill piece but didn't do any final work until I had ▲ "Turning" the Knob. Chuck the knob into the drill press and use files to shape it. The collar should fit the slot in the plane iron. the mouth of the plane complete, as detailed in the box below. Rivets. The final step is to add the rivets that lock the sides and infill in place. I used a dab of epoxy to hold the infill pieces in place then drilled the rivet holes. After peening the rivets in place, they can be filed flush with the sides. ▲ Shade Riser. A brass lamp part is "turned" into the adjuster knob. 5 Scrap laminate with holes allows the rivets to "mushroom" on the bottom. Remove it when peening the other side. /J A flat file smooths the sides and sole. O Just be careful not to round over the edges of the plane body. STOP NOTE: NUT IS TAPPED '/V'-DIA. FORSTNER BIT INFILL BLANK (7/16 X 13A - 35/16) NOTE: DRILL THE HOLE FOR THE BRASS ROD. THEN CUT THE SLOT FOR THE STEEL NUT FENCE NOTE: ALSO APPLY TWO CLAMPS TO THESE AREAS (NOT SHOWN FOR CLARITY) THROUGH-BOLT CLAMPS SIDE PIECES (1'/» x 2 - 11V2) When peening the sides to the sole, I had trouble with the pieces shifting. So I came up with this "peening buck" to help hold the pieces securely. The base and two side pieces are made from lVV'-thick hardwood. The center support is planed to the same thickness as the infill and is glued and screwed securely to the base. To hold the plane body in place while you're peening, the two side NOTE: LAG SCREWS ARE TIGHTENED AFTER THE THROUGHBOLT IS TIGHTENED pieces have oversized holes for a pair of lag screws. A bolt clamps the side pieces of the plane tight. Then you can tighten the lag screws down. Finally, place the assembly on a firm surface and start peening using firm, direct blows. INFILL BLANK J |


