90 - Get the Most out of a Plunge Router, страница 11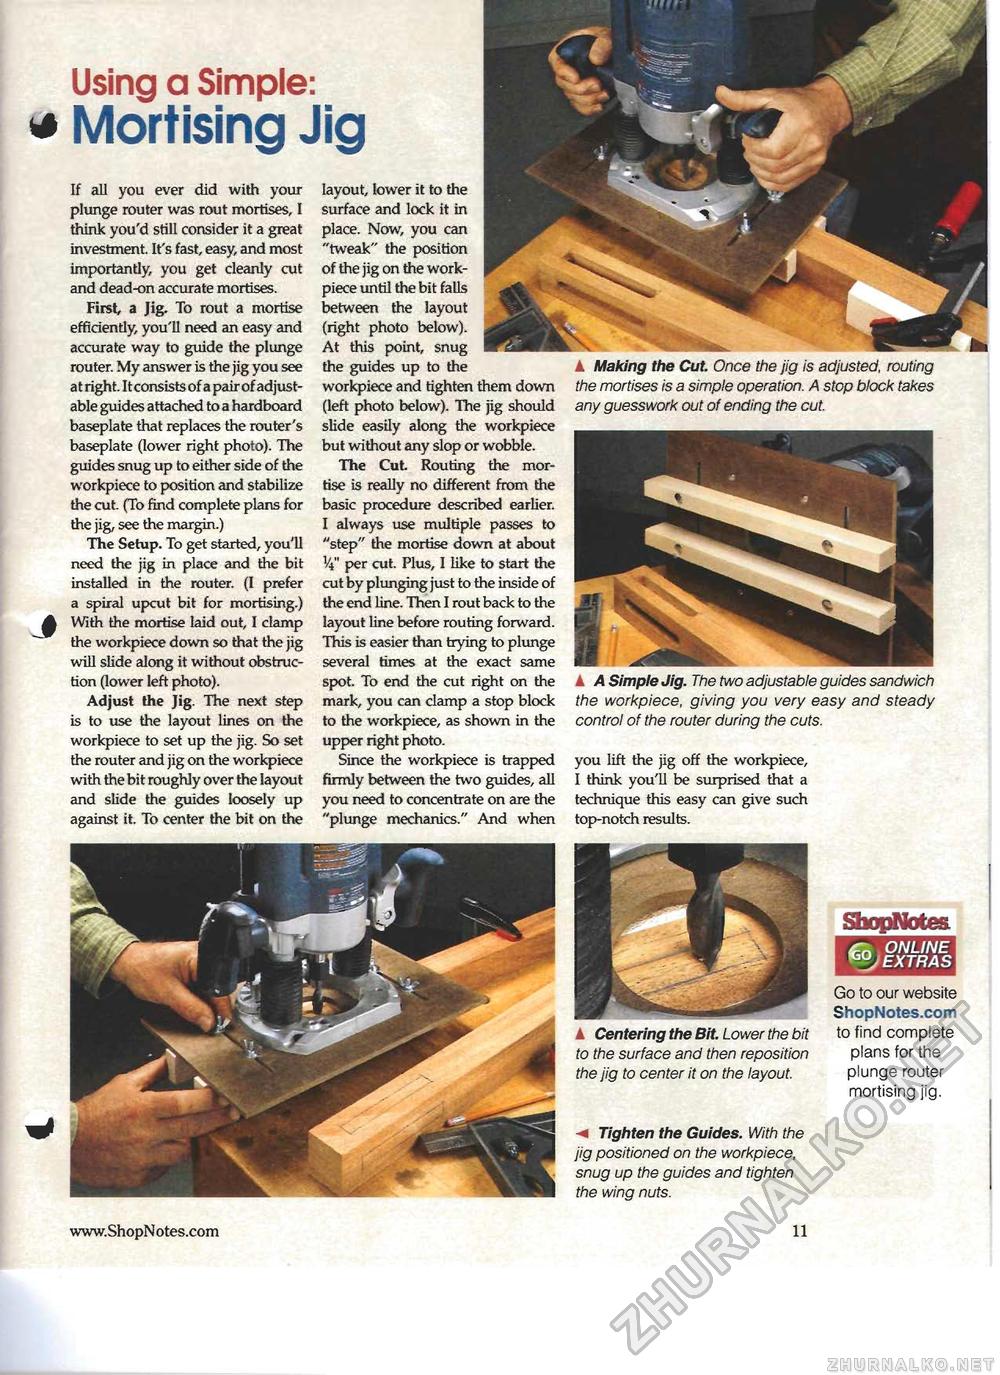
J £Tn ONLINE IS EXTRAS Using a Simple: Mortising Jig If all you ever did with your plunge router was rout mortises, I think you'd still consider it a great investment. It's fast, easy, and most importantly, you get cleanly cut and dead-on accurate mortises. First, a Jig. To rout a mortise efficiently, you'll need an easy and accurate way to guide the plunge router. My answer is the jig you see at right. It consists of a pair of adjustable guides attached to a hardboard baseplate that replaces the router's baseplate (lower right photo). The guides snug up to either side of the workpiece to position and stabilize the cut. (To find complete plans for the jig, see the margin.) The Setup. To get started, you'll need the jig in place and the bit installed in the router. (I prefer a spiral upcut bit for mortising.) With the mortise laid out, I clamp the workpiece down so that the jig will slide along it without obstruction (lower left photo). Adjust the Jig. The next step is to use the layout lines on the workpiece to set up the jig. So set the router and jig on the workpiece with the bit roughly over the layout and slide the guides loosely up against it. To center the bit on the A Centering the Bit. Lower the bit to the surface and then reposition the jig to center it on the layout. Tighten the Guides. With the jig positioned on the workpiece, snug up the guides and tighten the wing nuts. Go to our website ShopNotes.com to find complete plans for the plunge router mortising jig. layout, lower it to the surface and lock it in place. Now, you can "tweak" the position of the jig on the work-piece until the bit falls between the layout (right photo below). At this point, snug the guides up to the workpiece and tighten them down (left photo below). The jig should slide easily along the workpiece but without any slop or wobble. The Cut Routing the mortise is really no different from the basic procedure described earlier. I always use multiple passes to "step" the mortise down at about V4" per cut. Plus, I like to start the cut by plunging just to the inside of the end line. Then I rout back to the layout line before routing forward. This is easier than trying to plunge several times at the exact same spot. To end the cut right on the mark, you can clamp a stop block to the workpiece, as shown in the upper right photo. Since the workpiece is trapped firmly between the two guides, all you need to concentrate on are the "plunge mechanics." And when A Making the Cut. Once the jig is adjusted, routing the mortises is a simple operation. A stop block takes any guesswork out of ending the cut. A A Simple Jig. The two adjustable guides sandwich the workpiece, giving you very easy and steady control of the router during the cuts. you lift the jig off the workpiece, I think you'll be surprised that a technique this easy can give such top-notch results. |


