90 - Get the Most out of a Plunge Router, страница 9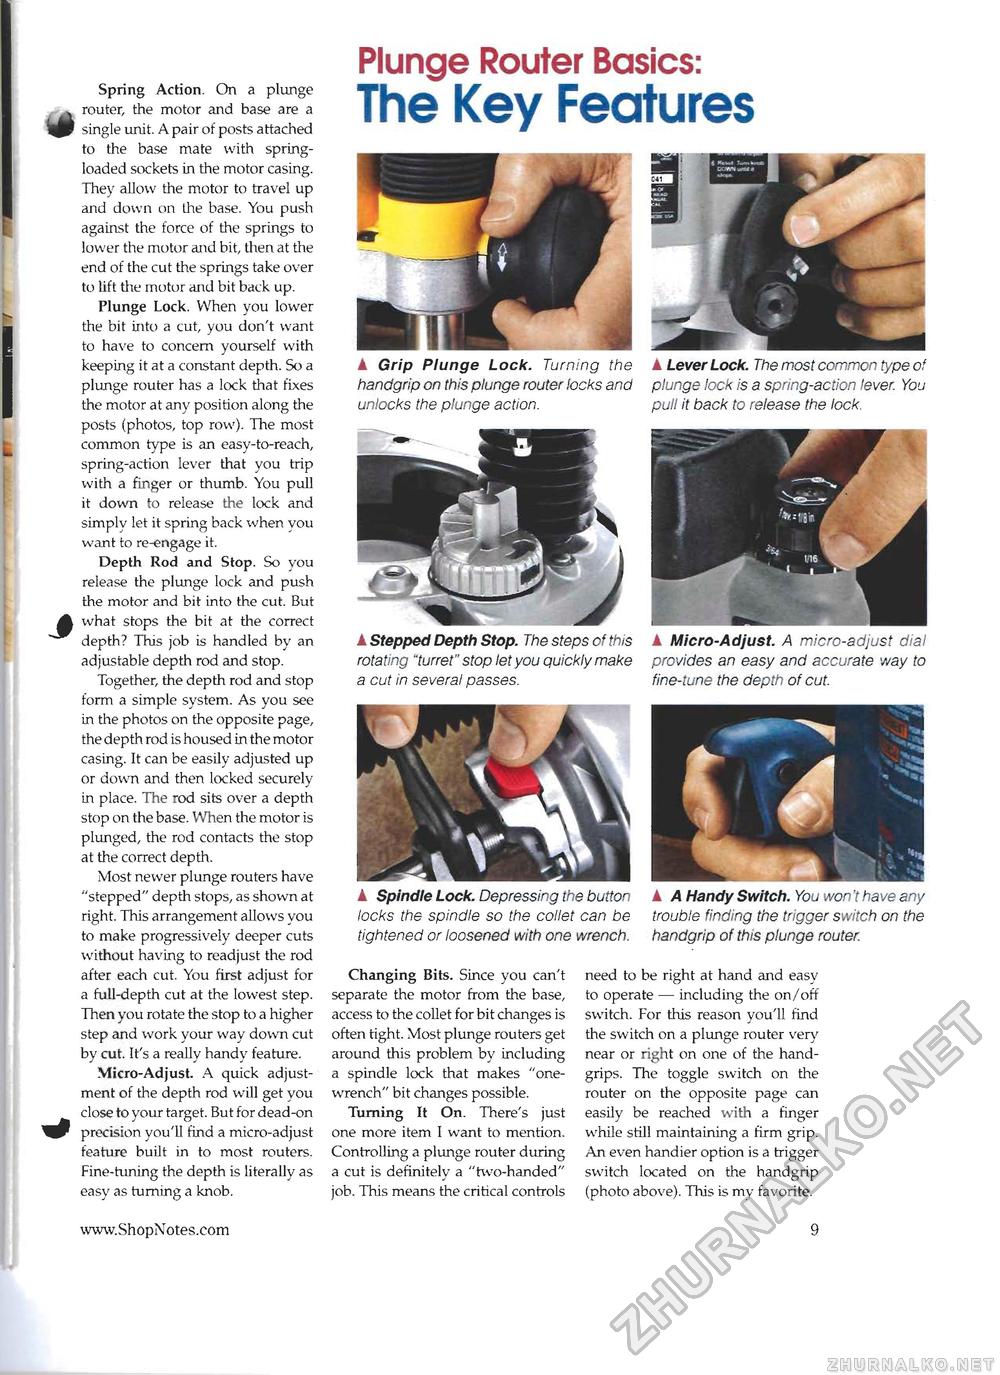
Spring Action. On a plunge router, the motor and base are a single unit. A pair of posts attached to the base mate with spring-loaded sockets in the motor casing. They allow the motor to travel up and down on the base. You push against the force of the springs to lower the motor and bit, then at the end of the cut the springs take over to lift the motor and bit back up. Plunge Lock. When you lower the bit into a cut, you don't want to have to concern yourself with keeping it at a constant depth. So a plunge router has a lock that fixes the motor at any position along the posts (photos, top row). The most common type is an easy-to-reach, spring-action lever that you trip with a finger or thumb. You pull it down to release the lock and simply let it spring back when you want to re-engage it. Depth Rod and Stop. So you release the plunge lock and push the motor and bit into the cut. But what stops the bit at the correct depth? This job is handled by an adjustable depth rod and stop. Together, the depth rod and stop form a simple system. As you see in the photos on the opposite page, the depth rod is housed in the motor casing. It can be easily adjusted up or down and then locked securely in place. The rod sits over a depth stop on the base. When the motor is plunged, the rod contacts the stop at the correct depth. Most newer plunge routers have "stepped" depth stops, as shown at right. This arrangement allows you to make progressively deeper cuts without having to readjust the rod after each cut. You first adjust for a full-depth cut at the lowest step. Then you rotate the stop to a higher step and work your way down cut by cut. It's a really handy feature. Micro-Adjust. A quick adjustment of the depth rod will get you close to your target. But for dead-on precision you'll find a micro-adjust feature built in to most routers. Fine-tuning the depth is literally as easy as turning a knob. Plunge Router Basics: The Key FeaturesA Grip Plunge Lock. Turning the handgrip on this plunge router locks and unlocks the plunge action. A Lever Lock. The most common type of plunge lock is a spring-action lever. You pull it back to release the lock. A Stepped Depth Stop. The steps of this rotating "turret" stop let you quickly make a cut in several passes. A Micro-Adjust. A micro-adjust dial provides an easy and accurate way to fine-tune the depth of cut. A Spindle Lock. Depressing the button locks the spindle so the collet can be tightened or loosened with one wrench. A A Handy Switch. You won't have any trouble finding the trigger switch on the handgrip of this plunge router. Changing Bits. Since you can't separate the motor from the base, access to the collet for bit changes is often tight. Most plunge routers get around this problem by including a spindle lock that makes "one-wrench" bit changes possible. Turning It On. There's just one more item I want to mention. Controlling a plunge router during a cut is definitely a "two-handed" job. This means the critical controls need to be right at hand and easy to operate — including the on/off switch. For this reason you'll find the switch on a plunge router very near or right on one of the handgrips. The toggle switch on the router on the opposite page can easily be reached with a finger while still maintaining a firm grip. An even handier option is a trigger switch located on the handgrip (photo above). This is my favorite. 9 |


