91 - Planer Stand, страница 26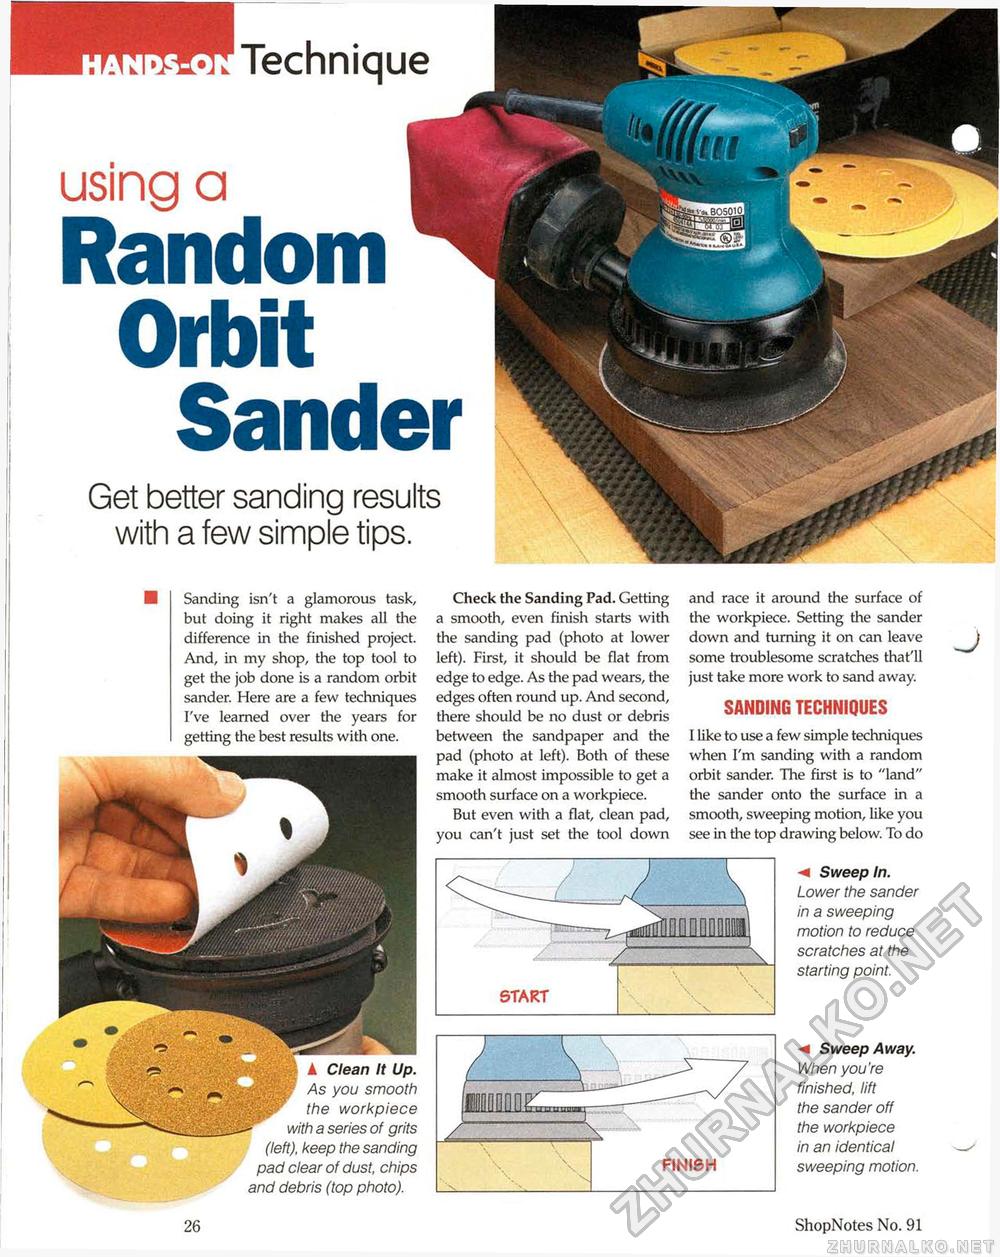
■Technique using a Random Orbit Sander Get better sanding results with a few simple tips. Sanding isn't a glamorous task, but doing it right makes all the difference in the finished project. And, in my shop, the top tool to get the job done is a random orbit sander. Here are a few techniques I've learned over the years for getting the best results with one. Check the Sanding Pad. Getting a smooth, even finish starts with the sanding pad (photo at lower left). First, it should be flat from edge to edge. As the pad wears, the edges often round up. And second, there should be no dust or debris between the sandpaper and the pad (photo at left). Both of these make it almost impossible to get a smooth surface on a workpiece. But even with a flat, clean pad, you can't just set the tool down and race it around the surface of the workpiece. Setting the sander down and turning it on can leave some troublesome scratches that'll just take more work to sand away. SANDING TECHNIQUES I like to use a few simple techniques when I'm sanding with a random orbit sander. The first is to "land" the sander onto the surface in a smooth, sweeping motion, like you see in the top drawing below. To do Sweep In. Lower the sander in a sweeping motion to reduce scratches at the starting point. J Sweep Away. When you're finished, lift the sander off the workpiece in an identical sweeping motion. A Clean It Up. As you smooth the workpiece with a series of grits (left), keep the sanding pad clear of dust, chips and debris (top photo). START FINISH 26 ShopNotes No. 91 |


