91 - Planer Stand, страница 27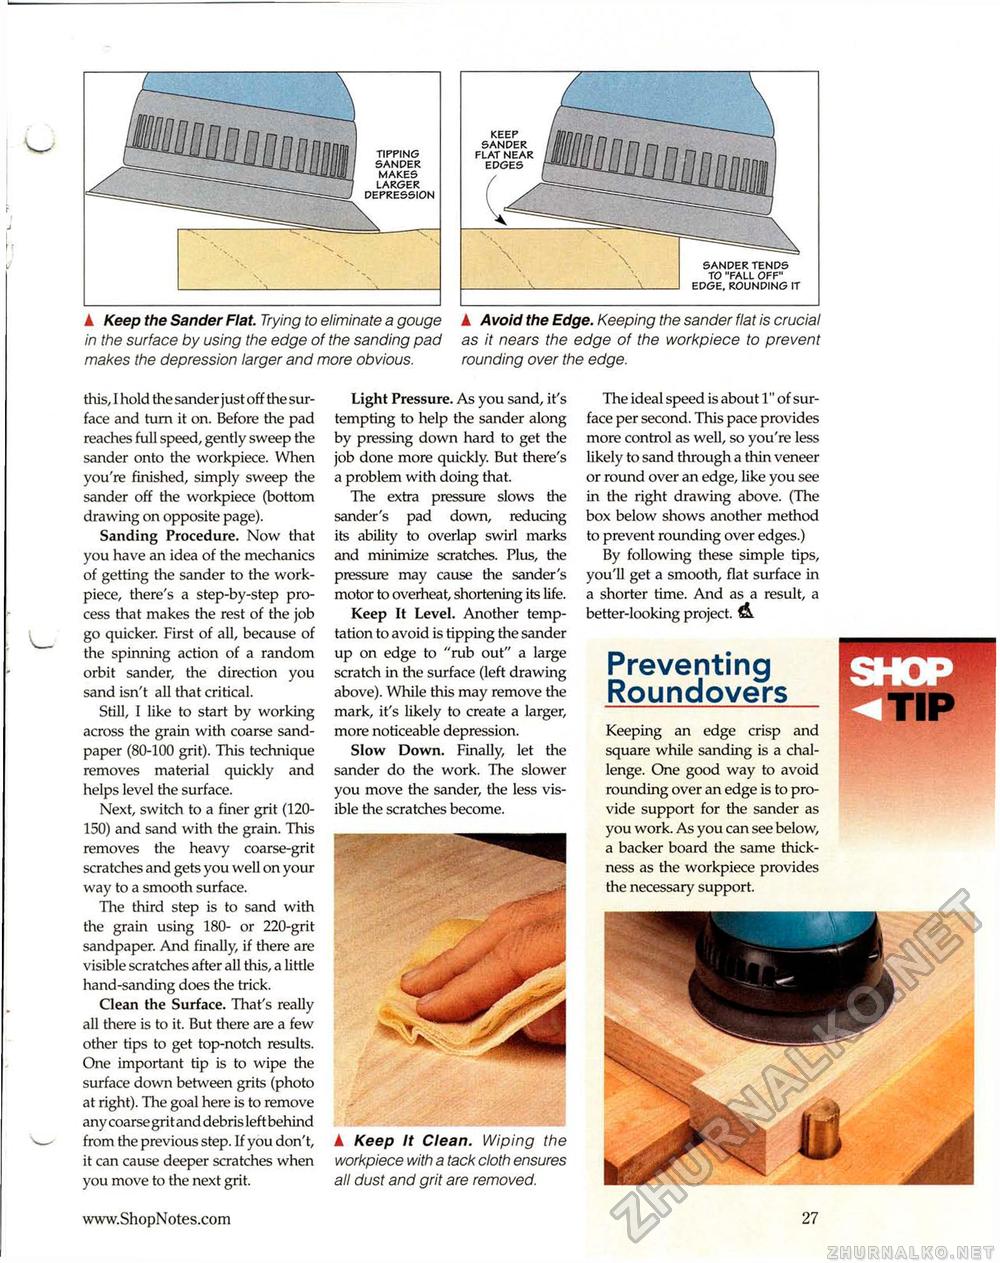
A Keep the Sander Flat. Trying to eliminate a gouge in the surface by using the edge of the sanding pad makes the depression larger and more obvious. ▲ Avoid the Edge. Keeping the sander flat is crucial as it nears the edge of the workpiece to prevent rounding over the edge. this, I hold the sander just off the surface and turn it on. Before the pad reaches full speed, gently sweep the sander onto the workpiece. When you're finished, simply sweep the sander off the workpiece (bottom drawing on opposite page). Sanding Procedure. Now that you have an idea of the mechanics of getting the sander to the work-piece, there's a step-by-step process that makes the rest of the job go quicker. First of all, because of the spinning action of a random orbit sander, the direction you sand isn't all that critical. Still, I like to start by working across the grain with coarse sandpaper (80-100 grit). This technique removes material quickly and helps level the surface. Next, switch to a finer grit (120-150) and sand with the grain. This removes the heavy coarse-grit scratches and gets you well on your way to a smooth surface. The third step is to sand with the grain using 180- or 220-grit sandpaper. And finally, if there are visible scratches after all this, a little hand-sanding does the trick. Clean the Surface. That's really all there is to it. But there are a few other tips to get top-notch results. One important tip is to wipe the surface down between grits (photo at right). The goal here is to remove any coarse grit and debris left behind from the previous step. If you don't, it can cause deeper scratches when you move to the next grit. Light Pressure. As you sand, it's tempting to help the sander along by pressing down hard to get the job done more quickly. But there's a problem with doing that. The extra pressure slows the sander's pad down, reducing its ability to overlap swirl marks and minimize scratches. Plus, the pressure may cause the sander's motor to overheat, shortening its life. Keep It Level. Another temptation to avoid is tipping the sander up on edge to "rub out" a large scratch in the surface (left drawing above). While this may remove the mark, it's likely to create a larger, more noticeable depression. Slow Down. Finally, let the sander do the work. The slower you move the sander, the less visible the scratches become. The ideal speed is about 1" of surface per second. This pace provides more control as well, so you're less likely to sand through a thin veneer or round over an edge, like you see in the right drawing above. (The box below shows another method to prevent rounding over edges.) By following these simple tips, you'll get a smooth, flat surface in a shorter time. And as a result, a better-looking project. & Preventing Roundovers Keeping an edge crisp and square while sanding is a challenge. One good way to avoid rounding over an edge is to provide support for the sander as you work. As you can see below, a backer board the same thickness as the workpiece provides the necessary support. ▲ Keep It Clean. Wiping the workpiece with a tack cloth ensures all dust and grit are removed. |


