91 - Planer Stand, страница 46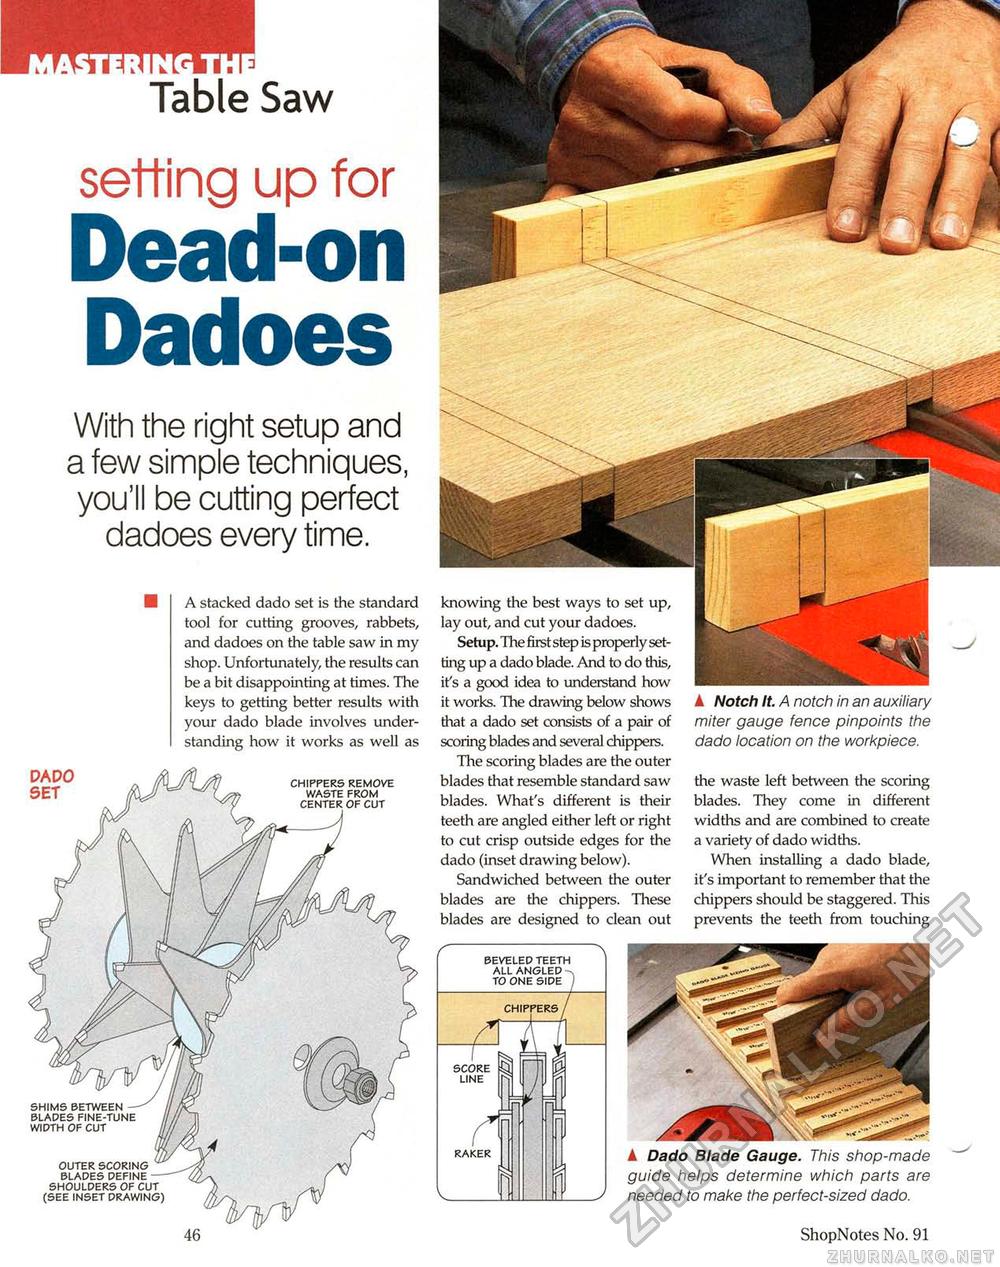
Table Sawsetting up forDead-on Dadoes With the right setup and a few simple techniques, you'll be cutting perfect dadoes every time. A stacked dado set is the standard tool for cutting grooves, rabbets, and dadoes on the table saw in my shop. Unfortunately, the results can be a bit disappointing at times. The keys to getting better results with your dado blade involves understanding how it works as well as DADO SET CHIPPERS REMOVE WASTE FROM OF CUT SHIMS BETWEEN BLADES FINE-TUNE WIDTH OF CUT OUTER SCORING BLADES DEFINE SHOULDERS OF CUT (SEE INSET DRAWING) knowing the best ways to set up, lay out, and CLit your dadoes. Setup. The first step is properly setting up a dado blade. And to do this, ifs a good idea to understand how it works. The drawing below shows that a dado set consists of a pair of scoring blades and several chippers. The scoring blades are the outer blades that resemble standard saw blades. What's different is their teeth are angled either left or right to cut crisp outside edges for the dado (inset drawing below). Sandwiched between the outer blades are the chippers. These blades are designed to clean out ▲ Notch It. A notch in an auxiliary miter gauge fence pinpoints the dado location on the workpiece. the waste left between the scoring blades. They come in different widths and are combined to create a variety of dado widths. When installing a dado blade, it's important to remember that the chippers should be staggered. This prevents the teeth from touching ▲ Dado Blade Gauge. This shop-made guide helps determine which parts are needed to make the perfect-sized dado. 46 ShopNotes No. 91 |


