91 - Planer Stand, страница 43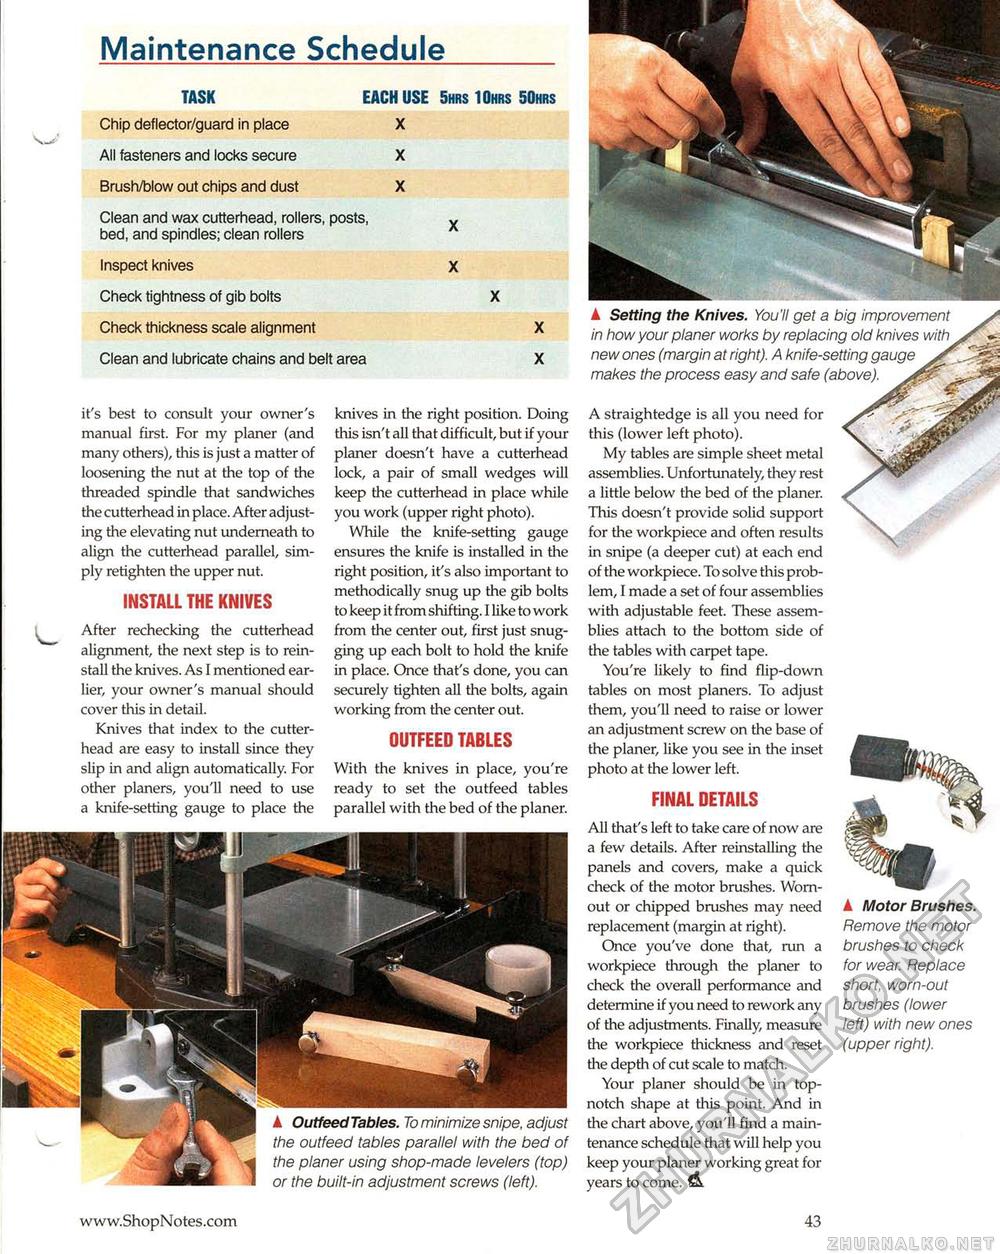
Maintenance Schedule_ TASK EACH USE 5hrs IOhrs 50hrs Chip deflector/guard in place X All fasteners and locks secure X Brush/blow out chips and dust X Clean and wax cutterhead, rollers, posts, x bed, and spindles; clean rollers Inspect knives X Check tightness of gib bolts X Check thickness scale alignment X Clean and lubricate chains and belt area X it's best to consult your owner's manual first. For my planer (and many others), this is just a matter of loosening the nut at the top of the threaded spindle that sandwiches the cutterhead in place. After adjusting the elevating nut underneath to align the cutterhead parallel, simply retighten the upper nut. INSTALL THE KNIVES After rechecking the cutterhead alignment, the next step is to reinstall the knives. As I mentioned earlier, your owner's manual should cover this in detail. Knives that index to the cutterhead are easy to install since they slip in and align automatically. For other planers, you'll need to use a knife-setting gauge to place the knives in the right position. Doing this isn't all that difficult, but if your planer doesn't have a cutterhead lock, a pair of small wedges will keep the cutterhead in place while you work (upper right photo). While the knife-setting gauge ensures the knife is installed in the right position, it's also important to methodically snug up the gib bolts to keep it from shifting. I like to work from the center out, first just snugging up each bolt to hold the knife in place. Once that's done, you can securely tighten all the bolts, again working from the center out. OUTFEED TABLES With the knives in place, you're ready to set the outfeed tables parallel with the bed of the planer. ▲ OutfeedTables. To minimize snipe, adjust the outfeed tables parallel with the bed of the planer using shop-made levelers (top) or the built-in adjustment screws (left). ▲ Setting the Knives. You'll get a big improvement in how your planer works by replacing old knives with new ones (margin at right). A knife-setting gauge makes the process easy and safe (above). A straightedge is all you need for this (lower left photo). My tables are simple sheet metal assemblies. Unfortunately, they rest a little below the bed of the planer. This doesn't provide solid support for the workpiece and often results in snipe (a deeper cut) at each end of the workpiece. To solve this problem, I made a set of four assemblies with adjustable feet. These assemblies attach to the bottom side of the tables with carpet tape. You're likely to find flip-down tables on most planers. To adjust them, you'll need to raise or lower an adjustment screw on the base of the planer, like you see in the inset photo at the lower left. FINAL DETAILS All that's left to take care of now are a few details. After reinstalling the panels and covers, make a quick check of the motor brushes. Worn-out or chipped brushes may need replacement (margin at right). Once you've done that, run a workpiece through the planer to check the overall performance and determine if you need to rework any of the adjustments. Filially, measure the workpiece thickness and reset the depth of cut scale to match. Your planer should be in top-notch shape at this point. And in the chart above, you'll find a maintenance schedule that will help you keep your planer working great for years to come. ▲ Motor Brushes. Remove the motor brushes to check for wear. Replace short, worn-out brushes (lower left) with new ones (upper right). |


