91 - Planer Stand, страница 41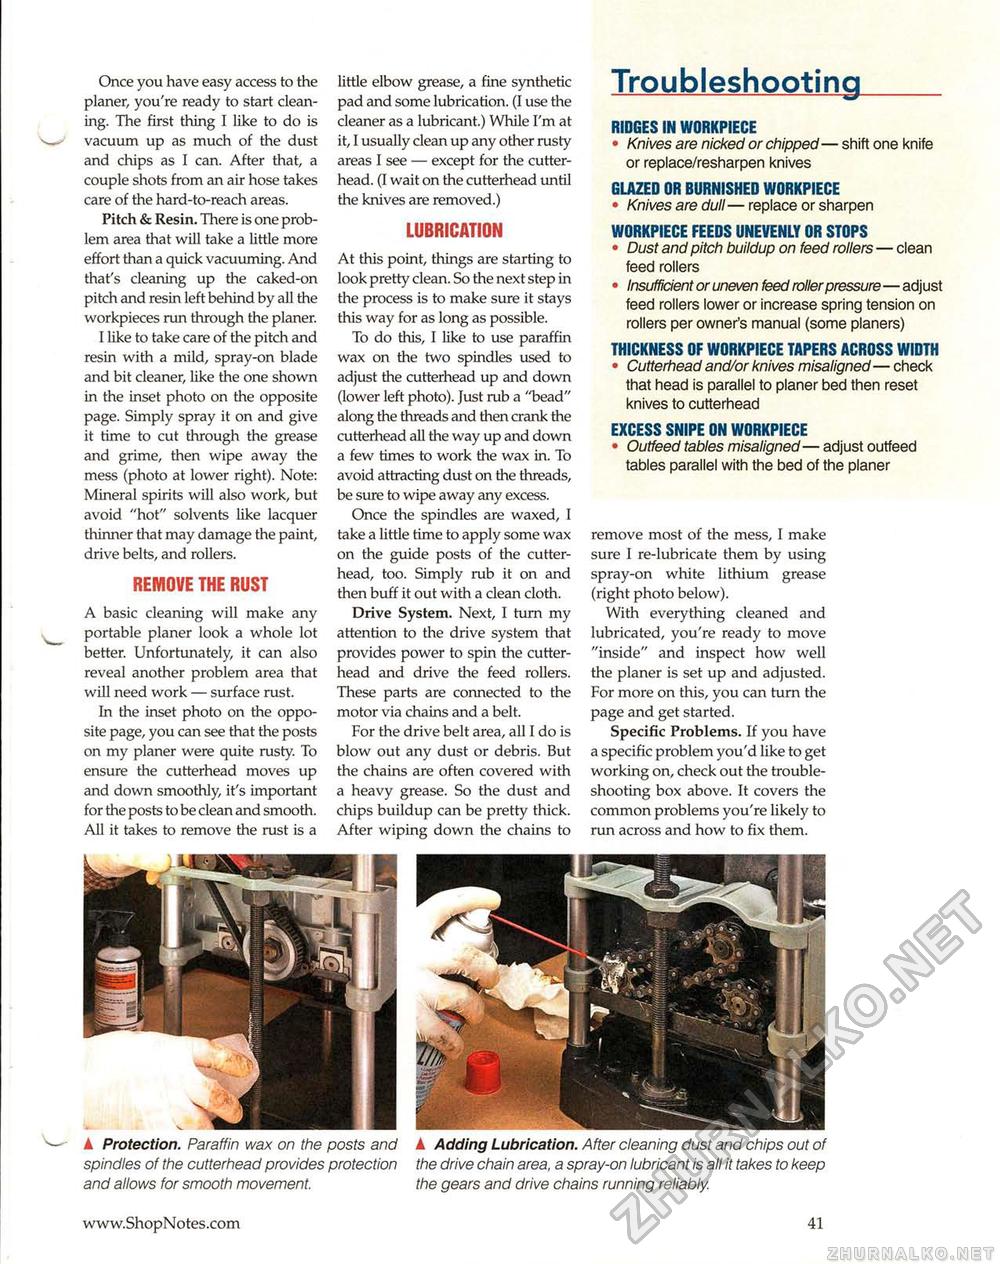
Once you have easy access to the planer, you're ready to start cleaning. The first thing I like to do is vacuum up as much of the dust and chips as I can. After that, a couple shots from an air hose takes care of the hard-to-reach areas. Pitch & Resin. There is one problem area that will take a little more effort than a quick vacuuming. And that's cleaning up the caked-on pitch and resin left behind by all the workpieces run through the planer. I like to take care of the pitch and resin with a mild, spray-on blade and bit cleaner, like the one shown in the inset photo on the opposite page. Simply spray it on and give it time to cut through the grease and grime, then wipe away the mess (photo at lower right). Note: Mineral spirits will also work, but avoid "hot" solvents like lacquer thinner that may damage the paint, drive belts, and rollers. REMOVE THE RUST A basic cleaning will make any portable planer look a whole lot better. Unfortunately, it can also reveal another problem area that will need work — surface rust. In the inset photo on the opposite page, you can see that the posts on my planer were quite rusty. To ensure the cutterhead moves up and down smoothly, it's important for the posts to be clean and smooth. All it takes to remove the rust is a little elbow grease, a fine synthetic pad and some lubrication. (I use the cleaner as a lubricant.) While I'm at it, I usually clean up any other rusty areas I see — except for the cutter-head. (I wait on the cutterhead until the knives are removed.) LUBRICATION At this point, things are starting to look pretty clean. So the next step in the process is to make sure it stays this way for as long as possible. To do this, I like to use paraffin wax on the two spindles used to adjust the cutterhead up and down (lower left photo). Just rub a "bead" along the threads and then crank the cutterhead all the way up and down a few times to work the wax in. To avoid attracting dust on the threads, be sure to wipe away any excess. Once the spindles are waxed, I take a little time to apply some wax on the guide posts of the cutterhead, too. Simply rub it on and then buff it out with a clean cloth. Drive System. Next, I turn my attention to the drive system that provides power to spin the cutterhead and drive the feed rollers. These parts are connected to the motor via chains and a belt. For the drive belt area, all I do is blow out any dust or debris. But the chains are often covered with a heavy grease. So the dust and chips buildup can be pretty thick. After wiping down the chains to Troubleshooting RIDGES IN WORKPIECE • Knives are nicked or chipped— shift one knife or replace/resharpen knives GLAZED OR BURNISHED WORKPIECE • Knives are dull— replace or sharpen WORKPIECE FEEDS UNEVENLY OR STOPS • Dust and pitch buildup on feed rollers — clean feed rollers • Insufficient or uneven feed roller pressure—adjust feed rollers lower or increase spring tension on rollers per owner's manual (some planers) THICKNESS OF WORKPIECE TAPERS ACROSS WIDTH • Cutterhead and/or knives misaligned — check that head is parallel to planer bed then reset knives to cutterhead EXCESS SNIPE ON WORKPIECE • Outfeed tables misaligned— adjust outfeed tables parallel with the bed of the planer remove most of the mess, I make sure I re-lubricate them by using spray-on white lithium grease (right photo below). With everything cleaned and lubricated, you're ready to move "inside" and inspect how well the planer is set up and adjusted. For more on this, you can turn the page and get started. Specific Problems. If you have a specific problem you'd like to get working on, check out the troubleshooting box above. It covers the common problems you're likely to run across and how to fix them. ▲ Protection. Paraffin wax on the posts and spindles of the cutterhead provides protection and allows for smooth movement. ▲ Adding Lubrication. After cleaning dust and chips out of the drive chain area, a spray-on lubricant is all it takes to keep the gears and drive chains running reliably. 41 |


