91 - Planer Stand, страница 39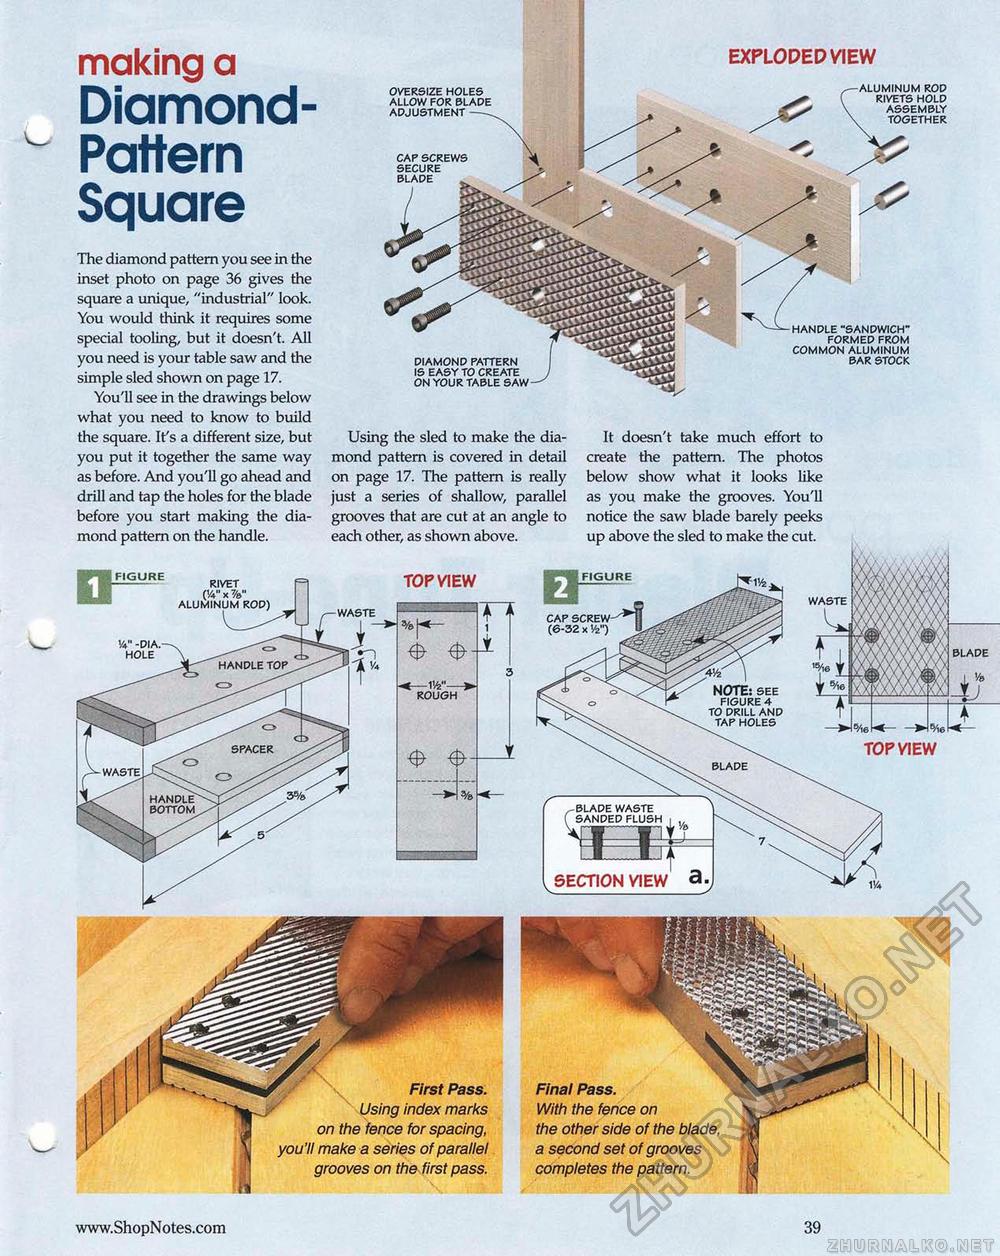
making a DiamondPatternSquareEXPLODEDV1EW aluminum rod rivets hold assembly together oversize holes allow for blade adjustment-- cap screws secure blade ^ The diamond pattern you see in the inset photo on page 36 gives the square a unique, "industrial" look. You would think it requires some special tooling, but it doesn't. All you need is your table saw and the simple sled shown on page 17. You'll see in the drawings below what you need to know to build the square. It's a different size, but Using the sled to make the dia-you put it together the same way mond pattern is covered in detail as before. And you'll go ahead and on page 17. The pattern is really drill and tap the holes for the blade just a series of shallow, parallel before you start making the dia- grooves that are cut at an angle to mond pattern on the handle. each other, as shown above. handle "sandwich-formed from common aluminum bar stock diamond pattern is easy to create on your table saw It doesn't take much effort to create the pattern. The photos below show what it looks like as you make the grooves. You'll notice the saw blade barely peeks up above the sled to make the cut. FIGURE TOP VIEW rivet ('A" x waste waste '/*" -dia. hole handle top \ NOTE: see figure 4 to drill and tap holes —W— rough TOP VIEW blade waste handle bottom blade waste sanded flush SECTION VIEW Final Pass. With the fence on the other side of the blade, a second set of grooves completes the pattern. 39 |


