92, страница 4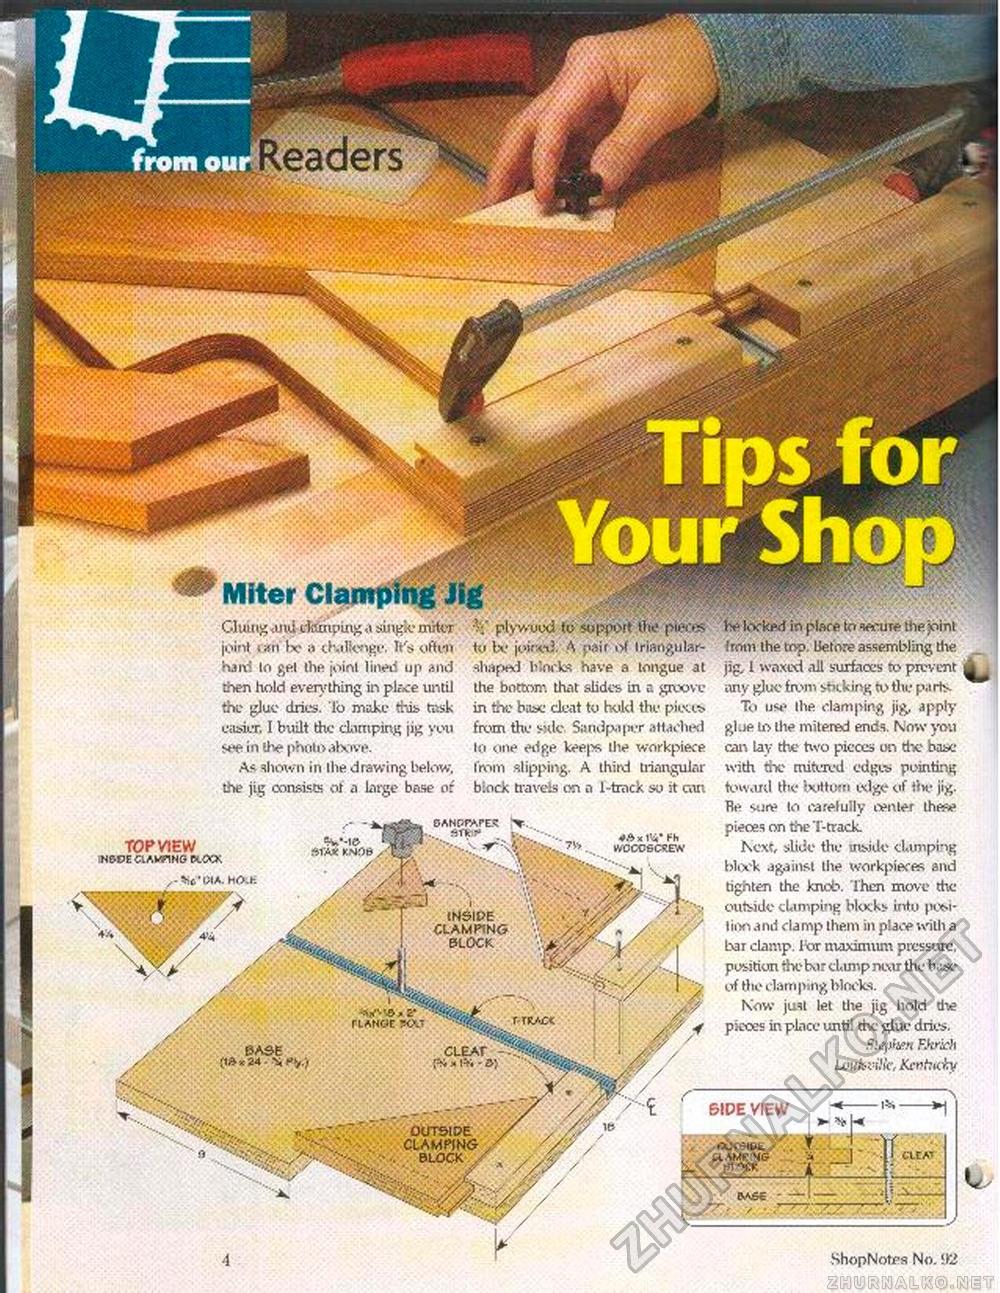
INSIDE CLAWING BLOCK W&.Z- ' riANde wj f-TKAC< CLEAr OUTSIDE CLAMPING BLOCK . Readers Miter mmm. ■ :—! .v. Cluing andctemping a single outer joint 1 an fx- ;> tKdfWge. It's often haivi to gel the joint lined up and then hold everything in place until the glue dries, lo make this task easier, I built the damping jig you see in the |>hoti> above. As shown in the drawing below, the jig consists of a large base of plywood to support the pieces to be joir.ct3. A ?<®ir of Iriangular- shaped blocks have a tongue at the bottom that slides in a groove in the base cleat to hold the pieces from the side. Sandpaper attached to one eilp.e kee|>s the workpiece from slipping. A third triangular block travels on a 1-track so it can TOP VIEW INODECiAWWNO W.<XX %)6'I»A. HO.K OANWAPEX r*~ :'■>.■>..^ v^,. wocobcubh be locked in place to secure the joint firhn the top. before assembling die jig 1 waxed all surfaces to prevent ^ any gluefn>m sticking to the parts. To use the damping jig. apply glue lo the mitered ends. Now you caii lay the two pieces on the bate with the mitered edges pointing toward the bottom edge of tin' jig. Re surw to carefully center thffte pieres on the T-track. Next, slide the inside damping block against the workplaces and tighten the knob. Then move the outside clamping blocks into pce.i-Iion a nd cla mp them in place with a bar clamp, lor maximum pressure, position the Kir clamp new the base of the damping blocks. Now just let die jig hold the paxes in place until the glue dries. Stephen FJvich U'uhviHc, Ks»t:ubf 4 ShopNotes No. 1)2 |


