92, страница 6
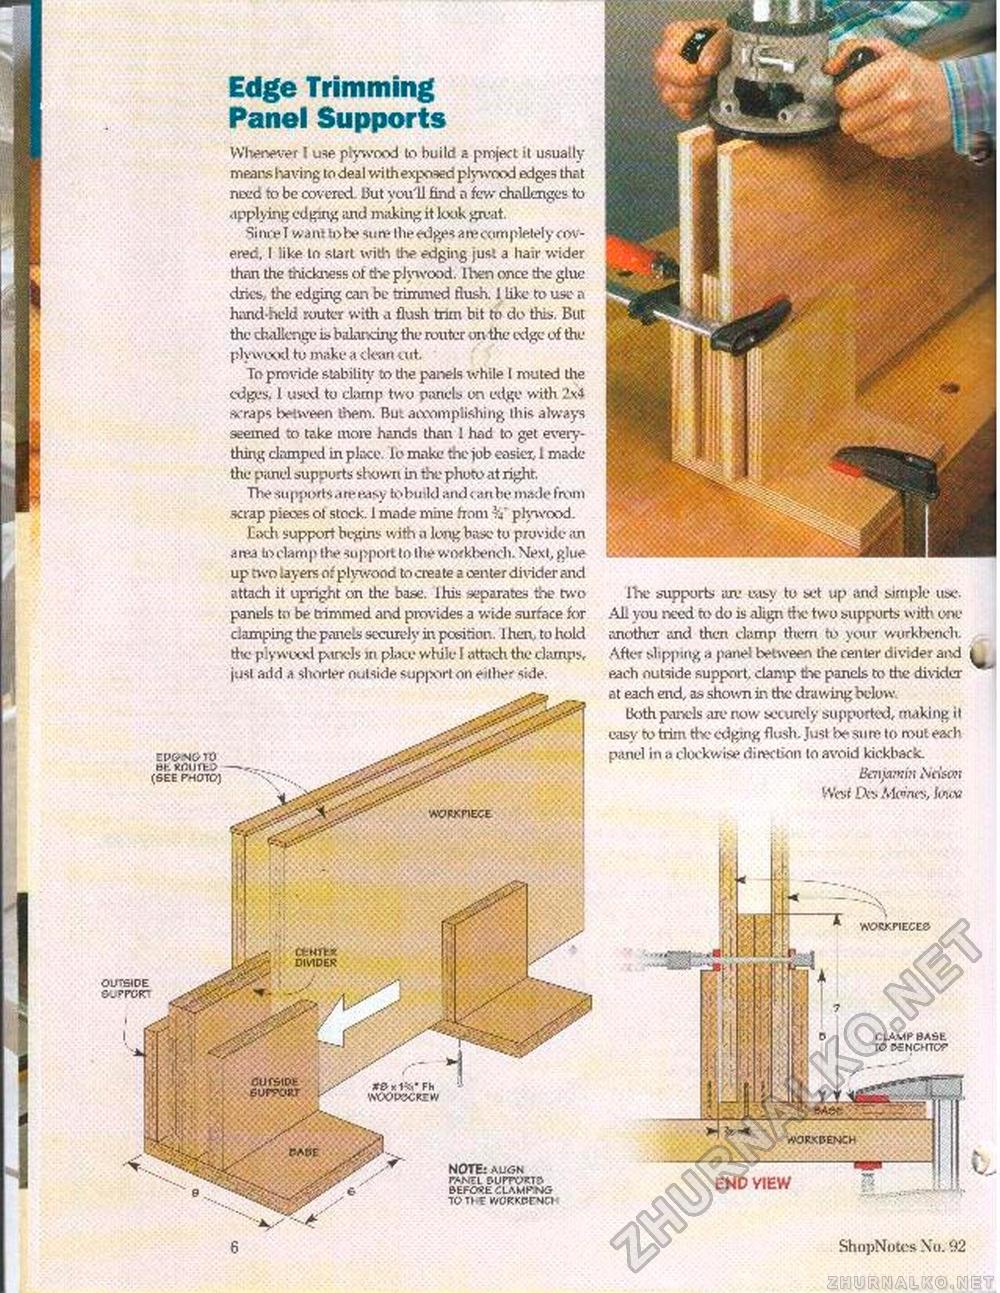
OUTSIDE wfran Edge Trimming Panel Supports VVIvtwer I uv plywood to build a jMnjecl il usually means having to deal with exposed plywood edges that need to be covered. But you'll find a few challenges to applying edging and making it look gnsat. Since I want to be su re Hit* edges a re completely <CW-ered. I like In start with the edging just a hair wider than the thickness of the plywood. Ihen once the glue dries, the edging can be trimmed flush. 1 like to use a hand-held router with a flush trim bit to do this. But the challenge is balancing the router on the edge of the plywood to make a clean cut. To pmvide stability to die panels while I muted the edges. 1 used to clamp two panels on edge with 2x4 scraps between them. Bui accomplishing this always seemed to take more hands than 1 had to get everything clamped in place, lo make the job easier, 1 made the panel supports Shown in the phuto at right. Thesu pf >i >rts a re Kisy to build and < an be madeftvm scrap pieces ol stock. 1 made mine from plywood. Each support begins with a long base to provide iin area to clamp the support In the workbench. Mext, glue up two layers of pi wood to create a center divider and attach it upright on the base, lhis separates toe two panels to be trimmed and provides a wide surface for clamping the panels securely in position. 1 hen, to hold Ate plywood panels ki place while I attach the clamps, just add a shorten outside support on either side. EPCyNC/10 (SEE FHOTOJ W00RSCREW WKXHECE NOTE; ALl<5N BEFORE £tAMPNG TOT IT WOKKWWl Ihe supports an.1 easy to set up and simple use. All you need to do is align tfie two supports with w another and then clump them to your workbench. After (.lipping a panel between the renter divider and each outside support, clamp the panels to the divider at each end, as shown in the drawing below both panels are now beturcly supported, making it easy to trim the edging flush. Just be sum to roul each panel in a clockwise direction to avoid kickback. Benjamin .\riswr Wre< DR. Akn/ioi, lw.v C lAWPBASE TO KNCXTCP END VIEW 6 ShopNotes No. 1)2 |


