93, страница 18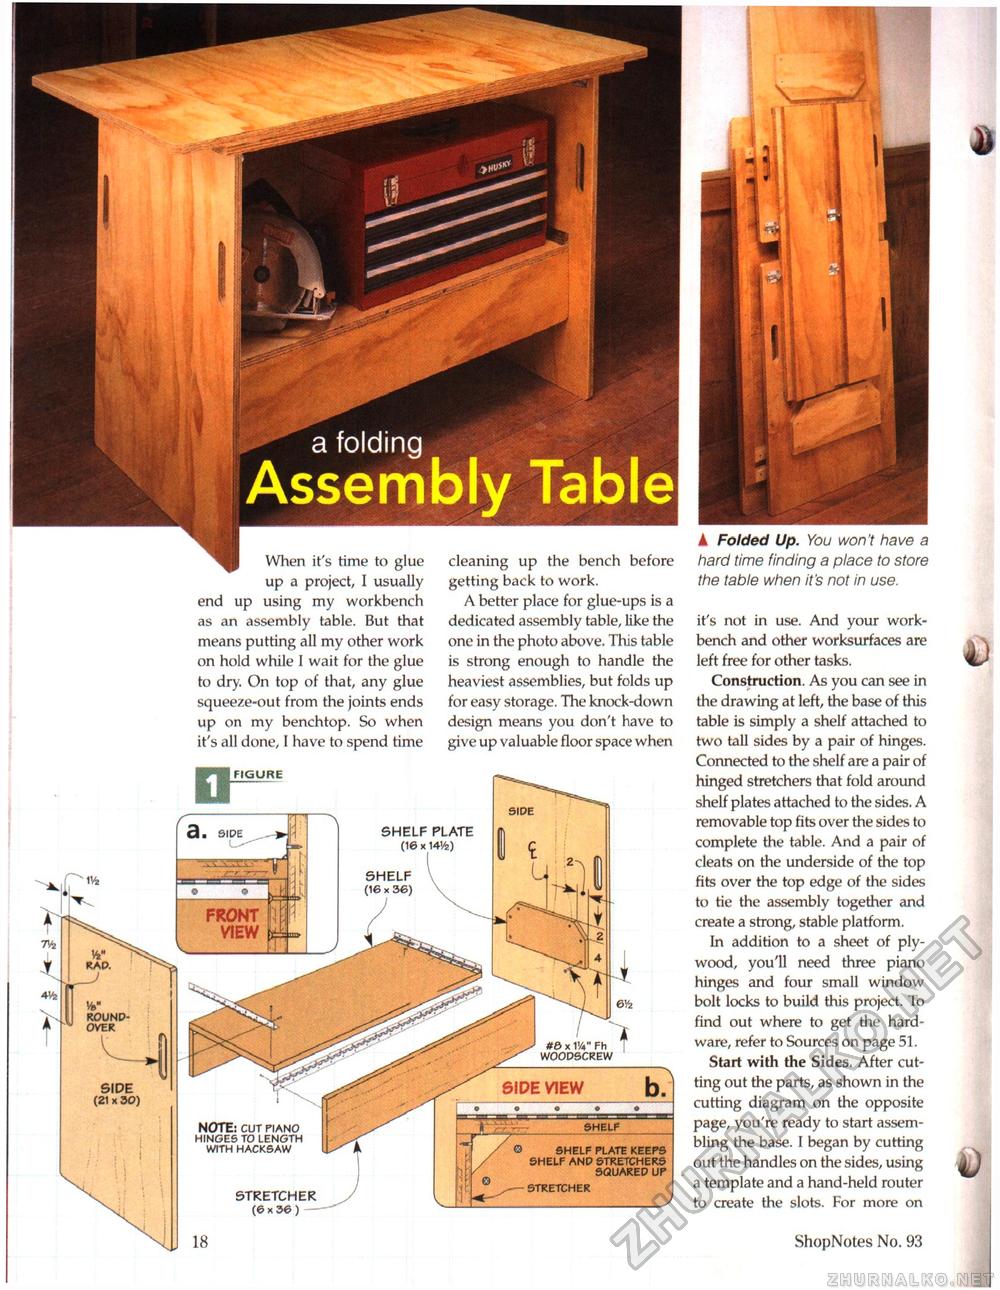
When it's time to glue up a project, I usually end up using my workbench as an assembly table. But that means putting all my other work on hold while I wait for the glue to dry. On top of that, any glue squeeze-out from the joints ends up on my benchtop. So when it's all done, I have to spend time cleaning up the bench before getting back to work. A better place for glue-ups is a dedicated assembly table, like the one in the photo above. This table is strong enough to handle the heaviest assemblies, but folds up for easy storage. The knock-down design means you don't have to give up valuable floor space when FIGURE SHELF PLATE (16 x 14V2) front view ROUND-OVER #6 x IV4" Fh WOODSCREW NOTE: CUT PIANO HINGES TO LENGTH WITH HACKSAW SHELF PLATE KEEPS SHELF AND STRETCHERS SQUARED UP STRETCHER ▲ Folded Up. You won't have a hard time finding a place to store the table when it's not in use. it's not in use. And your workbench and other worksurfaces are left free for other tasks. Construction. As you can see in the drawing at left, the base of this table is simply a shelf attached to two tall sides by a pair of hinges. Connected to the shelf are a pair of hinged stretchers that fold around shelf plates attached to the sides. A removable top fits over the sides to complete the table. And a pair of cleats on the underside of the top fits over the top edge of the sides to tie the assembly together and create a strong, stable platform. In addition to a sheet of plywood, you'll need three piano hinges and four small window bolt locks to build this project. To find out where to get the hardware, refer to Sources on page 51. Start with the Sides. After cutting out the parts, as shown in the cutting diagram on the opposite page, you're ready to start assembling the base. I began by cutting out the handles on the sides, using a template and a hand-held router to create the slots. For more on 18 ShopNotes No. 93 |


