94, страница 26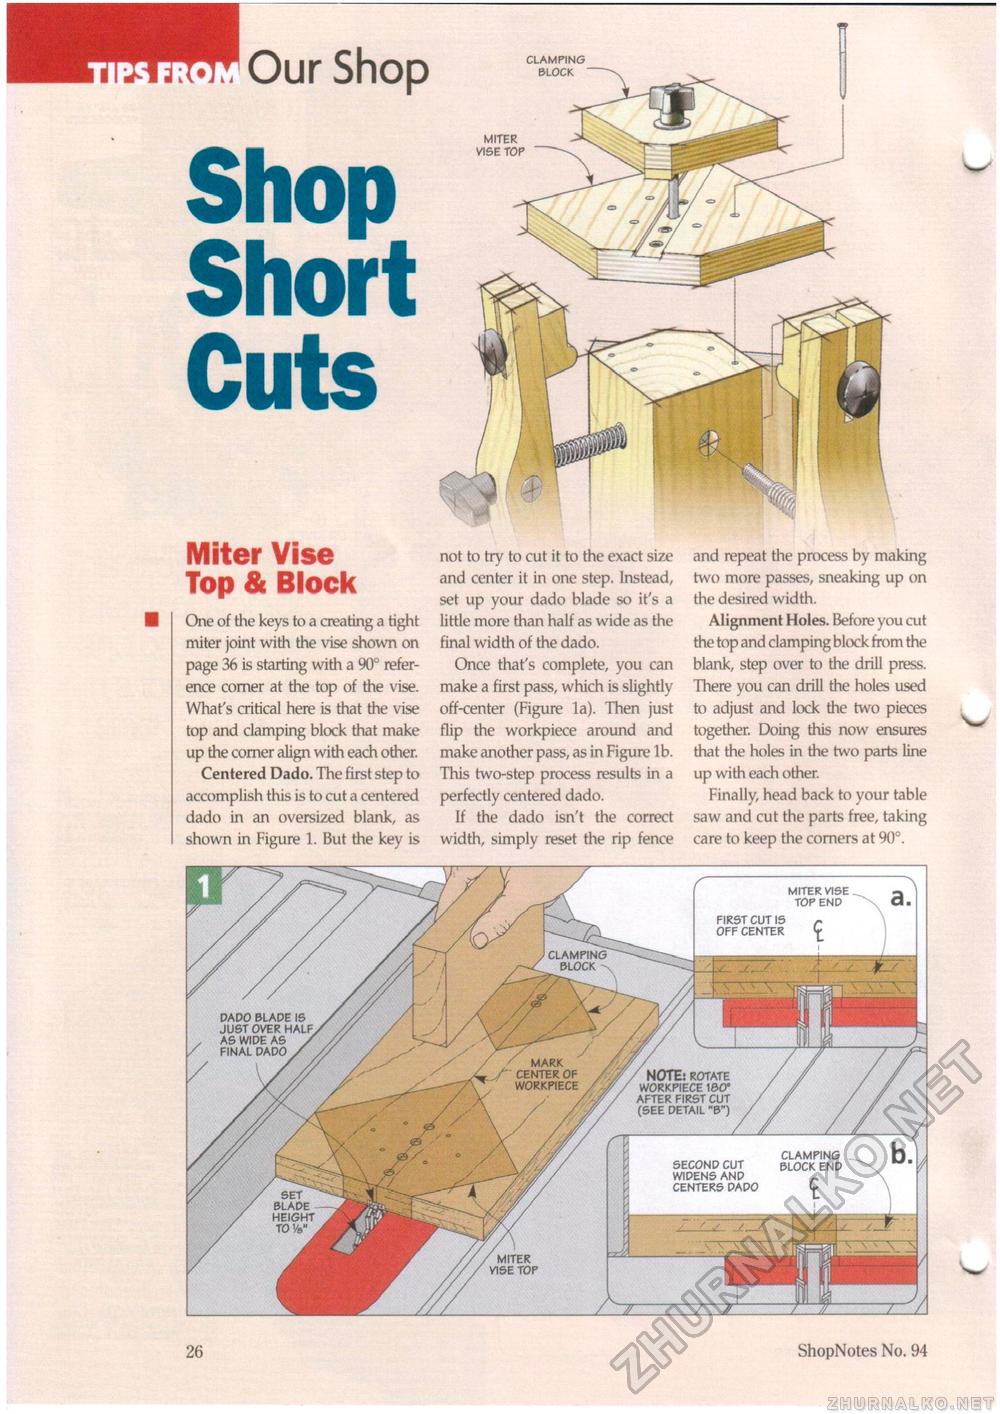
:w:)Our Shop ShopShortCutsMiter Vise Top & Block One of the keys to a creating a tight miter joint with the vise shown on page 36 is starting with a 90° reference corner at the top of the vise. What's critical here is that the vise top and clamping block that make up the corner align with each other. Centered Dado. The first step to accomplish this is to cut a centered dado in an oversized blank, as shown in Figure 1. But the key is CLAMPING BLOCK MITER VISE TOP not to try to cut it to the exact size and center it in one step. Instead, set up your dado blade so it's a little more than half as wide as the final width of the dado. Once that's complete, you can make a first pass, which is slightly off-center (Figure la). Then just flip the workpiece around and make another pass, as in Figure lb. This two-step process results in a perfectly centered dado. If the dado isn't the correct width, simply reset the rip fence and repeat the process by making two more passes, sneaking up on the desired width. Alignment Holes. Before you cut the top and clamping block from the blank, step over to the drill press. There you can drill the holes used to adjust and lock the two pieces together. Doing this now ensures that the holes in the two parts line up with each other. Finally, head back to your table saw and cut the parts free, taking care to keep the corners at 90°. clamping block MARK CENTER OF WORKPIECE Set blade height to Ve>" J MITER VISE TOP END FIRST CUT IS OFF CENTER / / dado blade is just over half as wide as final dado NOTE: rotate workpiece 180° after first cut (see detail "b") SECOND CUT WIDENS AND CENTERS DADO miter vise top CLAMPING h. BLOCK END 26 ShopNotes No. 94 |


