94, страница 24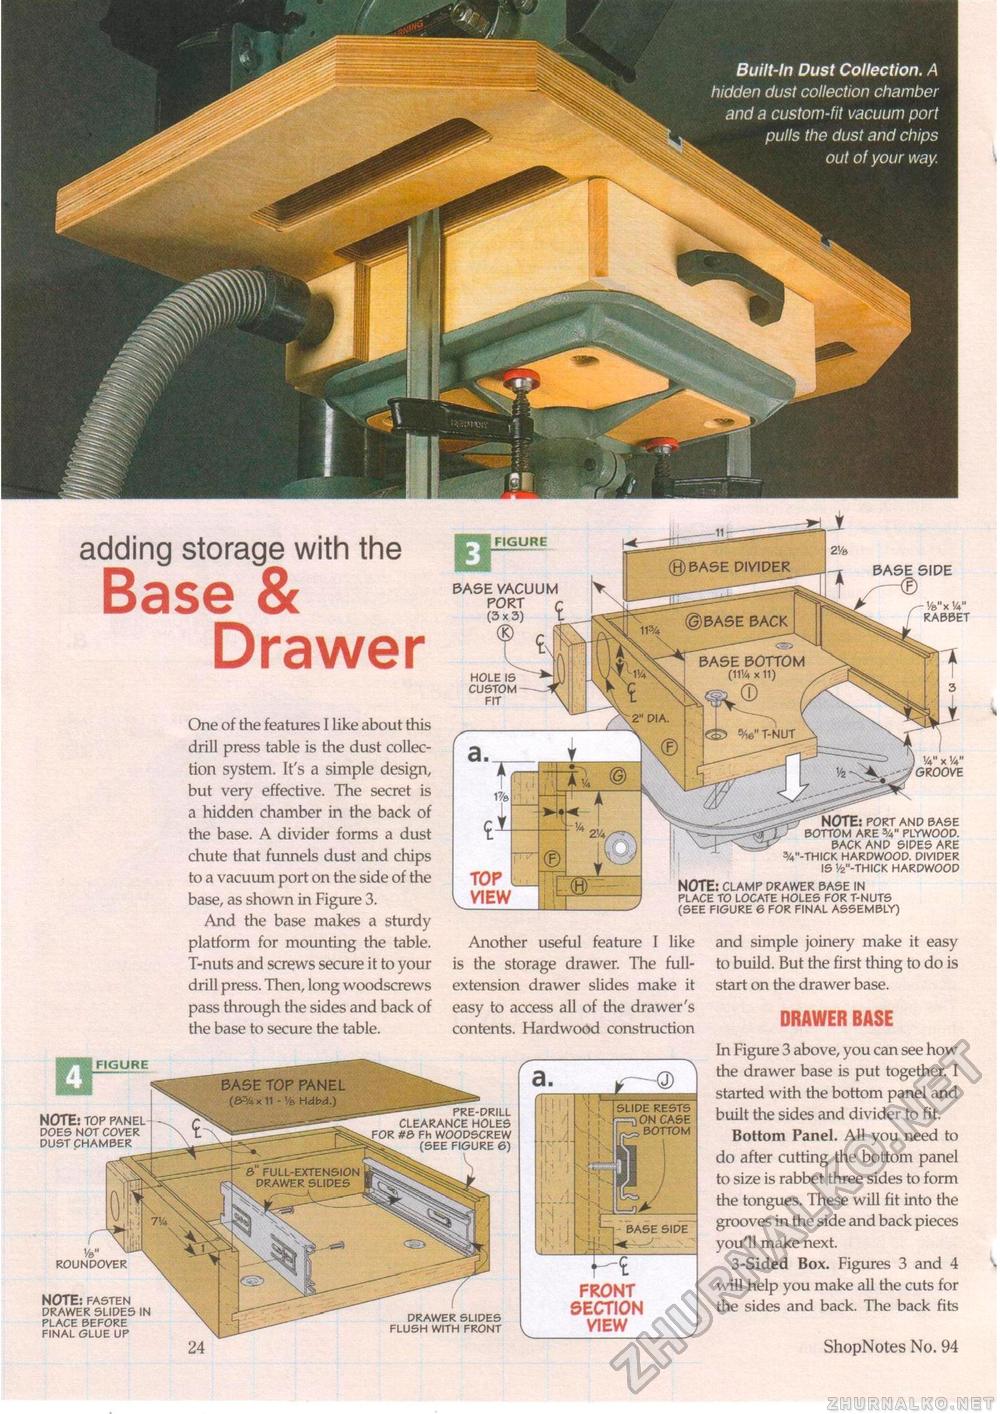
adding storage with the Base & DrawerNOTE: TOP PANEL DOES NOT COVER DUST CHAMBER One of the features I like about this drill press table is the dust collection system. It's a simple design, but very effective. The secret is a hidden chamber in the back of the base. A divider forms a dust chute that funnels dust and chips to a vacuum port on the side of the base, as shown in Figure 3. And the base makes a sturdy platform for mounting the table. T-nuts and screws secure it to your drill press. Then, long woodscrews pass through the sides and back of the base to secure the table. i FIGURE BASE VACUUM PORT (3x3) HOLE IS CUSTOM FIT NOTE: PORT AND BASE BOTTOM ARE 3/4M PLYWOOD. BACK AND SIDES ARE 3/4"-THICK HARDWOOD. DIVIDER IS Vfe"-THICK HARDWOOD NOTE: CLAMP DRAWER BASE IN PLACE TO LOCATE HOLES FOR T-NUTS (SEE FIGURE 6 FOR FINAL ASSEMBLY) Another useful feature I is the storage drawer. The like full- extension drawer slides make it easy to access all of the drawer's contents. Hardwood construction f ROUNDOVER NOTE: FASTEN DRAWER SLIDES IN PLACE BEFORE FINAL GLUE UP and simple joinery make it easy to build. But the first thing to do is start on the drawer base. DRAWER BASE In Figure 3 above, you can see how the drawer base is put together. I started with the bottom panel and bLiilt the sides and divider to fit. Bottom Panel. All you need to do after cutting the bottom panel to size is rabbet three sides to form the tongues. These will fit into the grooves in the side and back pieces you'll make next. 3-Sided Box. Figures 3 and 4 will help you make all the cuts for the sides and back. The back fits 24 ShopNotes No. 94 |


