Woodworker's Journal 101-Projects-for-Woodworkers, страница 46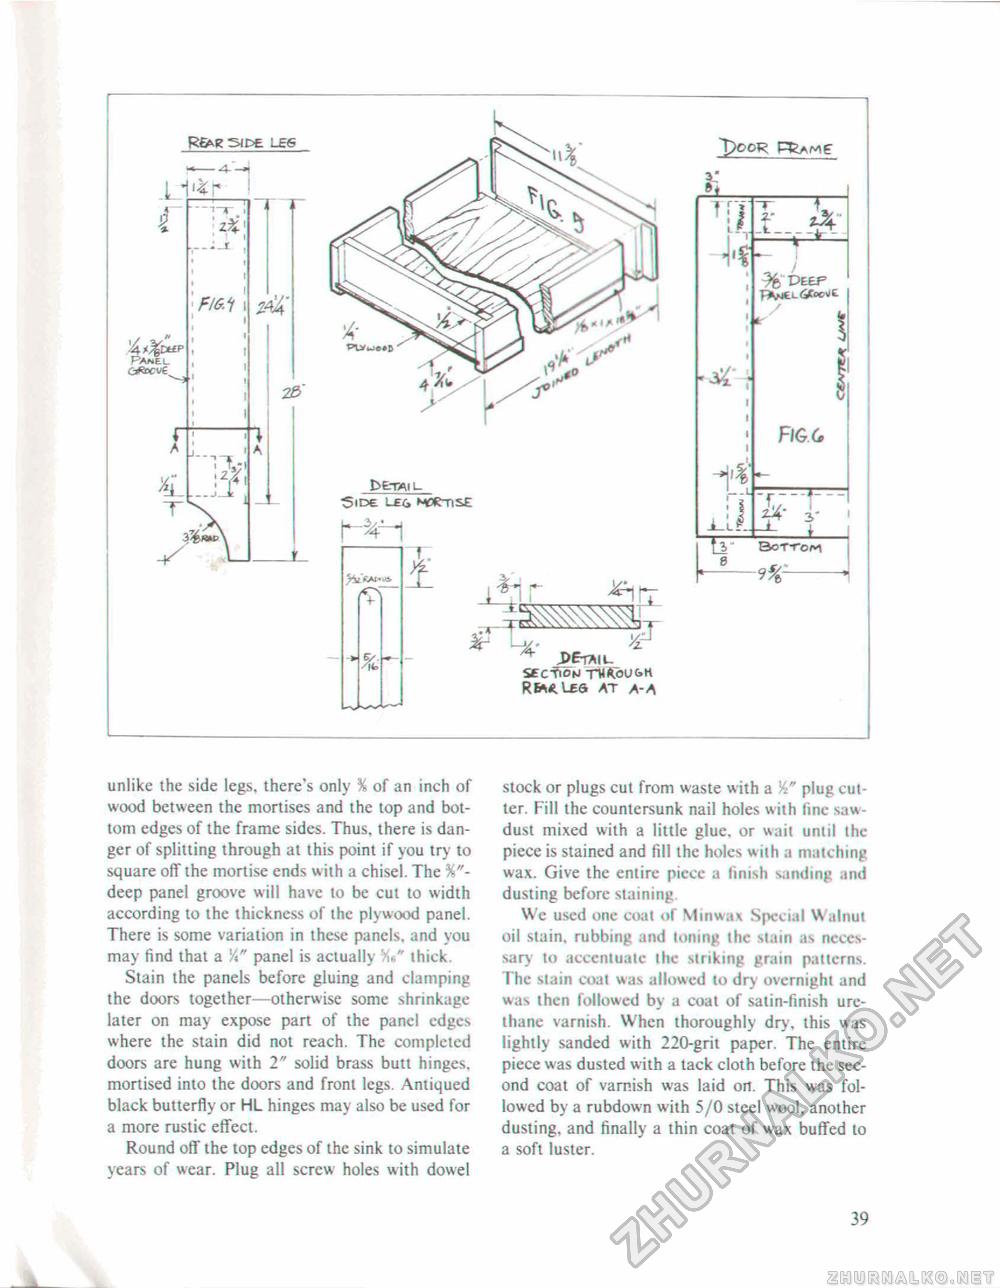
REM; SJE-E. LE6 F'aneu. •'It It. sec-nou tmAou&h R6%«.LE6 AT A-A "P&OR Ji_
unlike the side legs, there's only % of an inch of wood between the mortises and the top and bottom edges of the frame sides. Thus, there is danger of splitting through at this point if you try to square off the mortise ends with a chisel. The %"-deep panel groove will have to be cut to width according to the thickness of the plywood panel. There is some variation in these panels, and you may find that a Yi" panel is actually thick. Stain the panels before gluing and clamping the doors together—otherwise some shrinkage later on may expose part of the panel edges where the stain did not reach. The completed doors are hung with 2" solid brass butt hinges, mortised into the doors and front legs. Antiqued black butterfly or HL hinges may also be used for a more rustic effect. Round off the top edges of the sink to simulate years of wear. Plug all screw holes with dowel slock or plugs cut from waste with a V." plug cutter. Fill the countersunk nail holes with fine sawdust mixed with a little glue, or wait unlit the piece is stained and fill the holes with a matching wax. Give the entire piecc a finish sanding and dusting before staining. We used one coat of Minwax Special Walnut oil stain, rubbing and toning the stain as necessary lo accentuate the striking grain patterns. The stain coat was allowed to dry overnight and was then followed by a coat of satin-finish ure-thane varnish. When thoroughly dry, this was lightly sanded with 220-grii paper. The entire piece was dusted with a tack cloth before the second coat of varnish was laid on. This was followed by a rubdown with 5/0 steel wool, another dusting, and finally a thin coat of wax buffed to a soft luster. 39 _ |
|||||||||||||


