Woodworker's Journal 1983-7-5, страница 46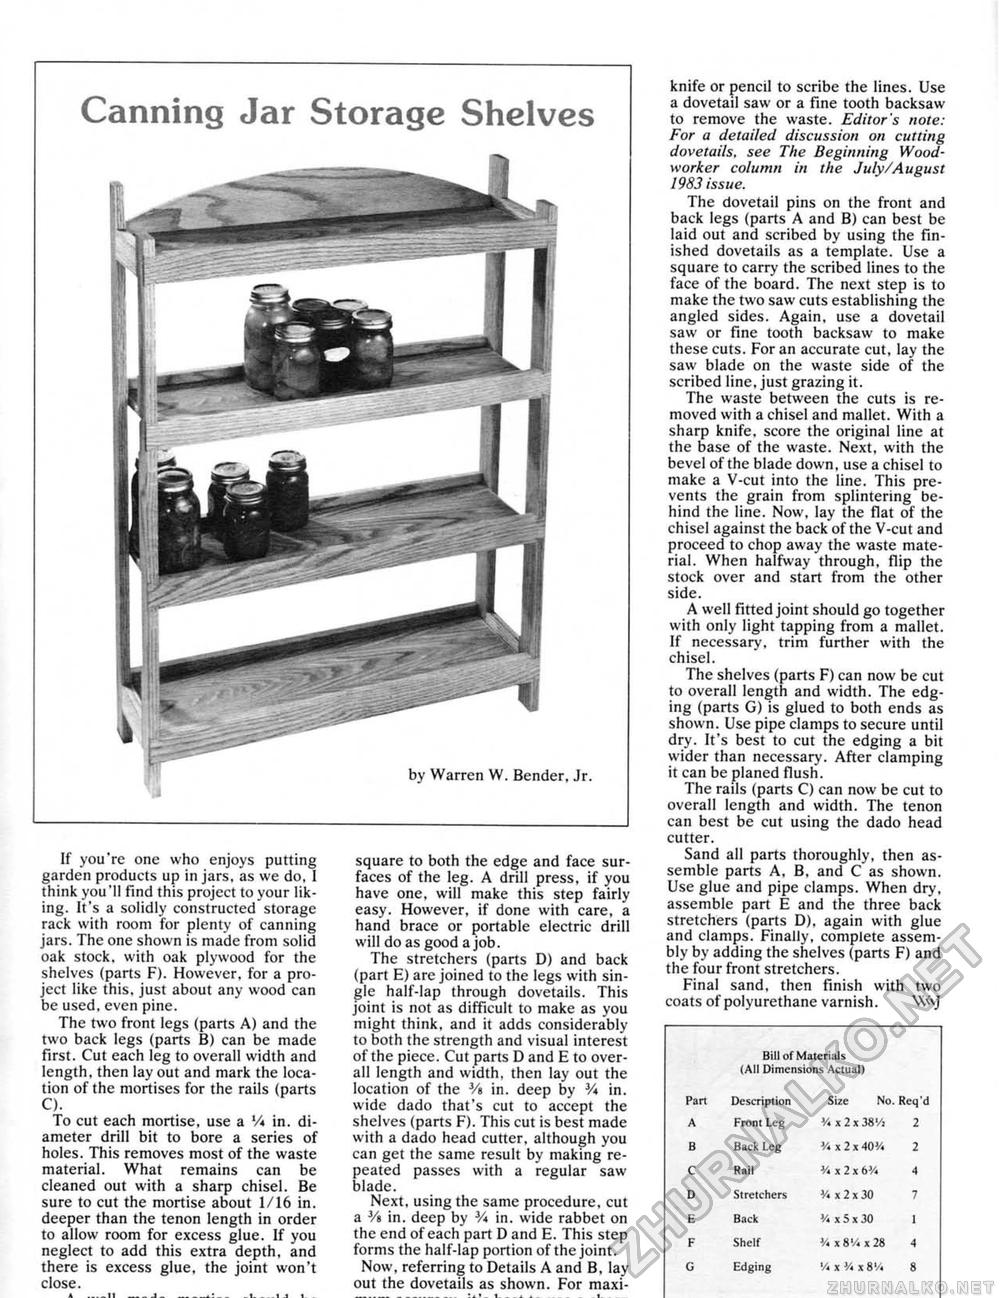
Canning Jar Storage Shelves by Warren W. Bender, Jr. If you're one who enjoys putting garden products up in jars, as we do, I think you'll find this project to your liking. It's a solidly constructed storage rack with room for plenty of canning jars. The one shown is made from solid oak stock, with oak plywood for the shelves (parts F). However, for a project like this, just about any wood can be used, even pine. The two front legs (parts A) and the two back legs (parts B) can be made first. Cut each leg to overall width and length, then lay out and mark the location of the mortises for the rails (parts C). To cut each mortise, use a Vi in. diameter drill bit to bore a series of holes. This removes most of the waste material. What remains can be cleaned out with a sharp chisel. Be sure to cut the mortise about 1/16 in. deeper than the tenon length in order to allow room for excess glue. If you neglect to add this extra depth, and there is excess glue, the joint won't close. square to both the edge and face surfaces of the leg. A drill press, if you have one, will make this step fairly easy. However, if done with care, a hand brace or portable electric drill will do as good a job. The stretchcrs (parts D) and back (part E) are joined to the legs with single half-lap through dovetails. This joint is not as difficult to make as you might think, and it adds considerably to both the strength and visual interest of the piece. Cut parts D and E to overall length and width, then lay out the location of the % in. deep by V* in. wide dado that's cut to accept the shelves (parts F). This cut is best made with a dado head cutter, although you can get the same result by making repeated passes with a regular saw biade. Next, using the same procedure, cut a % in. deep by V* in. wide rabbet on the end of each part D and E. This step forms the half-lap portion of the joint. Now, referring to Details A and B, lay out the dovetails as shown. For maxi- knife or pencil to scribe the lines. Use a dovetail saw or a fine tooth backsaw to remove the waste. Editor's note: For a detailed discussion on cutting dovetails, see The Beginning Woodworker column in the July/August 1983 issue. The dovetail pins on the front and back legs (parts A and B) can best be laid out and scribed by using the finished dovetails as a template. Use a square to carry the scribed lines to the face of the board. The next step is to make the two saw cuts establishing the angled sides. Again, use a dovetail saw or fine tooth backsaw to make these cuts. For an accurate cut, lay the saw blade on the waste side of the scribed line, just grazing it. The waste between the cuts is removed with a chisel and mallet. With a sharp knife, score the original line at the base of the waste. Next, with the bevel of the blade down, use a chisel to make a V-cut into the line. This prevents the grain from splintering behind the line. Now, lay the flat of the chisel against the back of the V-cut and proceed to chop away the waste material. When halfway through, flip the stock over and start from the other side. A well fitted joint should go together with only light tapping from a mallet. If necessary, trim further with the chisel. The shelves (parts F) can now be cut to overall length and width. The edging (parts G) is glued to both ends as shown. Use pipe clamps to secure until dry. It's best to cut the edging a bit wider than necessary. After clamping it can be planed flush. The rails (parts C) can now be cut to overall length and width. The tenon can best be cut using the dado head cutter. Sand all parts thoroughly, then assemble parts A, B, and C as shown. Use glue and pipe clamps. When dry, assemble part E and the three back stretchers (parts D), again with glue and clamps. Finally, complete assembly by adding the shelves (parts F) and the four front stretchers. Final sand, then finish with two coats of polyurethane varnish. W\j Bill of Materials (All Dimensions Actual) Bill of Materials (All Dimensions Actual)
|
||||||||||||||||||||||||||||||||


