Woodworker's Journal 1983-7-5, страница 49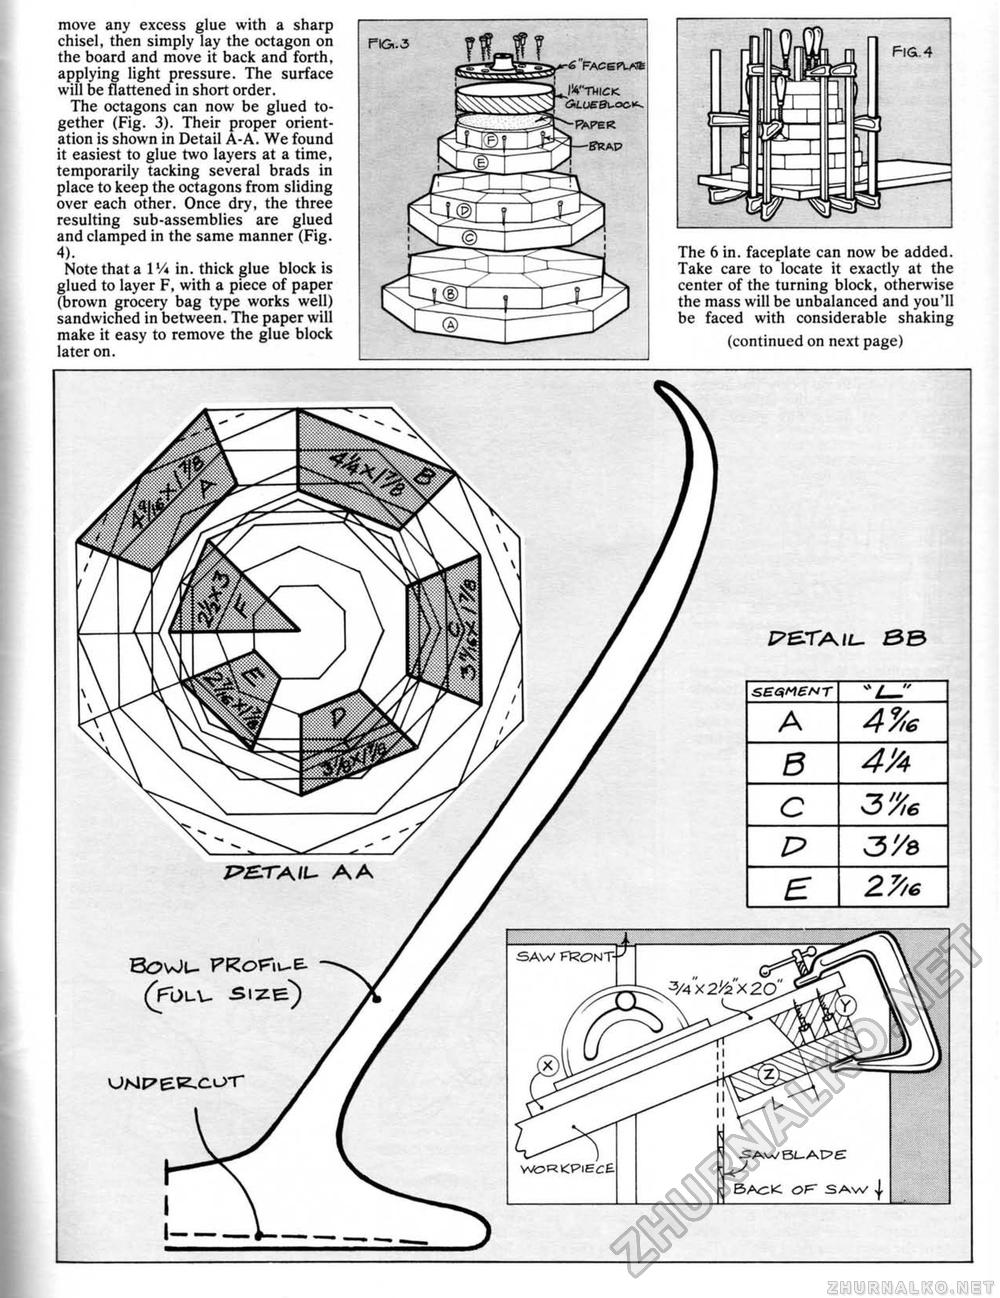
move any excess glue with a sharp chisel, then simply lay the octagon on the board and move it back and forth, applying light pressure. The surface will be flattened in short order. The octagons can now be glued together (Fig. 3). Their proper orientation is shown in Detail A-A. We found it easiest to glue two layers at a time, temporarily tacking several brads in place to keep the octagons from sliding over each other. Once dry, the three resulting sub-assemblies are glued and clamped in the same manner (Fig. 4). Note that a 1V* in. thick glue block is glued to layer F, with a piece of paper (brown grocery bag type works well) sandwiched in between. The paper will make it easy to remove the glue block later on. The 6 in. faceplate can now be added. Take care to locate it exactly at the center of the turning block, otherwise the mass will be unbalanced and you'll be faced with considerable shaking (continued on next page) |


