Woodworker's Journal 1983-7-5, страница 48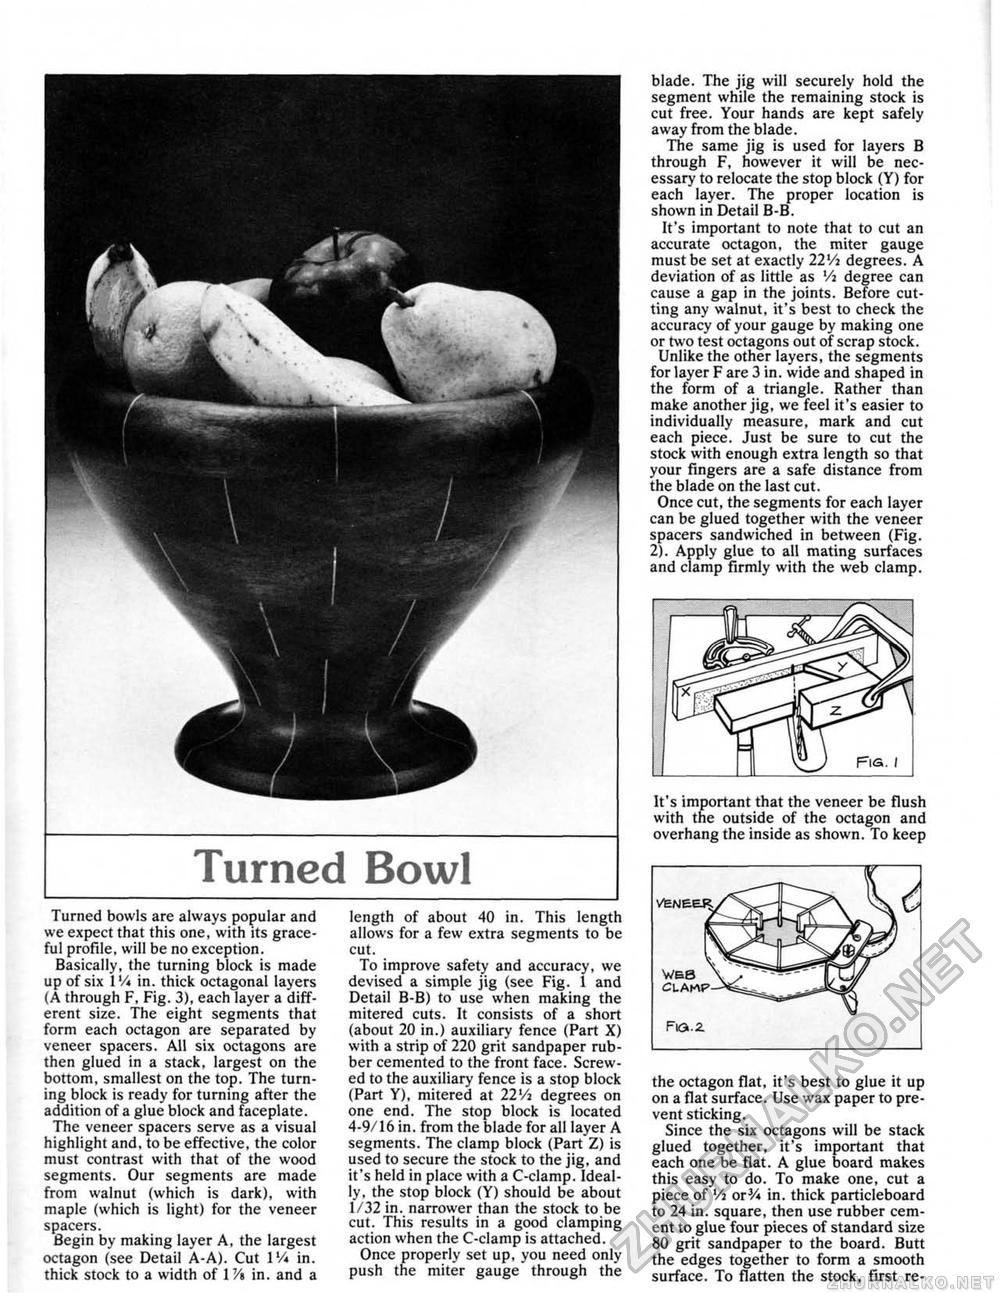
Turned bowls are always popular and we expect that this one, with its graceful profile, will be no exception. Basically, the turning block is made up of six 1 V* in. thick octagonal layers (A through F, Fig. 3), each layer a different size. The eight segments that form each octagon are separated by veneer spacers. All six octagons are then glued in a stack, largest on the bottom, smallest on the top. The turning block is ready for turning after the addition of a glue block and faceplate. The veneer spacers serve as a visual highlight and, to be effective, the color must contrast with that of the wood segments. Our segments are made from walnut (which is dark), with maple (which is light) for the veneer spacers. Begin by making layer A, the largest octagon (see Detail A-A). Cut IV* in. thick stock to a width of IVt in. and a length of about 40 in. This length allows for a few extra segments to be cut. To improve safety and accuracy, we devised a simple jig (see Fig. 1 and Detail B-B) to use when making the mitered cuts. It consists of a short {about 20 in.) auxiliary fence (Part X) with a strip of 220 grit sandpaper rubber cemented to the front face. Screwed to the auxiliary fence is a stop block (Part Y), mitered at 22Va degrees on one end. The stop block is located 4-9/16 in. from the blade for all layer A segments. The clamp block (Part Z) is used to secure the stock to the jig, and it's held in place with a C-clamp. Ideally, the stop block (Y) should be about 1/32 in. narrower than the stock to be cut. This results in a good clamping action when the C-clamp is attached. Once properly set up, you need only push the miter gauge through the blade. The jig will securely hold the segment while the remaining stock is cut free. Your hands are kept safely away from the blade. The same jig is used for layers B through F, however it will be necessary to relocate the stop block (Y) for each layer. The proper location is shown in Detail B-B. It's important to note that to cut an accurate octagon, the miter gauge must be set at exactly 22'/i degrees. A deviation of as little as Vi degree can cause a gap in the joints. Before cutting any walnut, it's best to check the accuracy of your gauge by making one or two test octagons out of scrap stock. Unlike the other layers, the segments for layer F are 3 in. wide and shaped in the form of a triangle. Rather than make another jig. we feel it's easier to individually measure, mark and cut each piece. Just be sure to cut the stock with enough extra length so that your fingers are a safe distance from the blade on the last cut. Once cut, the segments for each layer can be glued together with the veneer spacers sandwiched in between (Fig. 2). Apply glue to all mating surfaces and clamp firmly with the web clamp. It's important that the veneer be flush with the outside of the octagon and overhang the inside as shown. To keep Fia.z the octagon flat, it's best to glue it up on a flat surface. Use wax paper to prevent sticking. Since the six octagons will be stack glued together, it's important that each one be flat. A glue board makes this easy to do. To make one, cut a piece of Vi or % in. thick particleboard to 24 in. square, then use rubber cement to glue four pieces of standard size 80 grit sandpaper to the board. Butt the edges together to form a smooth surface. To flatten the stock, first re- |


