Woodworker's Journal 1983-7-5, страница 57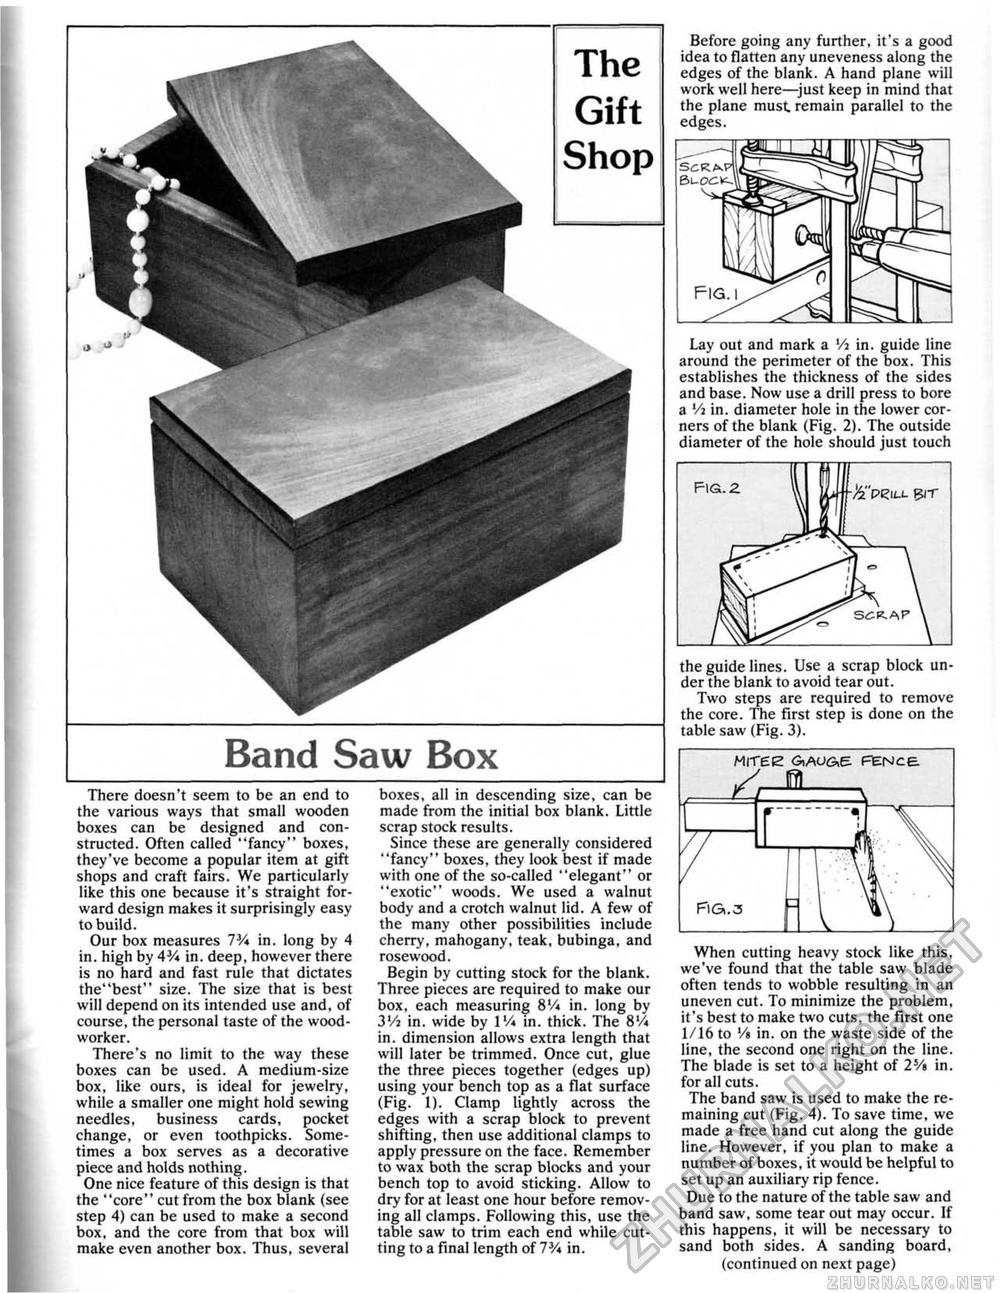
Band Saw Box Before going any further, it's a good idea to flatten any uneveness along the edges of the blank. A hand plane will work well here—just keep in mind that the plane must, remain parallel to the edges. Lay out and mark a '/a in. guide line around the perimeter of the box. This establishes the thickness of the sides and base. Now use a drill press to bore a Vi in. diameter hole in the lower corners of the blank (Fig. 2). The outside diameter of the hole should just touch the guide lines. Use a scrap block under the blank to avoid tear out. Two steps are required to remove the core. The first step is done on the table saw (Fig. 3). There doesn't seem to be an end to the various ways that small wooden boxes can be designed and constructed. Often called "fancy" boxes, they've become a popular item at gift shops and craft fairs. We particularly like this one because it's straight forward design makes it surprisingly easy to build. Our box measures IV\ in. long by 4 in. high by 4% in. deep, however there is no hard and fast rule that dictates the"best" size. The size that is best will depend on its intended use and, of course, the personal taste of the woodworker. There's no limit to the way these boxes can be used. A medium-size box, like ours, is ideal for jewelry, while a smaller one might hold sewing needles, business cards, pocket change, or even toothpicks. Sometimes a box serves as a decorative piece and holds nothing. One nice feature of this design is that the "core" cut from the box blank (see step 4) can be used to make a second box, and the core from that box will make even another box. Thus, several boxes, all in descending size, can be made from the initial box blank. Little scrap stock results. Since these are generally considered "fancy" boxes, they look best if made with one of the so-called "elegant" or "exotic" woods. We used a walnut body and a crotch walnut lid. A few of the many other possibilities include cherry, mahogany, teak, bubinga, and rosewood. Begin by cutting stock for the blank. Three pieces are required to make our box, each measuring 8V* in. long by 3'/a in. wide by IV* in. thick. The 8% in. dimension allows extra length that will later be trimmed. Once cut, glue the three pieces together (edges up) using your bench top as a flat surface (Fig. 1). Clamp lightly across the edges with a scrap block to prevent shifting, then use additional clamps to apply pressure on the face. Remember to wax both the scrap blocks and your bench top to avoid sticking. Allow to dry for at least one hour before removing all clamps. Following this, use the table saw to trim each end while cutting to a final length of IV* in. When cutting heavy stock like this, we've found that the table saw blade often tends to wobble resulting in an uneven cut. To minimize the problem, it's best to make two cuts, the first one 1/16 to Vt in. on the waste side of the line, the second one right on the line. The blade is set to a height of 2V» in. for all cuts. The band saw is used to make the remaining cut (Fig. 4). To save time, we made a free hand cut along the guide line. However, if you pian to make a number of boxes, it would be helpful to set up an auxiliary rip fence. Due to the nature of the table saw and band saw, some tear out may occur. If this happens, it will be necessary to sand both sides, A sanding board, (continued on next page) &"peiu. grr |


