Woodworker's Journal 1983-7-5, страница 58
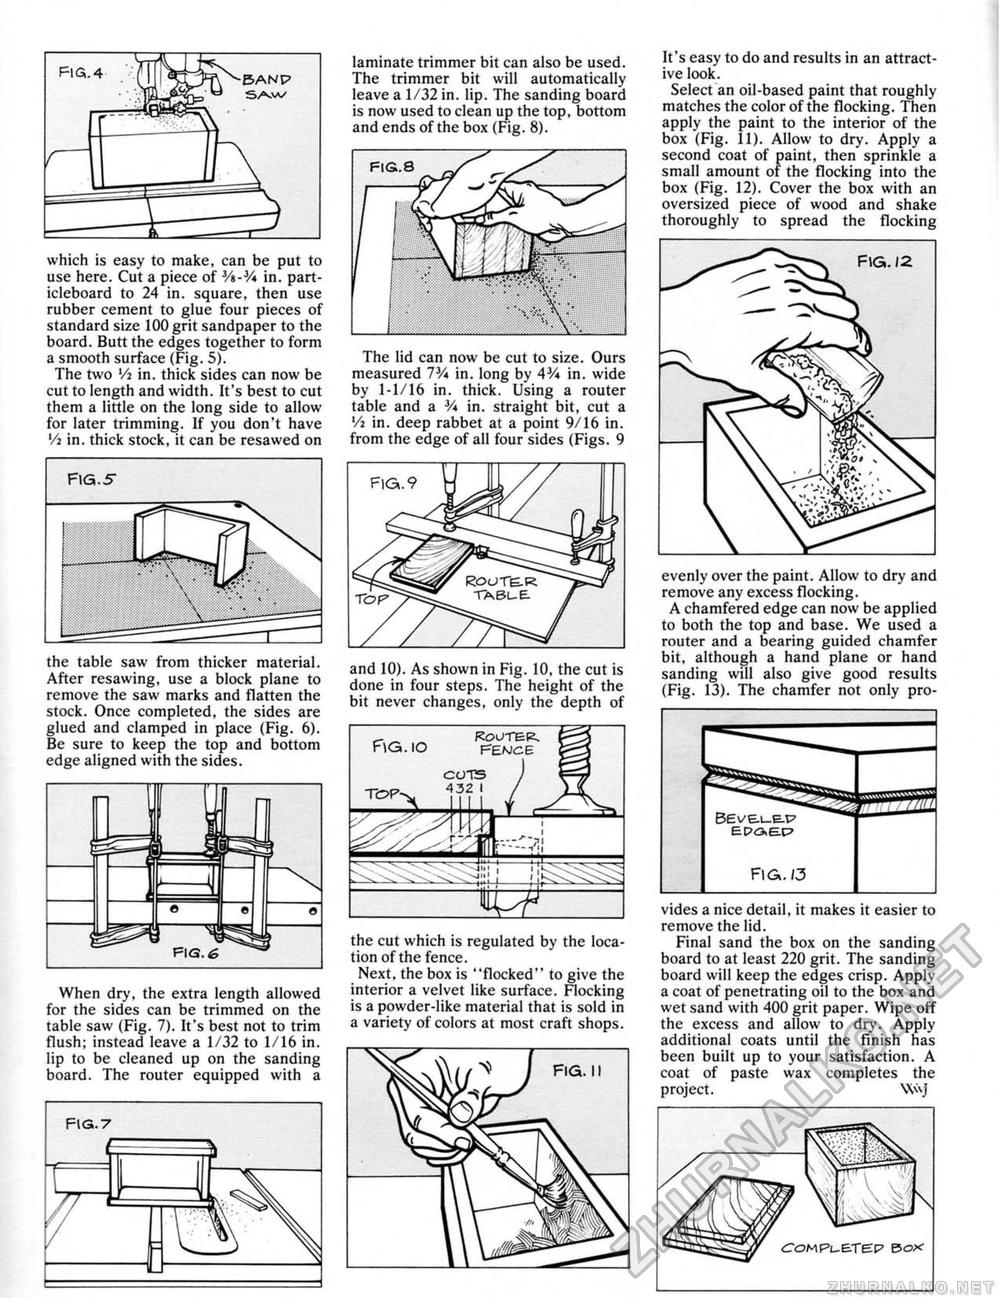
which is easy to make, can be put to use here. Cut a piece of 3/»-3A in. part-icleboard to 24 in. square, then use rubber cement to glue four pieces of standard size 100 grit sandpaper to the board. Butt the edges together to form a smooth surface (Fig. 5). The two Vi in. thick sides can now be cut to length and width. It's best to cut them a little on the long side to allow for later trimming. If you don't have Vi in. thick stock, it can be resawed on laminate trimmer bit can also be used. The trimmer bit will automatically leave a 1/32 in. lip. The sanding board is now used to clean up the top, bottom and ends of the box (Fig. 8). The lid can now be cut to size. Ours measured 73/* in. long by 43A in. wide by 1-1/16 in. thick. Using a router table and a 3A in. straight bit, cut a Vi in. deep rabbet at a point 9/16 in. from the edge of all four sides (Figs. 9 FlG.5" the table saw from thicker material. After resawing, use a block plane to remove the saw marks and flatten the stock. Once completed, the sides are glued and clamped in place (Fig. 6). Be sure to keep the top and bottom edge aligned with the sides. When dry, the extra length allowed for the sides can be trimmed on the table saw (Fig. 7). It's best not to trim flush; instead leave a 1/32 to I/I6 in. lip to be cleaned up on the sanding board. The router equipped with a and 10). As shown in Fig. 10. the cut is done in four steps. The height of the bit never changes, only the depth of the cut which is regulated by the location of the fence. Next, the box is "flocked" to give the interior a velvet like surface. Flocking is a powder-like material that is sold in a variety of colors at most craft shops. It's easy to do and results in an attractive look. Select an oil-based paint that roughly matches the color of the flocking. Then apply the paint to the interior of the box (Fig. 11). Allow to dry. Apply a second coat of paint, then sprinkle a small amount of the Hocking into the box (Fig. 12). Cover the box with an oversized piece of wood and shake thoroughly to spread the flocking evenly over the paint. Allow to dry and remove any excess flocking. A chamfered edge can now be applied to both the top and base. We used a router and a bearing guided chamfer bit, although a hand plane or hand sanding will also give good results (Fig. 13). The chamfer not only pro vides a nice detail, it makes it easier to remove the lid. Final sand the box on the sanding board to at least 220 grit. The sanding board will keep the edges crisp. Apply a coat of penetrating oil to the box and wret sand with 400 grit paper. Wipe off the excess and allow to dry. Apply additional coats until the finish has been built up to your satisfaction. A coat of paste wax completes the project. W\J |


