Woodworker's Journal 1984-8-1, страница 37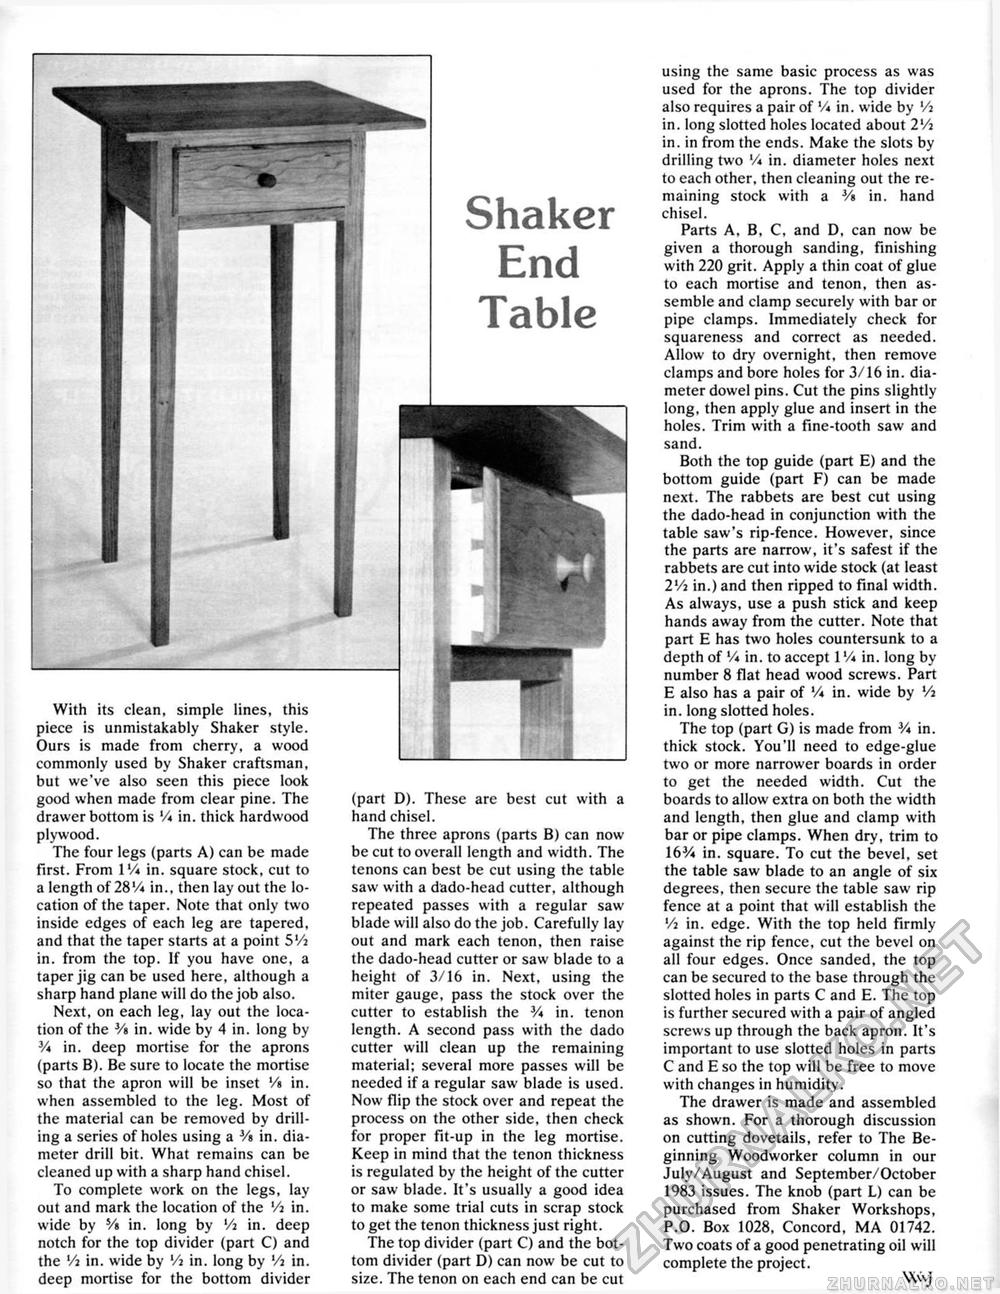
Shaker End Table With its clean, simple lines, this piece is unmistakably Shaker style. Ours is made from cherry, a wood commonly used by Shaker craftsman, but we've also seen this piece look good when made from clear pine. The drawer bottom is '/< in. thick hardwood plywood. The four legs (parts A) can be made first. From l'/« in. square stock, cut to a length of 28'/« in., then lay out the location of the taper. Note that only two inside edges of each leg are tapered, and that the taper starts at a point 5Vi in. from the top. If you have one, a taper jig can be used here, although a sharp hand plane will do the job also. Next, on each leg, lay out the location of the V» in. wide by 4 in. long by V* in. deep mortise for the aprons (parts B). Be sure to locate the mortise so that the apron will be inset '/« in. when assembled to the leg. Most of the material can be removed by drilling a series of holes using a Vi in. diameter drill bit. What remains can be cleaned up with a sharp hand chisel. To complete work on the legs, lay out and mark the location of the Vi in. wide by '/• in. long by Vi in. deep notch for the top divider (part C) and the Vi in. wide by Vi in. long by Vi in. deep mortise for the bottom divider (part D). These are best cut with a hand chisel. The three aprons (parts B) can now be cut to overall length and width. The tenons can best be cut using the table saw with a dado-head cutter, although repeated passes with a regular saw blade will also do the job. Carefully lay out and mark each tenon, then raise the dado-head cutter or saw blade to a height of 3/16 in. Next, using the miter gauge, pass the stock over the cutter to establish the 3/« in. tenon length. A second pass with the dado cutter will clean up the remaining material; several more passes will be needed if a regular saw blade is used. Now flip the stock over and repeat the process on the other side, then check for proper fit-up in the leg mortise. Keep in mind that the tenon thickness is regulated by the height of the cutter or saw blade. It's usually a good idea to make some trial cuts in scrap stock to get the tenon thickness just right. The top divider (part C) and the bottom divider (part D) can now be cut to size. The tenon on each end can be cut using the same basic process as was used for the aprons. The top divider also requires a pair of V* in. wide by Vi in. long slotted holes located about 2Vi in. in from the ends. Make the slots by drilling two Vi in. diameter holes next to each other, then cleaning out the remaining stock with a Vt in. hand chisel. Parts A, B, C, and D, can now be given a thorough sanding, finishing with 220 grit. Apply a thin coat of glue to each mortise and tenon, then assemble and clamp securely with bar or pipe clamps. Immediately check for squareness and correct as needed. Allow to dry overnight, then remove clamps and bore holes for 3/16 in. diameter dowel pins. Cut the pins slightly long, then apply glue and insert in the holes. Trim with a fine-tooth saw and sand. Both the top guide (part E) and the bottom guide (part F) can be made next. The rabbets are best cut using the dado-head in conjunction with the table saw's rip-fence. However, since the parts are narrow, it's safest if the rabbets are cut into wide stock (at least 2Vi in.) and then ripped to final width. As always, use a push stick and keep hands away from the cutter. Note that part E has two holes countersunk to a depth of V* in. to accept 1'/« in. long by number 8 flat head wood screws. Part E also has a pair of V* in. wide by Vi in. long slotted holes. The top (part G) is made from V* in. thick stock. You'll need to edge-glue two or more narrower boards in order to get the needed width. Cut the boards to allow extra on both the width and length, then glue and clamp with bar or pipe clamps. When dry, trim to \bV* in. square. To cut the bevel, set the table saw blade to an angle of six degrees, then secure the table saw rip fence at a point that will establish the Vi in. edge. With the top held firmly against the rip fence, cut the bevel on all four edges. Once sanded, the top can be secured to the base through the slotted holes in parts C and E. The top is further secured with a pair of angled screws up through the back apron. It's important to use slotted holes in parts C and E so the top will be free to move with changes in humidity. The drawer is made and assembled as shown. For a thorough discussion on cutting dovetails, refer to The Beginning Woodworker column in our July/August and September/October 1983 issues. The knob (part L) can be purchased from Shaker Workshops, P.O. Box 1028, Concord, MA 01742. Two coats of a good penetrating oil will complete the project. Wuj |


