Woodworker's Journal 1984-8-1, страница 60
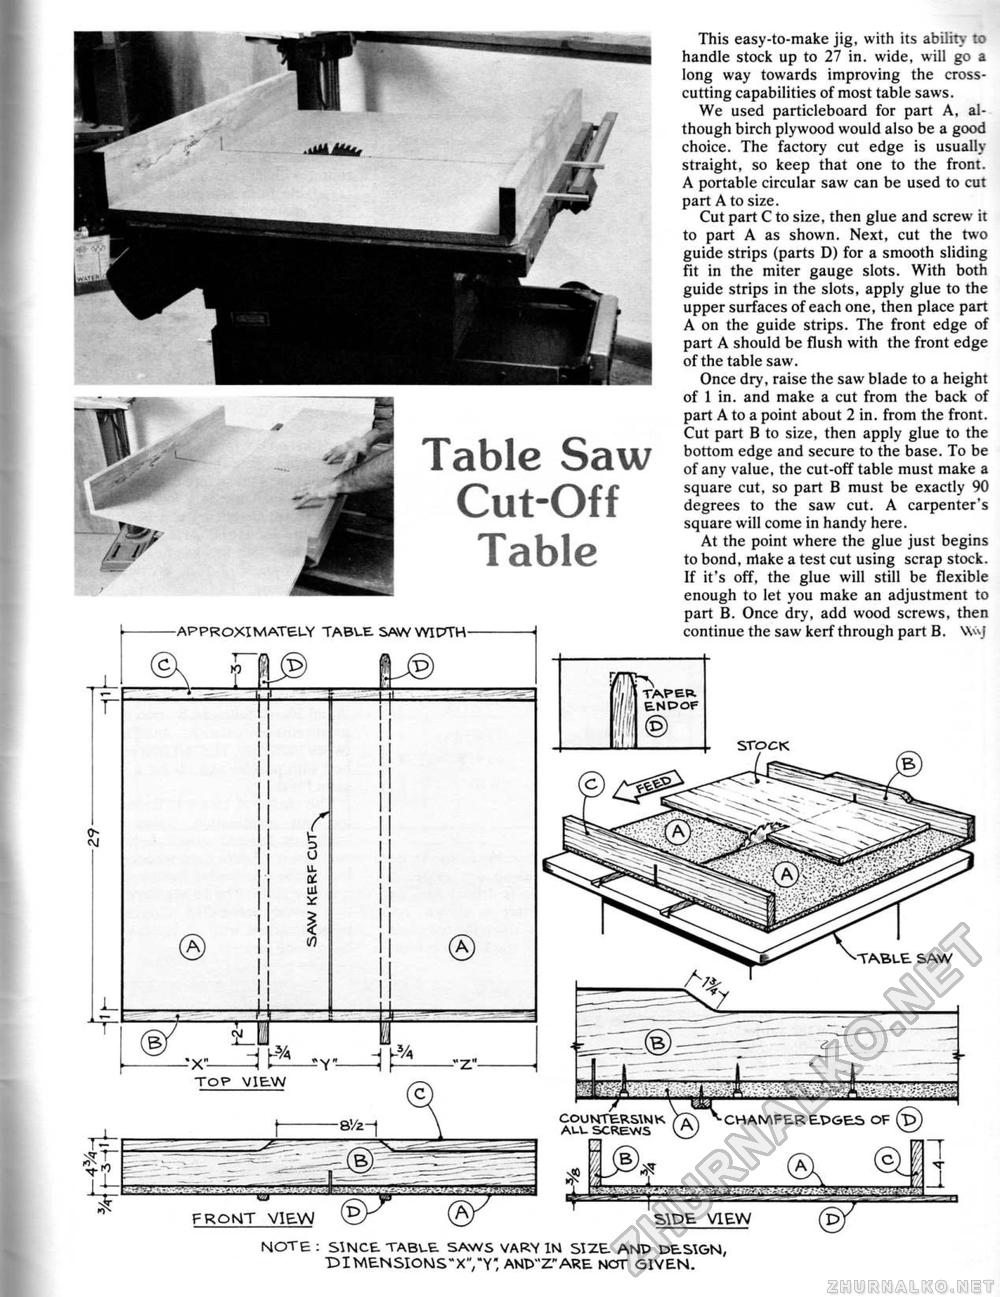
r Table Saw Cut-Off Tabic 0- N -APPROXIMATELY TABLE SAW W1PTH- 1 |j§) (jjj© / £ 0 u-Cl Ul ? tfl w N -X" TOP VIEW 4 ® This easy-to-make jig, with its ability to handle stock up to 27 in. wide, will go a long way towards improving the cross-cutting capabilities of most table saws. We used particleboard for part A, although birch plywood would also be a good choice. The factory cut edge is usually straight, so keep that one to the front. A portable circular saw can be used to cut part A to size. Cut part C to size, then glue and screw it to part A as shown. Next, cut the two guide strips (parts D) for a smooth sliding fit in the miter gauge slots. With both guide strips in the slots, apply glue to the upper surfaces of each one, then place part A on the guide strips. The front edge of part A should be flush with the front edge of the table saw. Once dry, raise the saw blade to a height of I in. and make a cut from the back of part A to a point about 2 in. from the front. Cut part B to size, then apply glue to the bottom edge and secure to the base. To be of any value, the cut-off table must make a square cut, so part B must be exactly 90 degrees to the saw cut. A carpenter's square will come in handy here. At the point where the glue just begins to bond, make a test cut using scrap stock. If it's off, the glue will still be flexible enough to let you make an adjustment to part B. Once dry, add wood screws, then continue the saw kerf through part B. Wvj
STOCK COUNTERSINK Aa%\ ALU SCREWS \[y CHAMFERtPGES OF ("D PROMT VIEW ©^.........w NOTE : SINCE TABLE SAWS VARY IN SIZE AND DESIGN, "DI "MENSIOWS" X","Y" AND" Z" ARE NOT GIVEN. |
||||||||||


