Woodworker's Journal 1984-8-4, страница 32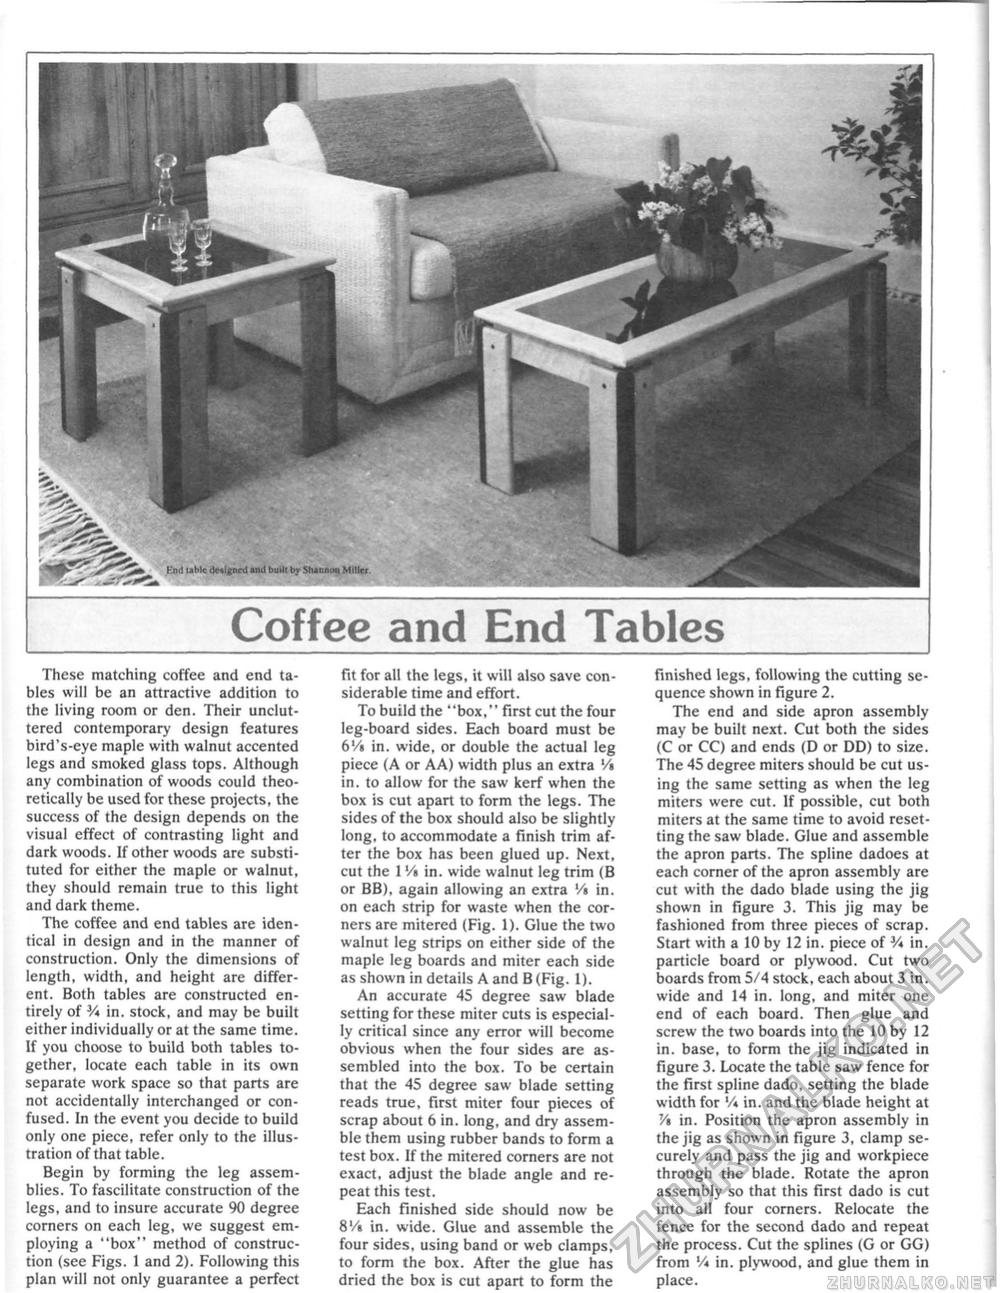
Coffee and End Tables These matching coffee and end tables will be an attractive addition to the living room or den. Their uncluttered contemporary design features bird's-eye maple with walnut accented legs and smoked glass tops. Although any combination of woods could theoretically be used for these projects, the success of the design depends on the visual effect of contrasting light and dark woods. If other woods are substituted for either the maple or walnut, they should remain true to this light and dark theme. The coffee and end tables are identical in design and in the manner of construction. Only the dimensions of length, width, and height are different. Both tables are constructed entirely of V* in. stock, and may be built either individually or at the same time. If you choose to build both tables together, locate each table in its own separate work space so that parts are not accidentally interchanged or confused. In the event you decide to build only one piece, refer only to the illustration of that table. Begin by forming the leg assemblies. To fascilitate construction of the legs, and to insure accurate 90 degree corners on each leg, we suggest employing a "box" method of construction (see Figs. 1 and 2). Following this plan will not only guarantee a perfect fit for alt the legs, it will also save considerable time and effort. To build the "box," first cut the four leg-board sides. Each board must be 6V* in. wide, or double the actual leg piece (A or AA) width plus an extra V% in. to allow for the saw kerf when the box is cut apart to form the legs. The sides of the box should also be slightly long, to accommodate a finish trim after the box has been glued up. Next, cut the 1 V» in, wide walnut leg trim (B or BB), again allowing an extra V% in, on each strip for waste when the corners are mitered (Fig. 1). Glue the two walnut leg strips on either side of the maple leg boards and miter each side as shown in details A and B (Fig. I). An accurate 45 degree saw blade setting for these miter cuts is especially critical since any error will become obvious when the four sides are assembled into the box. To be certain that the 45 degree saw blade setting reads true, first miter four pieces of scrap about 6 in. long, and dry assemble them using rubber bands to form a test box. If the mitered corners are not exact, adjust the blade angle and repeat this test. Each finished side should now be 8'/i in. wide. Glue and assemble the four sides, using band or web clamps, to form the box. After the glue has dried the box is cut apart to form the Finished legs, following the cutting sequence shown in figure 2. The end and side apron assembly may be built next. Cut both the sides (C or CC) and ends (D or DD) to size. The 45 degree miters should be cut using the same setting as when the leg miters were cut. If possible, cut both miters at the same time to avoid resetting the saw blade. Glue and assemble the apron parts. The spline dadoes at each corner of the apron assembly are cut with the dado blade using the jig shown in figure 3. This jig may be fashioned from three pieces of scrap. Start with a 10 by 12 in. piece of V* in. particle board or plywood. Cut two boards from 5/4 stock, each about 3 in. wide and 14 in. long, and miter one end of each board. Then glue and screw the two boards into the 10 by 12 in. base, to form the jig indicated in figure 3. Locate the table saw fence for the first spline dado, setting the blade width for '/* in. and the blade height at in. Position the apron assembly in the jig as shown in figure 3, clamp securely and pass the jig and workpiece through the blade. Rotate the apron assembly so that this first dado is cut into all four corners. Relocate the fence for the second dado and repeat the process. Cut the splines (G or GG) from V* in. plywood, and glue them in place. |


