Woodworker's Journal 1985-9-6, страница 48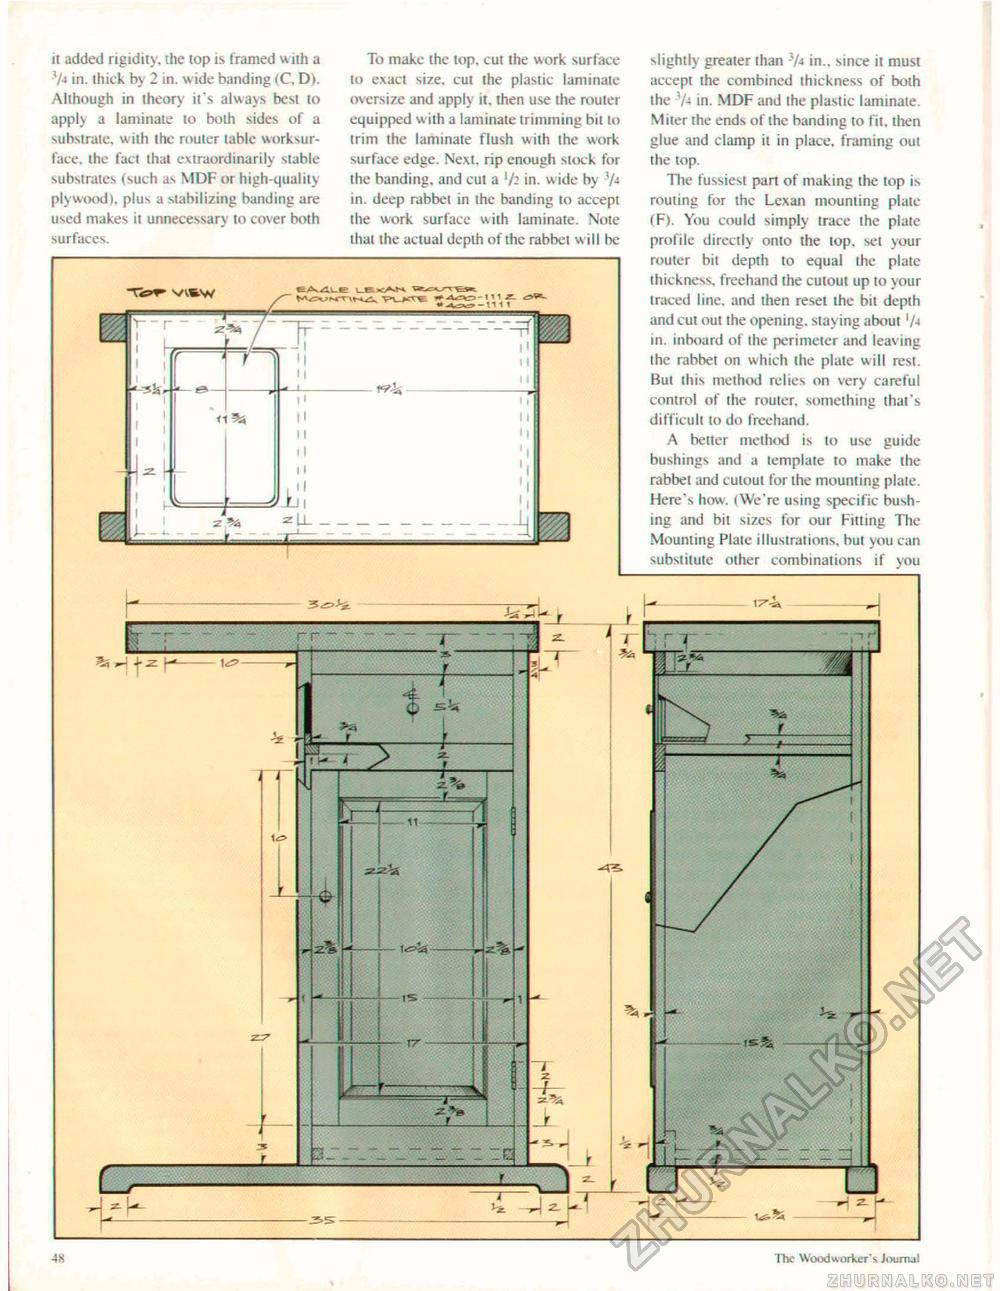
it added rigidity, the top is framed with a 3A in. thick by 2 in. w ide banding (C, D). Although in theory it's always best to apply a laminate to both sides of a substrate, with the router table worksur-face, the fact that extraordinarily stable substrates (such as MDF or high-quality plywood), plus a stabilizing banding are used makes it unnecessary' to cover both surfaces. To make the top, cut the work surface to exact size, cut the plastic laminate oversize and apply it, then use the router equipped with a laminate trimming bit lo trim the laminate flush with the work surface edge. Nexi, rip enough stock for the banding, and cut a '/i in. wide by 3A in. deep rabbel in ihe banding lo accept the work surface with laminate. Note that ihe actual depth of the rabbet will be EAAli slightly greater than 3A in., since it must accept the combined thickness of both the 3A in. MDF and ihe plastic laminate. Miter the ends of the banding to fit, then glue and clamp it in place, framing out the top. Tlie fussiest part of making the top is routing for the Lexan mounting plale (F). You could simply trace the plale profile directly onto the top. sel your router bit depth to equal the plale thickness, freehand the cutoul up io your traced line, and then reset the bit depth and cut out the opening, staying about 'A in. inboard of the perimeter and leaving the rabbet on which the plate will rest. Bui this method relies on very careful control of the router, something that's difficult to do freehand. A belter method is to use guide bushings and a template to make the rabbel and cutout for the mounting plate. Here's how. (We're using specific bushing and bit sizes for our Filling The Mourning Plale illuslrat ions, but you can substitute other combinations if you h •4K The Woodworker'?. Journal |


