Woodworker's Journal 1985-9-6, страница 52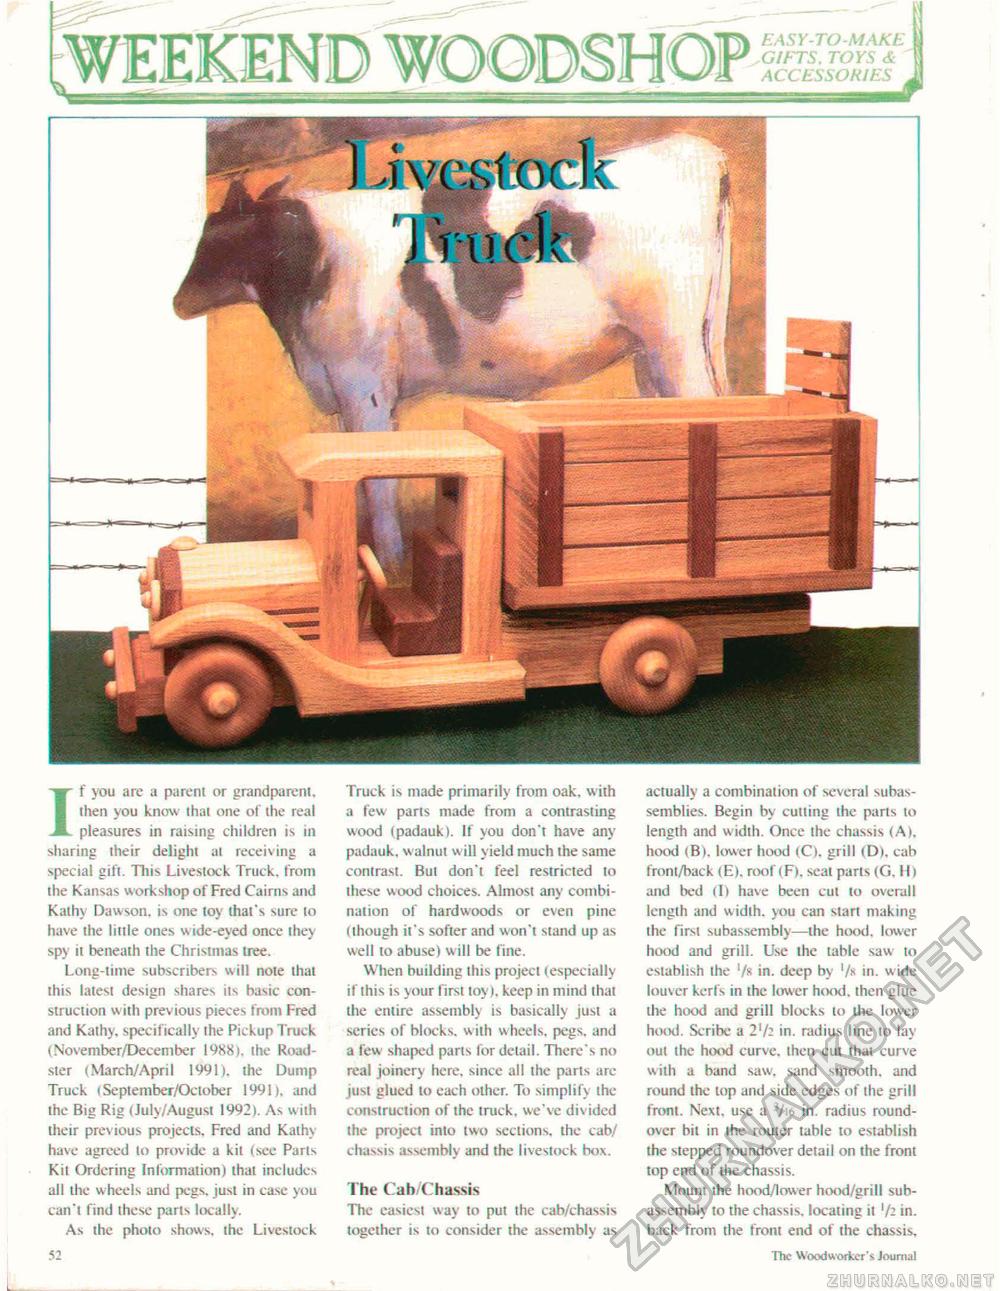
^WEEKEND WOODSHOP If Hi If you arc a parent or grandparent, ihen you know thai one of the real pleasures in raising children is in sharing their delight at receiving a special gift. This Livestock Truck, from the Kansas workshop of Fred Cairns and Kathy Dawson, is one toy that's sure to have the little ones wide-eyed once they spy it beneath the Christmas tree. Long-time subscribers will note that this latest design shares us basic construction with previous pieces from Fred and Kathy. specifically the Pickup Truck (November/December 1988). the Roadster (March/April 1991). the Dump Truck ( September/October 1991). and the Big Rig (July/August 1992). As with their previous projects. Fred and Kathy have agreed lo provide a kit (see Parts Kit Ordering Information) that includes all the wheels and pegs, jusl in case you can't find these parts locally. As the photo shows, the Livestock 52 i____________.... . . Truck is made primarily from oak, with a few parts made from a contrasting wood (padauk). If you don't have any padauk, w alnut will yield much the same contrast. But don't feel restricted lo these wood choices. Almost any combination of hardwoods or even pine (though it's softer and won't stand up as well to abuse) will be fine. When building this project (especially if (his is your first toy), keep in mind (hat the entire assembly is basically just a series of blocks, w ith wheels, pegs, and a few shaped parts for detail. There's no real joinery here, since all the parts are jusl glued lo each other. Tt) simplify the construction of the truck, we've divided the project into two sections, the cab/ chassis assembly and the livestock box. The Cab/Chassis The easiest way to put the cab/chassis together is to consider the assembly as actually a combination of several subassemblies. Begin by cutting the parts to length and width. Once the chassis (A), hood (Bi. lower hood (C). grill (D), cab front/back (E), roof (F), seat parts (G, 11) and bed (I) have been cut lo overall length and width, you can start making the first subassembly—the hood, lower hood and grill. Use the table saw to establish the '/s in. deep by in. wide louver kerfs in the lower hood, then glue die hood and grill blocks to ihe lower hood. Scribe a 2'/^ in. radius line to lay out the hood curve, then cut that curve with a band saw. sand smooth, and round the Lop and side edges of the grill front. Next, use a Vie in. radius round-over bit in the router table to establish the stepped roundover detail on the front top end of the chassis. Mount the hood/lower hood/grill subassembly to the chassis, locating it '/: in. back from the front end of the chassis. The Woodworker's Journal |


