Woodworker's Journal 1993-17-1, страница 49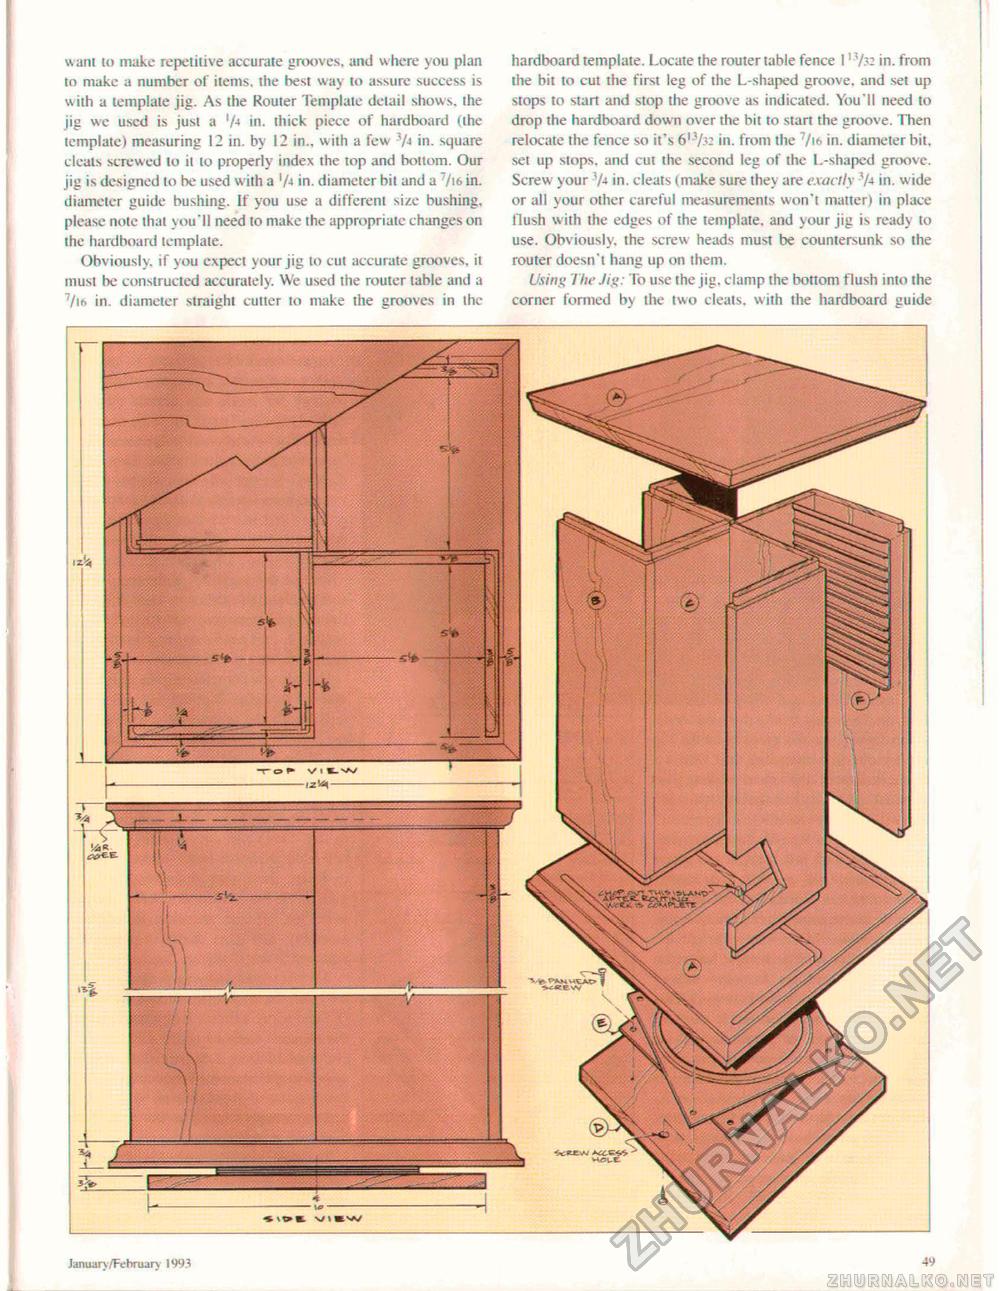
wani to make repetitive accurate grooves, and where you plan to make a number oi items, the best way to assure success is with a template jig. As the Router Template detail shows, the jig we used is just a 'A in. thick piece of hardboard uhe template) measuring 12 in. by 12 in., with a few 3A in. square cleats screwed to it to properly index the top and bottom. Our jig is designed lo be used with a 'A in. diameter bit and a 7/i6 in. diameter guide bushing. If you use a different size bushing, please note lhat you'll need to make the appropriate changes on the hardboard template. Obviously, if you expect your jig to cut accurate grooves, it must be constructed accurately. We used the router table and a 7/t6 in. diameter straight cutter lo make the grooves in the hardboard template. Locate the router table fence 11 V?2 in. from the bit to cut the first leg of the L-shaped groove, and set up stops to start and stop the groove as indicated. You'll need to drop the hardboard down over the bit to start the groove. Then relocate the fence so it's 6i3/j: in. from the :/i6 in. diameter bit. set up stops, and cut the second leg of Ihe L-shaped groove. Screw your 'A in. cleats (make sure they are exactly 'A in. w ide or all your other careful measurements won't matter) in place flush with the edges of the template, and your jig is ready to use. Obviously, the screw heads must be countersunk so the router doesn't hang up on them. Using The Jig: To use the jig. clamp the bottom flush into the corner formed by the two cleats, with the hardboard guide January/February llW Pico if circle No. JO on the Reader Service Card. 7 |


