Woodworker's Journal 1993-17-1, страница 54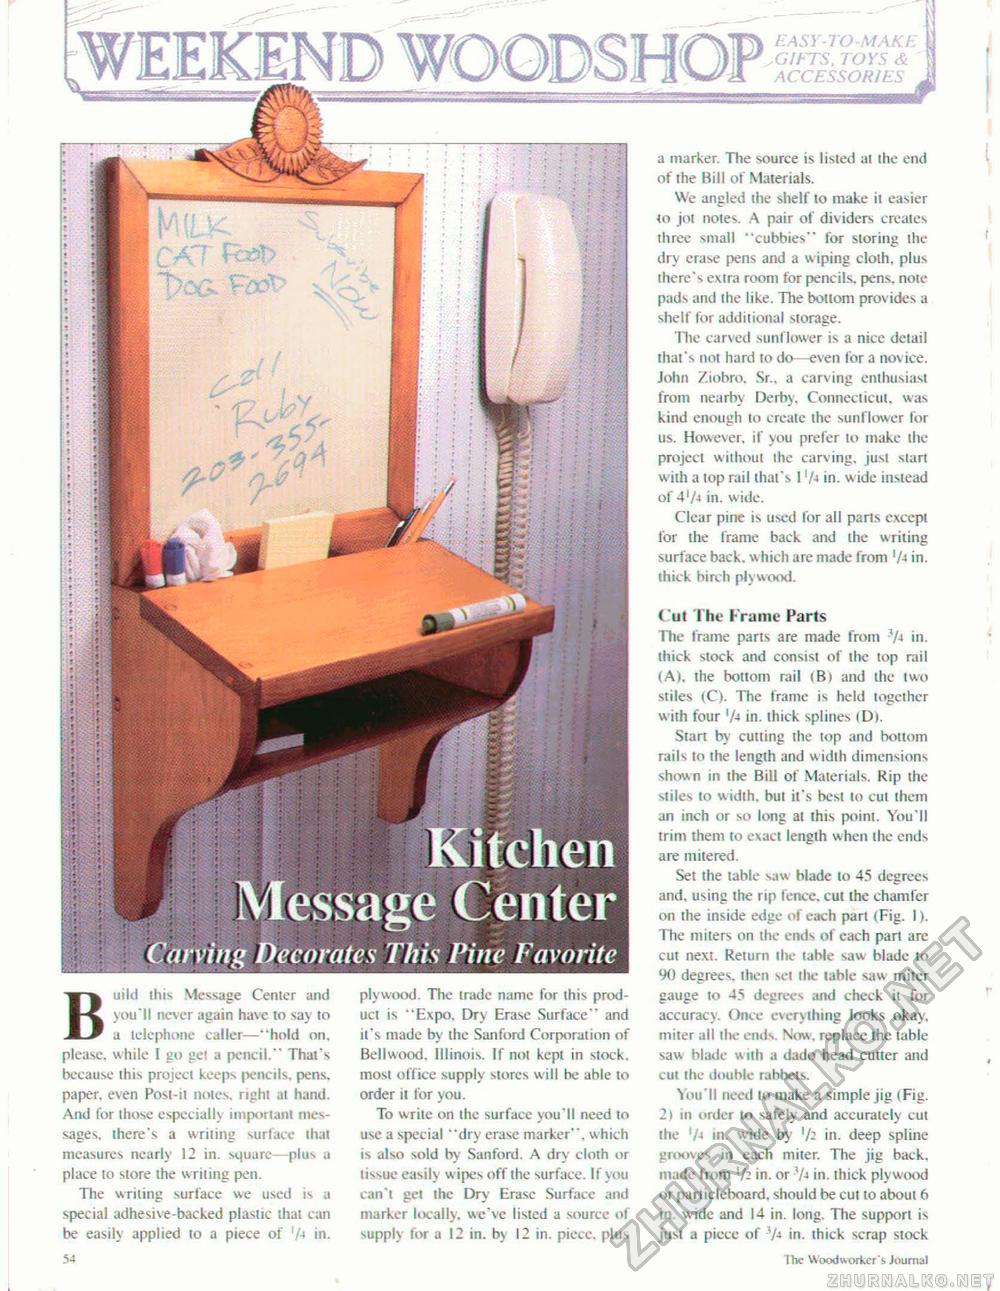
Message Center Carving Decorates This Pine Favorite Build this Message Center and you'll never again have to say lo a telephone caller—"hold on, please, while 1 go gel a pencil." That's because this project keeps pencils, pens, paper, even Post-ii notes, right at hand. And for those especially important messages. there's a writing surface I hat measures nearly 12 in. square—plus a place to store the writing pen. The writing surface we used is a special adhesive-backed plastic that can be easily applied to a piece of 'A in. 54 plywood. The trade name for this product is "Expo. Dry Erase Surface" and it's made by the Sanford Corporation of Bellwood. Illinois. I! not kept in stock, most office supply stores will be able to order it for you. To write on the surface you'll need to use a special "dry erase marker", which is also sold by Sanford. A dry cloth or tissue easily w ipes off the surface. If you can't gel the Dry Erase Surface and marker locally, we've listed a source of supply for a 12 in. by 12 in. piece, plus EASY-TO-MAKt .GIFTS, TOYS & ACCESSORIES a marker. The source is listed at the end of the Bill of Materials. We angled the shelf to make il easier to jot notes. A pair of dividers creates three small "cubbies" for storing the dry erase pens and a wiping cloth, plus there's extra room for pencils, pens, note pads and ihe like. The bottom provides a shelf for additional storage. The carved sunflower is a nice detail that's not hard to do—even for a novice, John Ziobro. Sr., a carving enthusiast from nearby Derby, Connecticut, was kind enough to create the sunflower for us. However, if you prefer to make the project without the carving, just start with a top rail that's I 'A in. wide instead of 4'A in. wide. Clear pine is used for all parts except for the frame back and the writing surface back, w hich are made from 'A in. thick birch plywood. ('ut The I ramc Farts The frame parts are made from 'A in. thick stock and consist of ihe top rail (A), the bottom rail <B) and the two stiles (C). The frame is held together with four !A in. thick splines (D). Start by cutting the top and bonom rails to the length and width dimensions shown in the Bill of Materials. Rip the stiles to width, but it's best to cut them an inch or so long at this point. You'll trim them to exact length when the ends are milered. Set the table saw blade lo 45 degrees and, using the rip fence, cul the chamfer on ihe inside edge of each part (Fig. 1>. The miters on the ends of each part are cut next. Return ihe table saw blade to 90 degrees, then set the table saw miter gauge to 4.S degrees and check il for accuracy. Once everything looks okay, miter all the ends. Now, replace the table saw blade w uh a dado head cutter and cut the double rabbets. You'll need to make a simple jig (Fig. 2i in order to safely and accurately cut the 'A m. wide by in. deep spline grooves in each miter. The jig back, made from in. or 7-t in. thick plywood or particleboard. should be cut to about 6 in. wide and 14 in. long. The support is just a picce of 3A in. thick scrap stock The Woodworker s Journal |


