Woodworker's Journal 1993-17-1, страница 63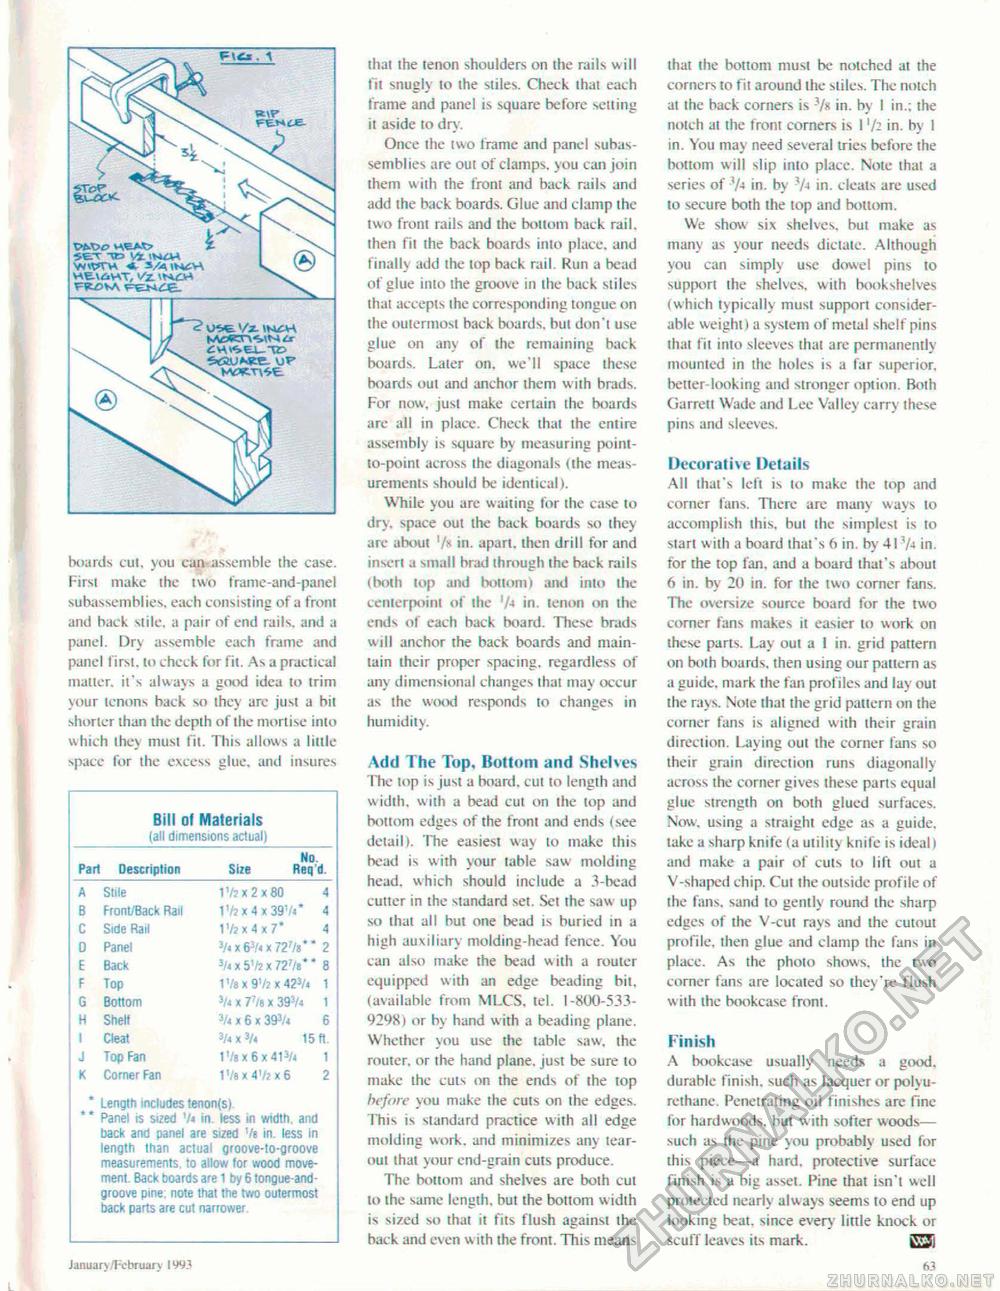
thai the tenon shoulders on the rails will fit snugly to the stiles. Cheek that each frame and panel is square before setting it aside to dry. Once the two frame and panel subassemblies are out of clamps, you can join them with Ihe front and back rails and add the back boards. Glue and clamp the two from rails and the bottom back rail, then fit ihe back boards into place, and finally add the top back rail. Run a bead of glue into the groove in the back stiles lhat accepts the corresponding tongue on the outermost back boards, but don't use glue on any of the remaining back boards. Later on. we'll space these boards oul and anchor them w ith brads. For now, jusl make certain the boards are all in place. Check that the entire assembly is square by measuring point-to-point across the diagonals (the measurements should be identical). While you arc wailing for the case lo dry. space oul the back boards so they are about '/* in. apart, then drill for and insert a small brad ihrough the back rails (both lop and botlom) and into the centerpoint of the 'A in. lenon on the ends of each back board. These brads will anchor the back boards and maintain their proper spacing, regardless of any dimensional changes thai may occur as the wood responds to changes in humidity. Add The Top, Bottom and Shelves The lop is just a board, cut to length and w idth, with a bead cut on Ihe lop and botiom edges of the front and ends (see detail i. The easiest was to make this bead is with your table saw molding head, which should include a 3-bead cutter in the standard set. Set the saw up so that ail but one bead is buried in a high auxiliary molding-head fence. You can also make the bead with a router equipped with an edge beading bit, (available from V1LCS. tel. 1-800-5339248) or by hand with a beading plane. Wheiher you use the table saw, the router, or the hand plane, just be sure to make the cuts on the ends of the top before you make the cuts on the edges. This is standard practice with all edge molding work, and minimizes any tear-oul that your end-grain cuts produce. The bottom and shelves are both cul lo ihe same length, but the bottom width is sized so thai it fits flush against the hack and even with the front. This means January/February 1993 L boards cul. you can-assemble the case. First make the two frame-and-panel subassemblies, each consisting of a front and back stile, a pair of end rails, and a panel. Dry assemble each frame and panel first, to check for fit. As a practical matter, it's always a good idea to trim vour tenons back so they arc just a bit shorter than the depth of Ihe mortise into which lhe\ must fii This allows a little space for the excess glue, and insures Sill of Materials (all dimensions actual) Part Description Size No Fteq d A Stile B Front/Back Rail C Side Rail 0 Panel Back Top Bottom H Shelf Cleat Top Fan Corner Fan 1V2 x 2 x 80 4 IV2X4X39V 4 1 Vi x 4 x 7* 4 3/<x63/«x72'It" 2 3I» x 5'ft x 72r/t* * 8 t V» x 91/2 x 423/« 1 !/< x Vn * 393/4 1 Vt * 6 * 393/4 6 '/ot'/i 15 ft. iVa x 6 x 413/< 1 t'/s x 4'/z x 6 2 Length includes tenon{s). Panel is sized V< in. less in width, and back and panel are sized Vs in. less in length than actual groove-to-groove measurements, to allow for wood movement. Back boards are 1 by 6 tongue-and-groove pine: note that the two outermost back parts are cut narrower that the bottom must be notched at the corners to fit around the stiles. The notch at the back corners is Vs in. by I in.; the notch at the front corners is 1 '/2 in. by I in. You may need several tries before the bottom will slip into place. Note lhal a series of 7-t in. by 'A in. cleats are used to secure both the top and bottom. We show six shelves, but make as many as your needs dictate. Although you can simply use dowel pins to support the shelves, with bookshelves (which typically must support considerable weight) a system of metal shelf pins that fit into sleeves that are permanently mounted in the holes is a far superior, better-looking and stronger option. Both Garret! Wade and Lee Valley carry these pins and sleeves. Decorative Details All that's left is to make the top and corner fans. There are many ways to accomplish this, bul the simplest is to start with a board that's 6 in. by 41 'A in. for the top fan. and a board that's about 6 in. by 20 in. for the two corner fans. The oversize source board for the two corner fans makes it easier to work on these parts. Lay oul a 1 in. grid pattern on both boards, then using our pattern as a guide, mark the fan profiles and lav out the rays. Note that ihe grid pattern on the corner fans is aligned with their grain direction. Laying oul the corner fans so their grain direction runs diagonally across the corner gives these parts equal glue strength on both glued surfaces. Now. using a straight edge as a guide, take a sharp knife (a utility knife is ideal) and make a pair of culs lo lift oul a V-shaped chip. Cut the outside profile of the fans, sand to gently round ihe sharp edges of the V-cut rays and the cutout profile, then glue and clamp the fans in place. As the phoio shows, the two corner fans are located so thev re flush w ith the bookcase front. Finish A bookcase usually needs a good, durable finish, such as lacquer or polyu-rethane. Penetrating oil finishes are fine for hardwoods, but with softer woods— such as the pine you probably used for this piece—a hard, protective surface finish is a big asset. Pine that isn't well protected nearly always seems to end up looking beat, since every little knock or scuff leaves its mark. EJj 63 |


