Woodworker's Journal 1993-17-1, страница 65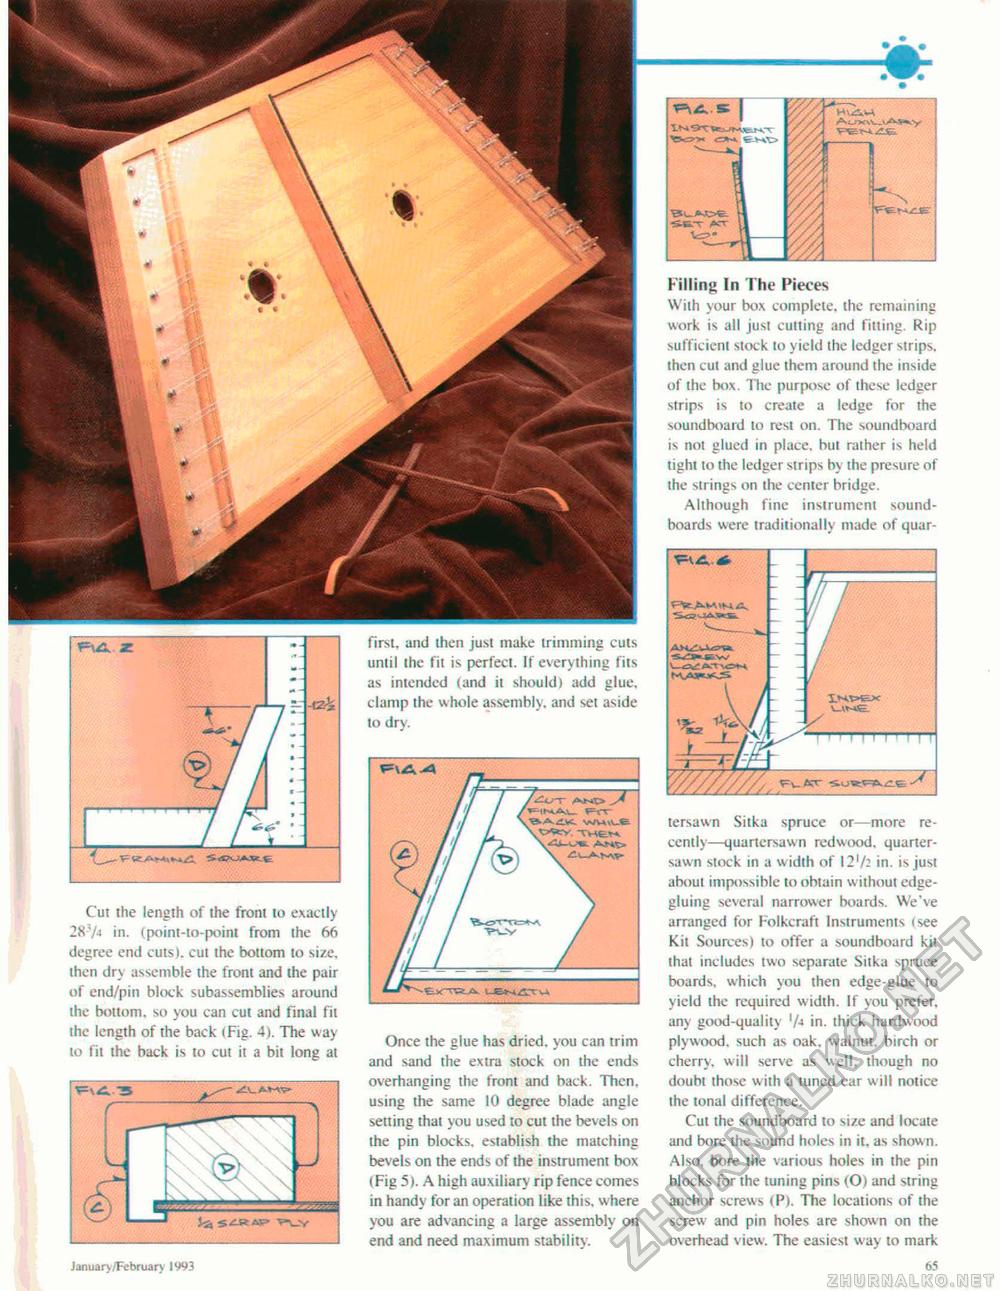
Filling In The Pieces Wiih your box complete, the remaining work is all just cutting and fitting Rip sufficient stock to yield the ledger strips, then cut and glue them around the inside of the box. The purpose of these ledger strips is to create a ledge for the soundboard to rest on. The soundboard is not glued in place, but rather is held tight to the ledger strips by the presure of the strings on the center bridge. Although fine instrument soundboards were traditionally made of quar- tersawn Sitka spruce or—more recently—quartcrsawn redwood, quarter-sawn stock in a w idth of 121/: in. is just about impossible to obtain w ithout edge-gluing several narrower boards. We've arranged for Folkcraft Instruments (see Kit Sources) to offer a soundboard kit that includes two separate Sitka spruce boards, which you then edge-glue to yield the required width. If you prefer, any good-quality '/■+ in. thick hardwood plywood, such as oak. walnut, birch or cherry, will serve as well, though no doubt those with a tuned car will notice the tonal difference. Cut the soundboard to size and locate and bore the sound holes in it. as show n. Also, bore the various holes in the pin blocks for the tuning pins (O) and string anchor screws (P). The locations of the screw and pin holes are shown on the overhead view. The easiest way to mark 65 Cut the length of the front to exactly 28-74 in. (point-to-point from the 66 degree end cuts), cut the bottom to size, then dry assemble the front and the pair of end/pin block subassemblies around the bottom, so you can cut and final fit the length of the back (Fig. 4). The w ay to fit the back is to cut it a bit long at January /February JW3 first, and then just make trimming cuts until the fit is perfect. If everything fits as intended (and it should) add glue, clamp the whole assembly, and set aside to dry. Once the glue has dried, you can trim and sand the extra stock on the ends overhanging the front and back. Then, using the same 10 degree blade angle setting that you used to cut the bevels on the pin blocks, establish the matching bevels on the ends of the instrument box (Fig 5). A high auxiliary rip fence comes in handy for an operation like this, where you are advancing a large assembly on end and need maximum stability. Fv. UWE --l-f |


