Woodworker's Journal 1993-17-5, страница 29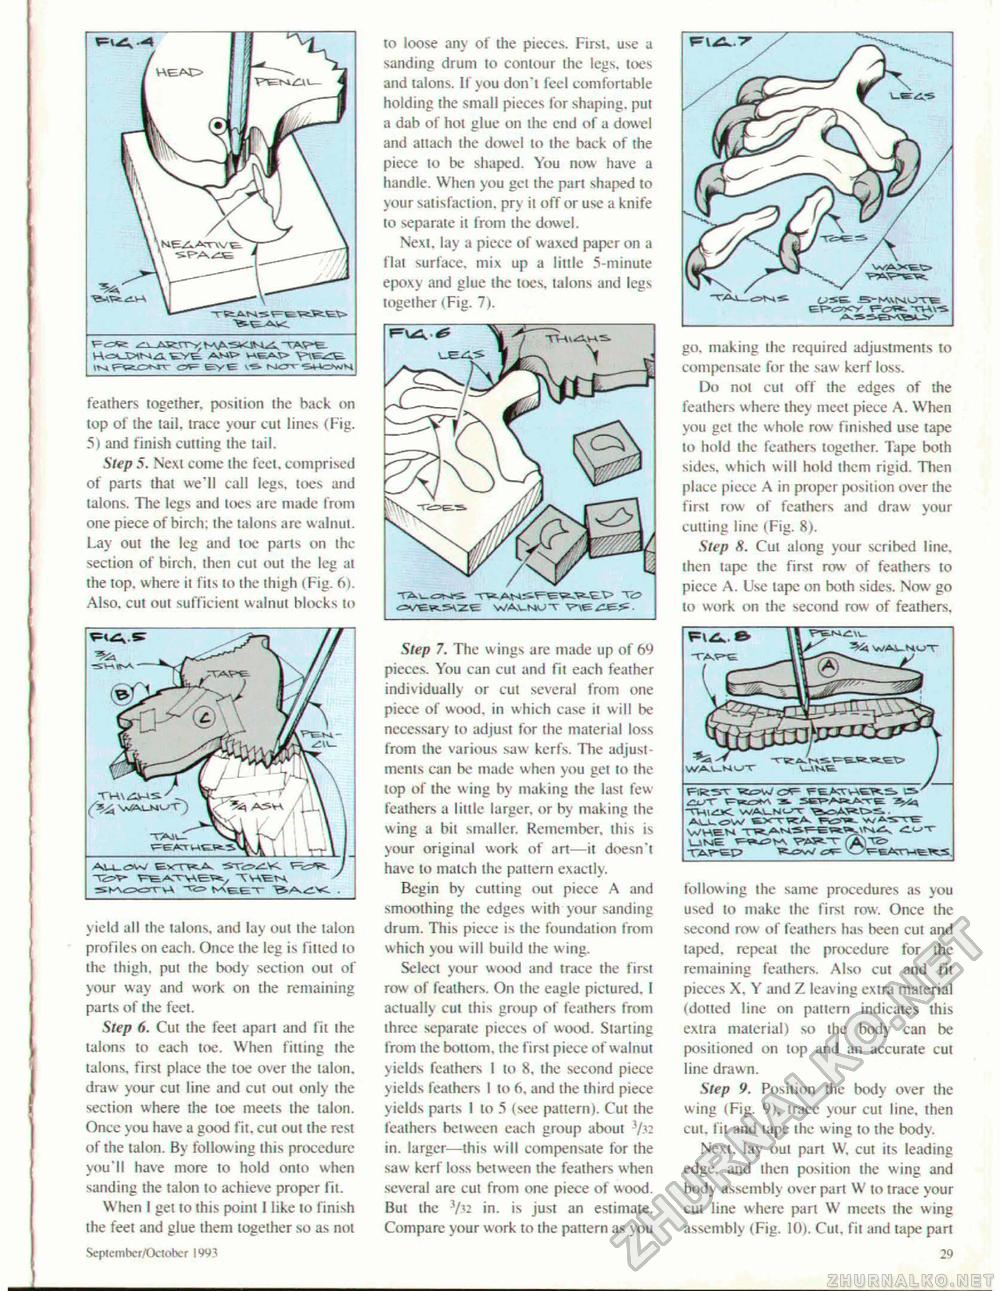
iufkcmt eve MOT leathers together, position the hack on top of the tail, trace your cut lines (Fig. 5) and finish cutting the tail. Step 5. Next come the feet, comprised of parts that we'll call legs, loes and talons. The legs and toes are made from one piece of birch: the talons are walnut. Lay out the leg and toe parts on the section of birch, then cut out the leg ai the lop. where il fits to the ihigh (Fig. 6). Also, cut out sufficient walnut blinks to to loose any of the pieces. First, use a sanding drum to contour the legs, toes and talons. If you don't feel comfortable holding the small pieces for shaping, put a dab of hot glue on the end of a dowel and attach the dowel to ihe back of the piece lo be shaped. You now have a handle. When you get the part shaped to your satisfaction, prv it off or use a knife to separate il from the dowel. Next, lay a piece of waxed paper on a flat surface, mix up a little 5-minute epoxy and glue ihe Iocs, talons and legs togeiher (Fig. 7). go, making the required adjustments to compensate for the saw kerf loss. Do not cui off the edges of the feathers where they meet piece A. When you get the whole row finished use tape to hold the feathers together. Tape both sides, which will hold them rigid. Then place piece A in proper position over the first row of feathers and draw your cutting line (Fig. 8). Step S. Cut along your scribed line, then tape the first row of feathers to piece A. Use tape on both sides. Now go lo work on the second row of feathers. yield all the talons, and lay oui the talon profiles on each. Once the leg is fitted to the ihigh. put the body section oul of your way and work on the remaining parts of (he feet. Step 6. Cut Ihe feet apart and fit the talons to each toe. When fitting the talons, first place ihe toe over the talon, draw your cut line and cut out only the section where the toe meets the lalon. Once you have a good fit. cut out the rest of the talon. By follow ing this procedure you'll have more to hold onto when sanding the talon lo achieve proper fit. When I gel lo this poini I like to finish the feet and glue them together so as not Sepfembcr/Oetohcr 1993 Step 7. The wings are made up of 69 pieces. You can cut and fit each feather individually or cut several from one piece of wood, in which case it wilt be necessary to adjust for the material loss from the various saw kerfs. Ihe adjustments can be made when you gel to the top of the w ing by making the last few feathers a little larger, or by making ihe wing a bil smaller. Remember, this is your original work of art—it doesn't have to match ihe pattern exactly. Begin by cutting out piece A and smtxuhing ihe edges with your sanding drum. This piece is the foundation from which you will build the wing. Selecl your wtxid and trace ihe first row of feathers. On the eagle pictured. I actually cui this group of feathers from three separate pieces of wood. Starting from the bottom, ihe first piece of walnut yields feathers 1 to 8, ihe second piece yields feathers 1 to 6. and the third piece yields parts I to 5 (see pattern). Cut the feathers between each group aboul V-i-in. larger—this will compensate for the saw kerf loss between the feaihers when several arc cut from one piece of wood. Bui the i/n in. is just an estimate. Compare your work to the pattern as you following ihe same procedures as you used to make the first row. Once the second row of feathers has been cui and taped, repeat ihe procedure for ihe remaining feaihers. Also cut and fil pieces X. Y and Z leaving extra material (dotted line on pallern indicates this extra material) so ihe body can be positioned on lop and an accurate cui line drawn. Step 9. Position the body over the wing (Fig. 9), trace your cut line, then cui. fil and tape the wing to the body. Nexi. lay out part W, cui its leading edge, and then position the wing and body assembly over part W to trace your cut line where part W meets the wing assembly (Fig. 10). Cut. fil and tape part 29 oveyt-^ze WA1.WT -r/OFT! |


