Woodworker's Journal 1993-17-5, страница 27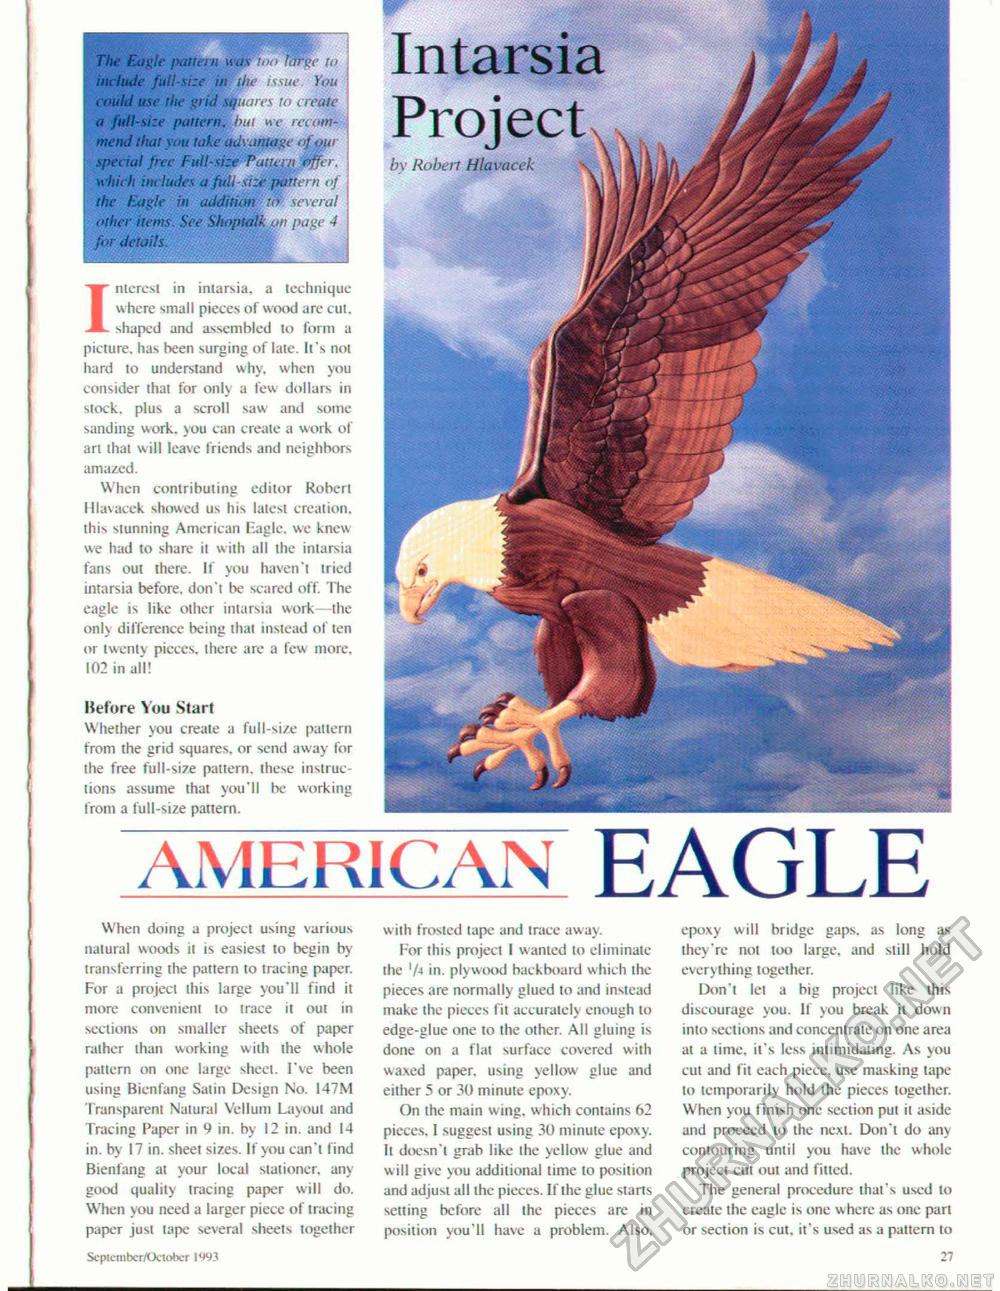
Tin1 Eagle pattern ii tM^^^pfr to include full-size infthe issue. You could use rh<1 grid smtares to create a full-size pattern.wut »'f recommend that yen take advatuage of pur special free Full-size PasieraWfer. \ which includes a ftdl-sizt pattern of the Eagle in addition to several other items. See Shoptdlk on page 4 for details. Interest in intarsia. a technique where small pieces of wood are cut. shaped and assembled to form a picture, has been surging of late. It's not hard to understand why, when you consider that for only a lew dollars in stock, plus a scroll saw and some sanding work, you can create a work of art that will leave friends and neighbors amazed. When contributing editor Robert lllavacck shewed us his latest creation, this stunning American Eagle, we knew we had to share it with all the intarsia fans out there. If you haven't tried intarsia before, don't be scared off. The eagle is like other intarsia work—the only difference being that instead of ten or twenty pieces, there are a few more. 102 in all! Before You Start Whether you create a full-size pattern from the grid squares, or send away for the free full-size pattern, these instructions assume that you'll be working from a full-size pattern. AMERICAN EAGLE When doing a project using various natural woods it is easiest to begin by transferring the pattern to tracing paper. For a project this large you'll find it more convenient to trace it out in sections on smaller sheets of paper rather than working with the whole pattern on one large sheet. I've been using Bicnfang Satin Design No. 147M Transparent Natural Vellum Layout and Tracing Paper in 9 in. by 12 in. and 14 in. by 17 in. sheet sizes. If you can't find Bienfang at your local stationer, any good quality tracing paper will do. When you need a larger piece of tracing paper just tape several sheets together Scpicmber/Ociobcr IW with frosted tape and trace awav. For this project I wanted to eliminate the 'A in, plywood backboard which the pieces are normally glued to and instead make the pieces fit accurately enough to edge-glue one to the other. All gluing is done on a flat surface covered with waxed paper, using yellow glue and either 5 or 30 minute epoxy. On the main wing, which contains 62 pieces. I suggest using 30 minute epoxy. It doesn't grab like the yellow glue and will give you additional lime to position and adjust all the pieces. If the glue starts setting before all the pieces are in position you'll have a problem. Also, epoxy will bridge gaps, as long as they're not too large, and still hold everything together. Don't let a big project like this discourage you. If you break it down into sections and concentrate on one area at a time, it's less intimidating. As you cut and fit each piece, use masking tape to temporarily hold the pieces together. When you finish one section put it aside and proceed to the next. Don't do any contouring until you have the whole project cut out and fitted. The general procedure that's used to create the eagle is one w here as one part or section is cut, it's used as a pattern to 27 Intarsia Project by Robert Hlavacek |


