Woodworker's Journal 1994-18-6, страница 74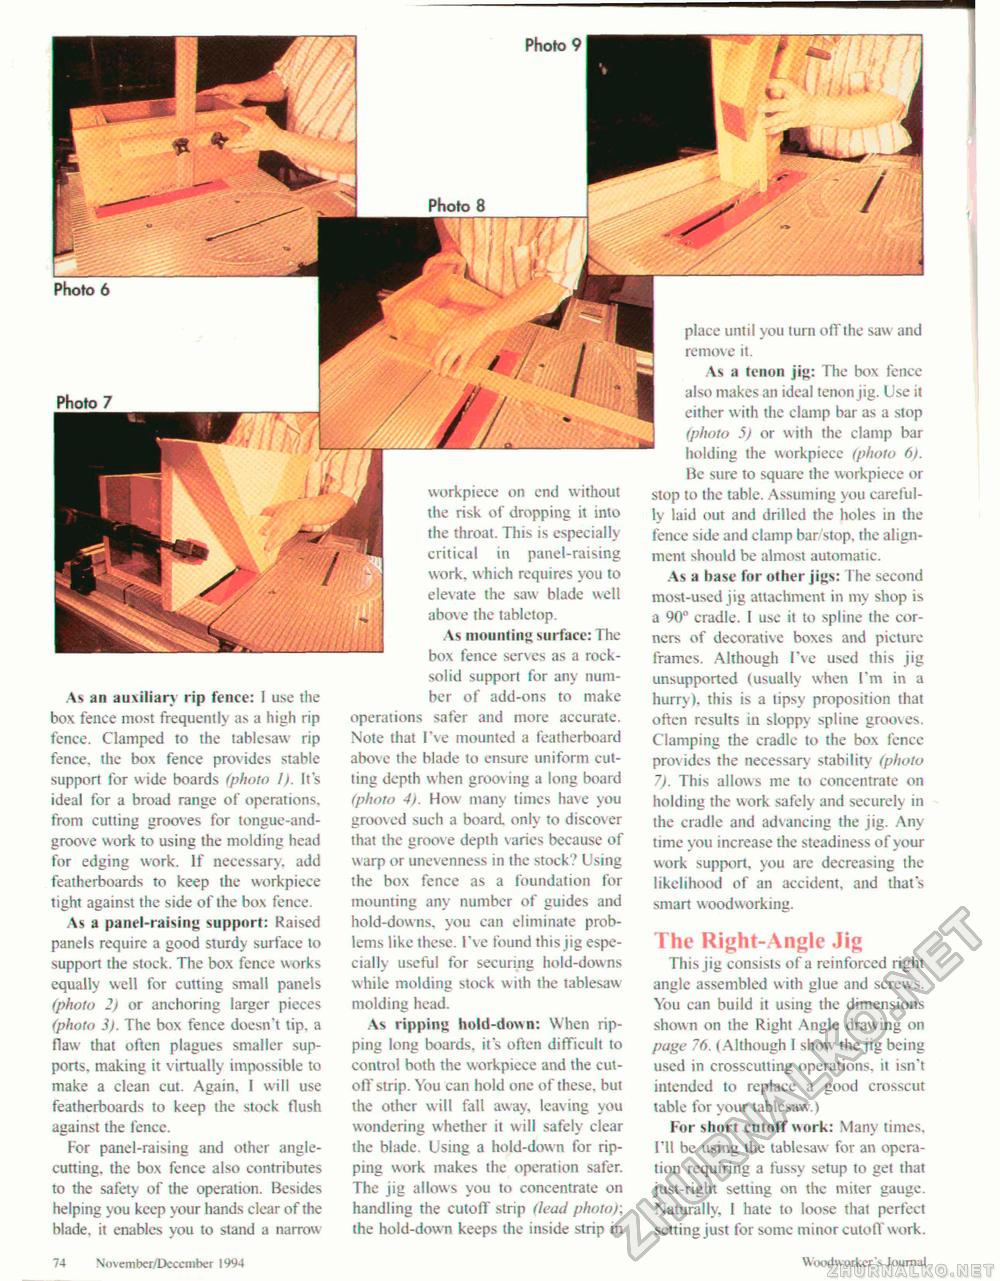
As an auxiliary rip fence: I use the box fence most frequently as a high rip fence. Clamped to the tablesaw rip fence, the box fence provides stable support for wide boards (photo I). It's ideal for a broad range of operations, from cutting grooves for tongue-and-groove work to using the molding head for edging work. If necessary, add featherboards to keep the workpiece tight against the side of the box fence. As a panel-raising support: Raised panels require a good sturdy surface to support the stock. The box fcnce works equally well for cutting small panels (photo 2) or anchoring larger pieces (photo 3). The box fence doesn't tip. a flaw that often plagues smaller supports. making it virtually impossible to make a clean cut. Again, I will use featherboards to keep the stock flush against the fence. For panel-raising and other angle-cutting. the box fcnce also contributes to the safety of the operation. Besides helping you keep your hands clear of the blade, it enables vou to stand a narrow workpiece on end without the risk of dropping it into the throat. This is especially critical in panel-raising work, which requires you to elevate the saw blade well above the tabletop. As mounting surface: The box fence serves as a rock-solid support for any number of add-ons to make operations safer and more accurate. Note that I've mounted a featherboard above the blade to ensure uniform cutting depth when grooving a long board (photo 4). How many times have you grooved such a board only to discover that the groove depth varies because of warp or uncvenness in the stock? Using the box fence as a foundation for mounting any number of guides and hold-downs, you can eliminate problems like these. I've found this jig especially useful for securing hold-downs while molding stock with the tablesaw molding head. As ripping hold-down: When ripping long boards, it's often difficult to control both the workpiece and the cut-otY strip. You can hold one of these, but the other will fall away, leaving you wondering whether it will safely clear the blade. Using a hold-down for ripping work makes the operation safer. The jig allows you to concentrate on handling the cutoff strip (lead photo); the hold-down keeps the inside strip in place until you turn off the saw and remove it. As a tenon jig: The box fencc also makes an ideal tenon jig. Use it either with the clamp bar as a stop (photo 5) or with the clamp bar holding the workpiece (photo 6). Be sure to square the workpiece or stop to the table. Assuming you carefully laid out and drilled the holes in the fence side and clamp bar stop, the alignment should be almost automatic. As a base for other jigs: The second most-used jig attachment in my shop is a 90" cradle. I use it to spline the corners of decorative boxes and picture frames. Although I've used this jig unsupported (usually when I'm in a hurry), this is a tipsy proposition that often results in sloppy spline grooves. Clamping the cradic to the box fence prov ides the necessary stability (photo 7). This allows me to concentrate on holding the work safely and securely in the cradle and advancing the jig. Any time you increase the steadiness of your work support, you are decreasing the likelihood of an accident, and that's smart woodworking. The Right-Angle Jig This jig consists of a reinforced right angle assembled with glue and screws. You can build it using the dimensions shown on the Right Angle drawing on page 76. (Although 1 show the jig being used in crosscutting operations, it isn't intended to replace a good crosscut table for your tablesaw.) For short cutoff work: Many times, I'll be using the tablesaw for an operation requiring a fussy setup to gel that just-right setting on the miter gauge. Naturally, 1 hate to loose that perfect setting just for some minor cutoff work. 74 November/Deccmber 1994 Woodworker's Journal |


