Woodworker's Journal 2001-25-1, страница 47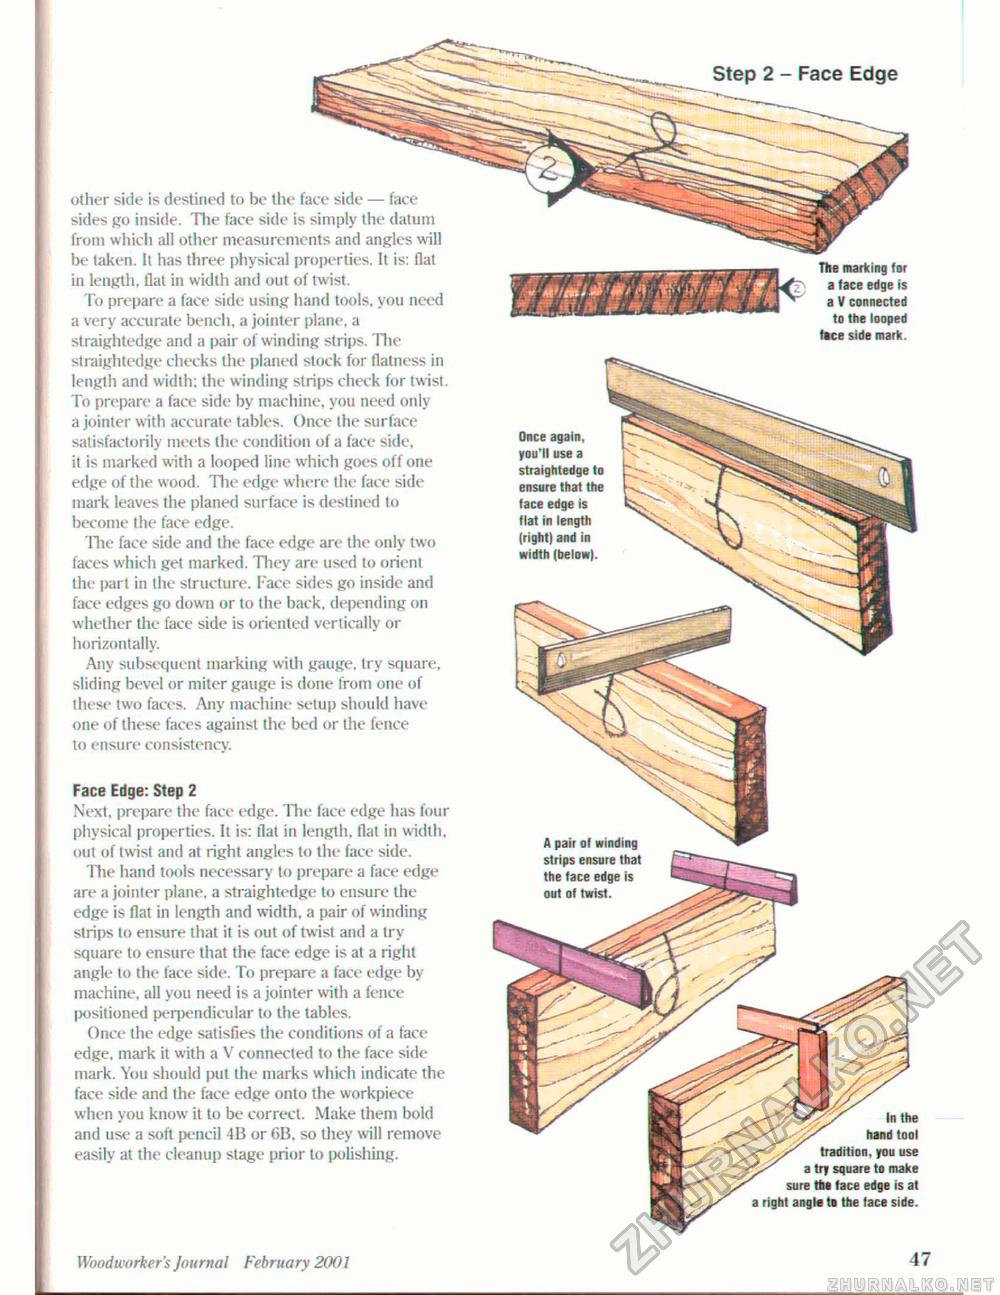
Face Edge: Step 2 Next, prepare the face edge. Hie face edge has four physical properties. It is: flat in length, flat in width, iout of twisl and at right angles to the face side. The hand tools necessary to prepare a face edge are a jointer plane, a straightedge to ensure the edge is flat in length and width, a pair of winding strips to ensure that it is out of twist and a try square to ensure that the face edge is at a right angle to the face side. To prepare a face edge by machine, all you need is a jointer with a fence positioned perpendicular to the tables. Once the edge satisfies the conditions of a face edge, mark it with a V connected to the face side mark. You should put the marks which indicate the face side and the face edge onto the workpiece when you knowr it to be correct. Make them bold and use a soft pencil 4B or 6B. so they will remove easily at the cleanup stage prior to polishing. Woodworker's Journal February 2001 47 I_ Step 2 - Face Edge other side is destined to be the face side — face sides go inside. The face side is simply the datum front which all other measurements and angles will be taken. It has three physical properties. It is: flat in length, flat in width and out of twist. To prepare a face side using hand tools, you need a very accurate bench, a jointer plane, a straightedge and a pair of winding strips. The straightedge checks the planed stock for flatness in length and width; the winding strips check for twist. To prepare a face side by machine, you need only a jointer with accurate tables. Once the surface satisfactorily meets the condition of a face side, it is marked with a looped line which goes off one edge of the wood. The edge where the face side mark leaves the planer! surface is destined to become the face edge. The face side and the face edge are the only two faces which get marked. They are used to orient the part in the structure. Face sides go inside and face edges go down or to the back, depending on whether the face side is oriented vertically or horizontally. Any subsequent marking with gauge, try square, sliding bevel or miter gauge is done from one of these two faces. Any machine setup should have one of these faces against the bed or the fence to ensure consistency. A pair of winding strips ensure that the face edge is out of twist. Once again, you'll use a straightedge to ensure that the face edge is flat in length (right) and in width (below). hand tool tradition, you use a try square to make sure tfct face edge is at a right angle to Hie face side. |


