Woodworker's Journal 2001-25-1, страница 46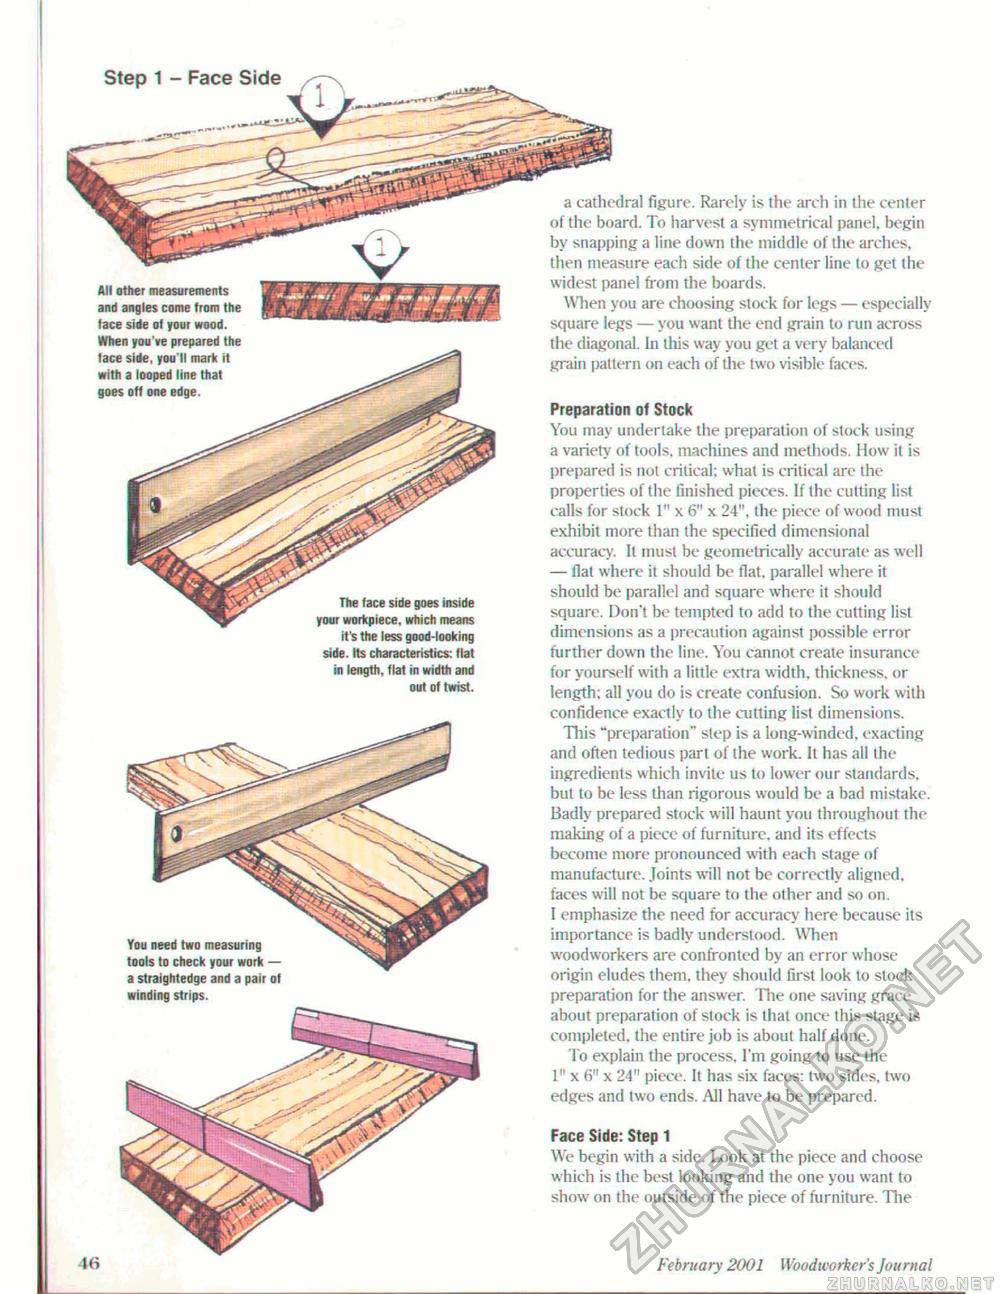
a cathedral figure. Rarely is the arch in the center of the board. To harvest a symmetrical panel, begin by snapping a line down the middle of the arches, then measure each side of the center line to get the widest panel from the boards. When you are choosing stock for legs — especially square legs — you want the end grain to run across the diagonal. In this way you get a very balanced grain pattern on each of the two visible faces. Preparation of Stock You may undertake the preparation of stock using a variety of tools, machines and methods. How it is prepared is not critical; what is critical are the properties of the finished pieces. If the cutting list calls for stock J." x 6" x 24". the piece of wood must exhibit more than the specified dimensional accuracy. It must be geometrically accurate as well — flat where it should be flat, parallel where it should be parallel and square where it should square. Don't be tempted to add to the cutting list dimensions as a precaution against possible error further down the line. You cannot create insurance for yourself with a little extra width, thickness, or length; all you do is create confusion. So work with confidence exactly to the cutting list dimensions. This ■"preparation" step is a long-winded, exacting and often tedious part of the work. It has all the ingredients which invite us to lower our standards, but to be less than rigorous would be a bad mistake. Badly prepared stock will haunt you throughout the making of a piece of furniture, and its effects become more pronounced with each stage of manufacture. Joints will not be correctly aligned, faces will not be square to the other and so on. I emphasize the need for accuracy here because its importance is badly understood. When woodworkers are confronted by an error whose origin eludes them, they should first look to stock preparation for the answer. Ihe one saving grace about preparation of stock is that once this stage is completed, the entire job is about half done. To explain the process, I'm going lo use the 1" x 6" x 24" piece. It has six faces: two sides, two edges and I wo ends. All have to be prepared. The face side goes inside your workpiece. which means it's the less good-looking side. Its characteristics: flat in length, flat in width and out of twist. All other measurements and angles come from the face side of your wood. When you've prepared the face side, you'll mark it with a looped line that goes oft one edge. Face Side: Step 1 We begin with a side. Ixiok at the piece and choose which is the best looking and the one you want to show on the outside of the piece of furniture. The 46 February 2001 Wood wo rker's Jo u mat You need two measuring tools to check your work — a straightedge and a pair ol winding strips. |


