Woodworker's Journal 2001-25-1, страница 48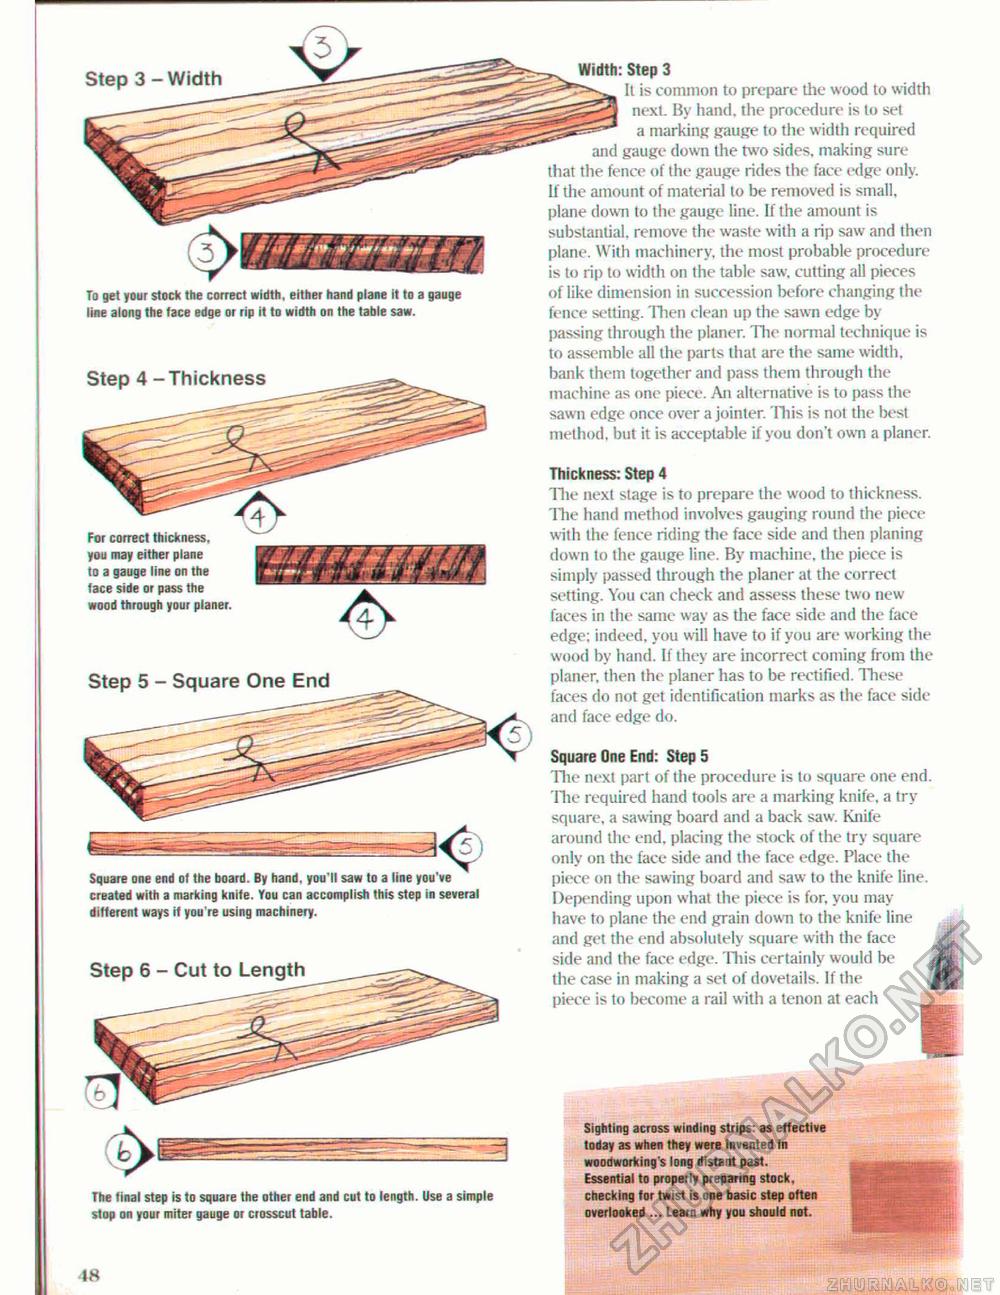
Width: Step 3 f^J^s. It is common to prepare the wood to width ^^^J next. By hand, the procedure is to set ^^^ a marking gauge to the width required and gauge down the two sides, making sure that the fence of the gauge rides the face edge only. 11 tiie amount of material to be removed is small, plane down to the gauge line. If the amount is substantial, remove the waste with a rip saw and then plane. With machinery, the most probable procedure is to rip to width 011 the table saw, cutting all pieces of like dimension in succession before changing the fence setting. 'linen clean up the sawn edge by passing through the planer. The normal technique is to assemble all the parts that are the same width, bank them together and pass them through the machine as one piece. An alternative is to pass the sawn edge once over a jointer. This is not the best method, but it is acceptable if you don't own a planer. Step 3 - Width To get your stock the correct width, either hand plane it to a gauge line along the face edge or rip it to width on the table saw. Step 4 - Thickness Thickness: Step 4 The next stage is to prepare the wood to thickness. The hand method involves gauging round the piece with the fence riding the face side and then planing down to the gauge line. By machine, the piece is simply passed through the planer at the correct setting. You can check and assess these two new-faces in the same way as the face side and the face edge: indeed, you will have to if you are working the wood by hand. If they are incorrect coming from the planer, then the planer has to be rectified. These faces do not get identification marks as the face side and face edge do. For correct thickness, you may either plane to a gauge line on the face side or pass the wood through your planer. Step 5 - Square One End Square One End: Step 5 The next part of the procedure is to square one end The required hand tools are a marking knife, a try square, a sawing board and a back saw. Knife around the end. placing the stock of the try square only on the face side and the face edge. Place the piece on the sawing board and saw to the knife line. Depending upon what the piece is for, you may-have to plane the end grain down to the knife line and get the end absolutely square with the face side and the face edge. This certainly would be the case in making a set of dovetails. If the piece is to become a rail with a tenon at each Square one end of the board. By hand, you'll saw to a line you've created with a marking knife. You can accomplish this step in several different ways if you're using machinery. Step 6 - Cut to Length The final step is to square the other end and cut to length. Use a simple stop on your miter gauge or crosscut table. Sighting across winding strips: as effective today as when they were invented in woodworking's long distant past. Essential to properly preparing stock, checking for twist is one basic step often overlooked ... Learn why you should not. |


