Woodworker's Journal 2004-28-6, страница 32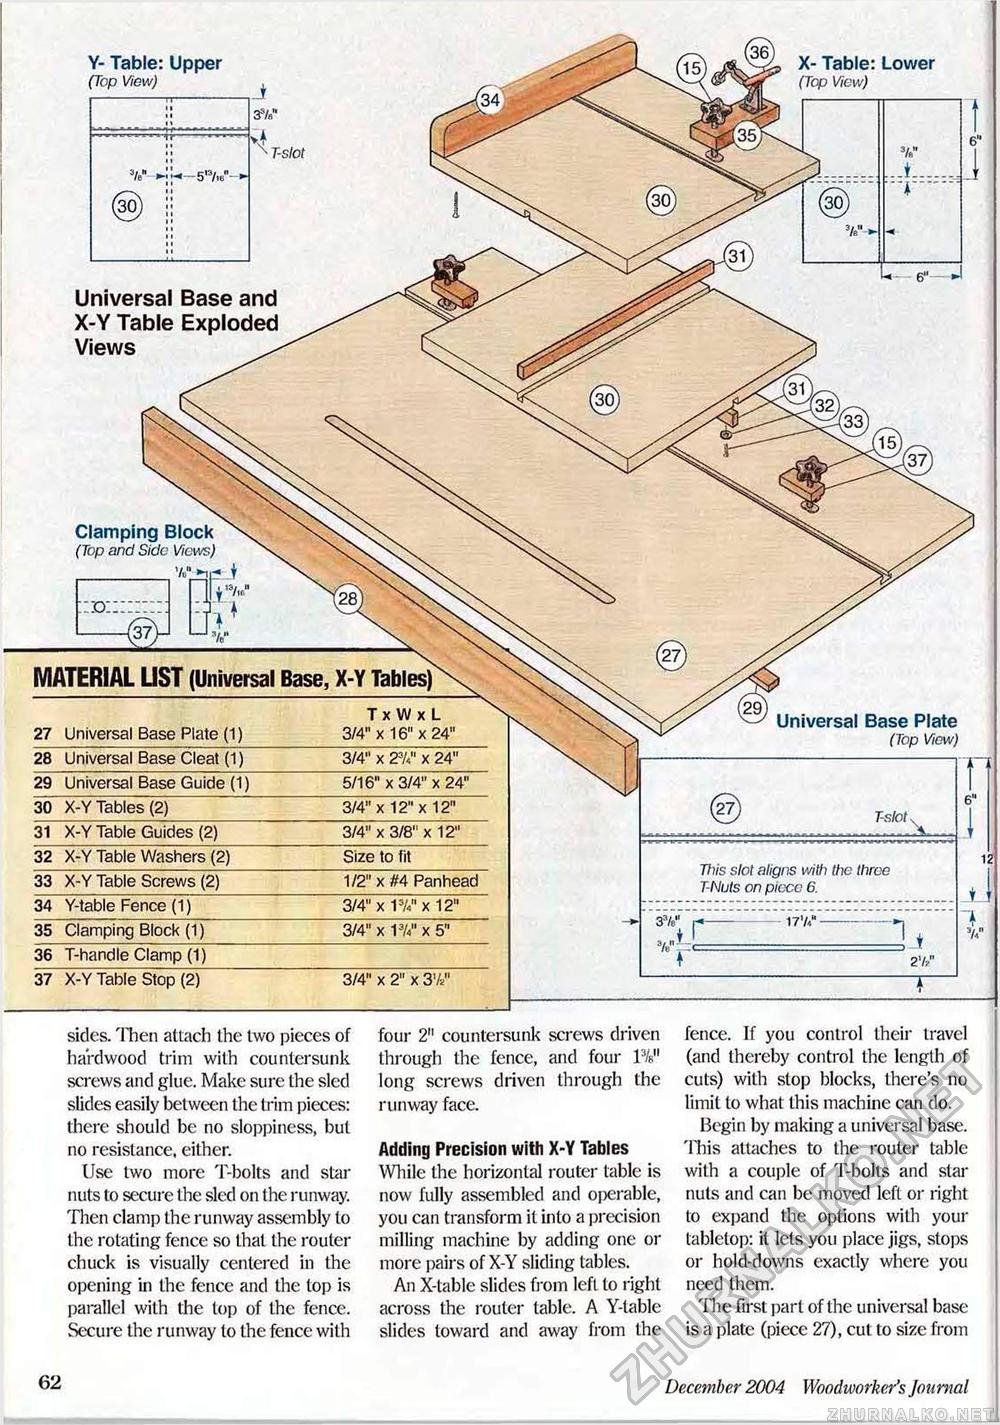
sides. Then attach the two pieces of hardwood trim with countersunk screws and glue. Make sure the sled slides easily between the trim pieces: there should be no sloppiness, but no resistance, either. Use two more T-bolts and star nuts to secure the sled on the runway. Then clamp the runway assembly to the rotating fence so that the router chuck is visually centered in the opening in the fence and the top is parallel with the top of the fence. Secure the runway to the fence with four 2" countersunk screws driven through the fence, and four W long screws driven through the runway face. Adding Precision with X-Y Tables While the horizontal router table is now fully assembled and operable, you can transform it into a precision milling machine by adding one or more pairs of X-Y sliding tables. An X-table slides from left to right across the router table. A Y-table slides toward and away from the fence. If you control their travel (and thereby control the length of cuts) with stop blocks, there's no limit to what this machine can do. Begin by making a universal base. This attaches to the router table with a couple of T-bolts and star nuts and can be moved left or right to expand the options with your tabletop: it lets you place jigs, stops or hold-downs exactly where you need them. The first part of the universal base is a plate (piece 27), cut to size from Clamping Block (Top and Side Views) Universal Base and X-Y Table Exploded Views X- Table: Lower (Top View) TxWxL 27 Universal Base Plate (1) 3/4" x 16" x 24" 28 Universal Base Cleat (1) 3/4" x 27<" x 24" 29 Universal Base Guide (1) 5/16" x 3/4" x 24" 30 X-Y Tables (2) 3/4" x 12" x 12" 31 X-Y Table Guides (2) 3/4" x 3/8" x 12" 32 X-Y Table Washers (2) Size to fit 33 X-Y Table Screws (2) 1/2" x #4 Panhead 34 Y-table Fence (1) 3/4" x W x 12" 36 T-handle 37 X-Y Table Stop (2) 3/4" x 2" x 37/ Universal Base Plate (Top View) Y- Table: Upper (Top View) , 3?/i 35 Clamping Block 3/4" x W x 5" This slot aligns with the three T-Nuts on piece 6. 62 December 2004 Woodworker's Journal |


