Woodworker's Journal 2004-28-6, страница 33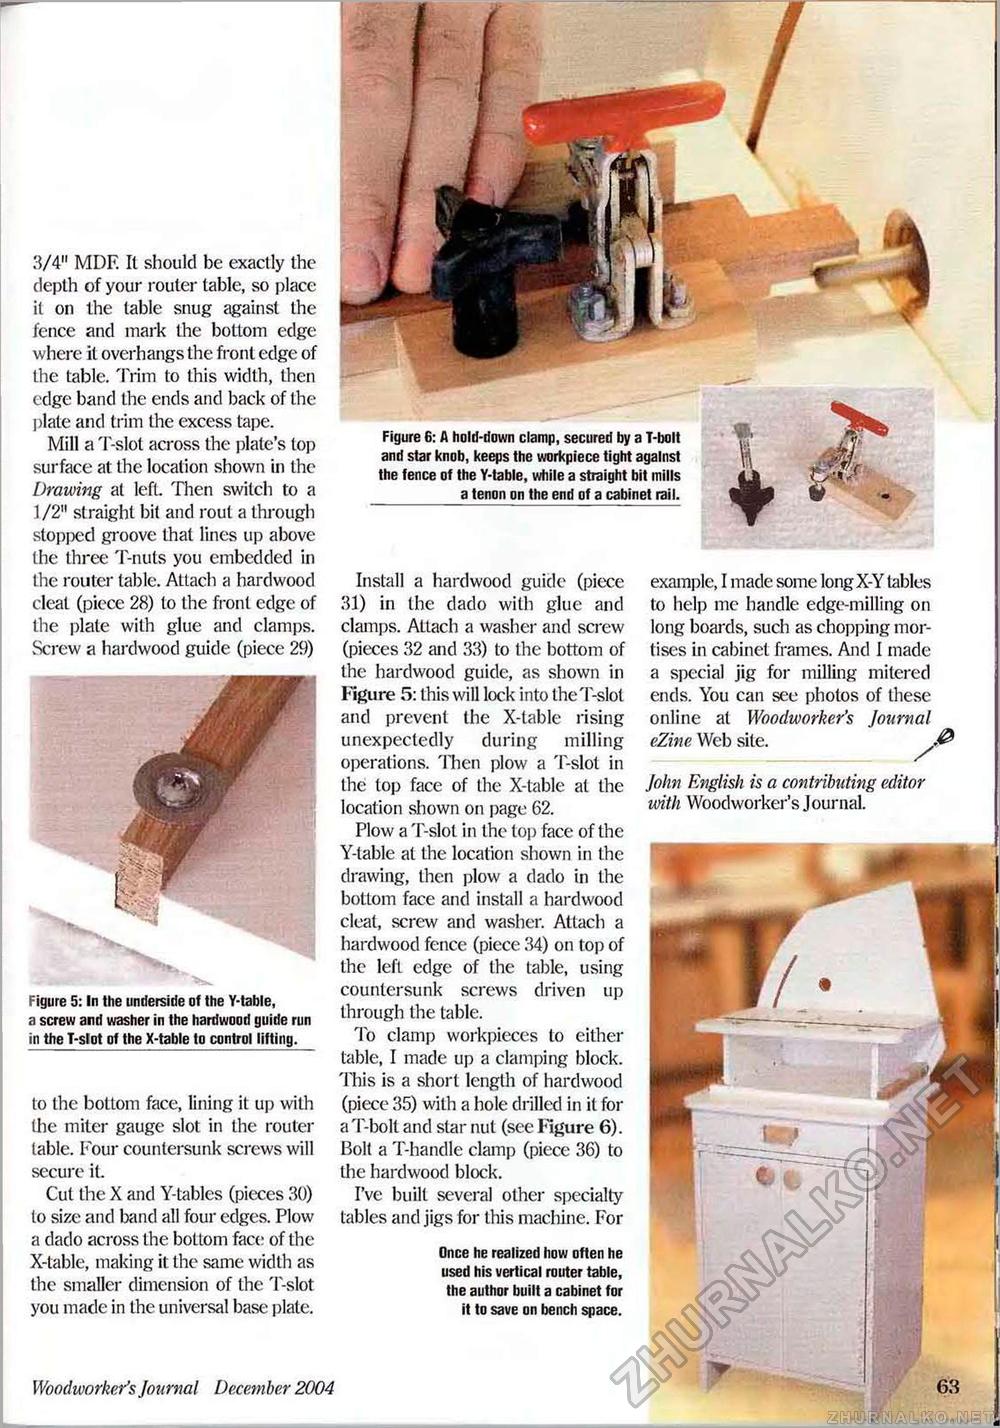
3/4" MDF. II should be exactly the depth of your router table, so place it on the table snug against the fence and mark the bottom edge where it overhangs the front edge of the table. Trim to this width, then edge band the ends and back of the plate and trim the excess tape. Mill a T-slot across the plate's top surface at the location shown in the Drawing at left. Then switch to a 1/2" straight bit and rout a through stopped groove that lines up above the three T-nuts you embedded in the router table. Attach a hardwood cleat (piece 28) to the front edge of the plate with glue and clamps. Screw a hardwood guide (piece 29) Figure 5: In the underside of the Y-table, a screw and washer in the hardwood guide run in the T-slot of the X-table to control lifting. to the bottom face, lining it up with the miter gauge slot in the router table. Four countersunk screws will secure it. Cut the X and Y-tables (pieces 30) to size and band all four edges. Plow a dado across the bottom face of the X-table, making it the same width as the smaller dimension of the T-slot you made in the universal base plate. Install a hardwood guide (piece 31) in the dado with glue and clamps. Attach a washer and screw (pieces 32 and 33) to the bottom of the hardwood guide, as shown in Figure 5: this will lock into the T-slot and prevent the X-table rising unexpectedly during milling operations. Then plow a T-slot in the top face of the X-table at the location shown on page 62. Plow a T-slot in the top face of the Y-table at the location shown in the drawing, then plow a dado in the bottom face and install a hardwood cleat, screw and washer. Attach a hardwood fence (piece 34) on top of the left edge of the table, using countersunk screws driven up through the table. To clamp workpieces to either table, I made up a clamping block. This is a short length of hardwood (piece 35) with a hole drilled in it for aT-bolt and star nut (see Figure 6). Bolt a T-handle clamp (piece 36) to the hardwood block. I've built several other specialty tables and jigs for this machine. For Once he realized how often he used his vertical router table, the author built a cabinet for it to save on bench space. example, I made some longX-Y tables to help me handle edge-milling on long boards, such as chopping mortises in cabinet frames. And I made a special jig for milling mitered ends. You can see photos of these online at Woodworker's Journal eZine Web site. John English is a contributing editor with Woodworker's Journal. Woodworker's Journal Decernber 2004 63 Figure 6: A hold-down clamp, secured by a T-bolt and star knob, keeps the workpiece tight against the fence of the Y-table, while a straight bit mills a tenon on the end of a cabinet rail. |


