Woodworker's Journal 2006-30-Winter, страница 23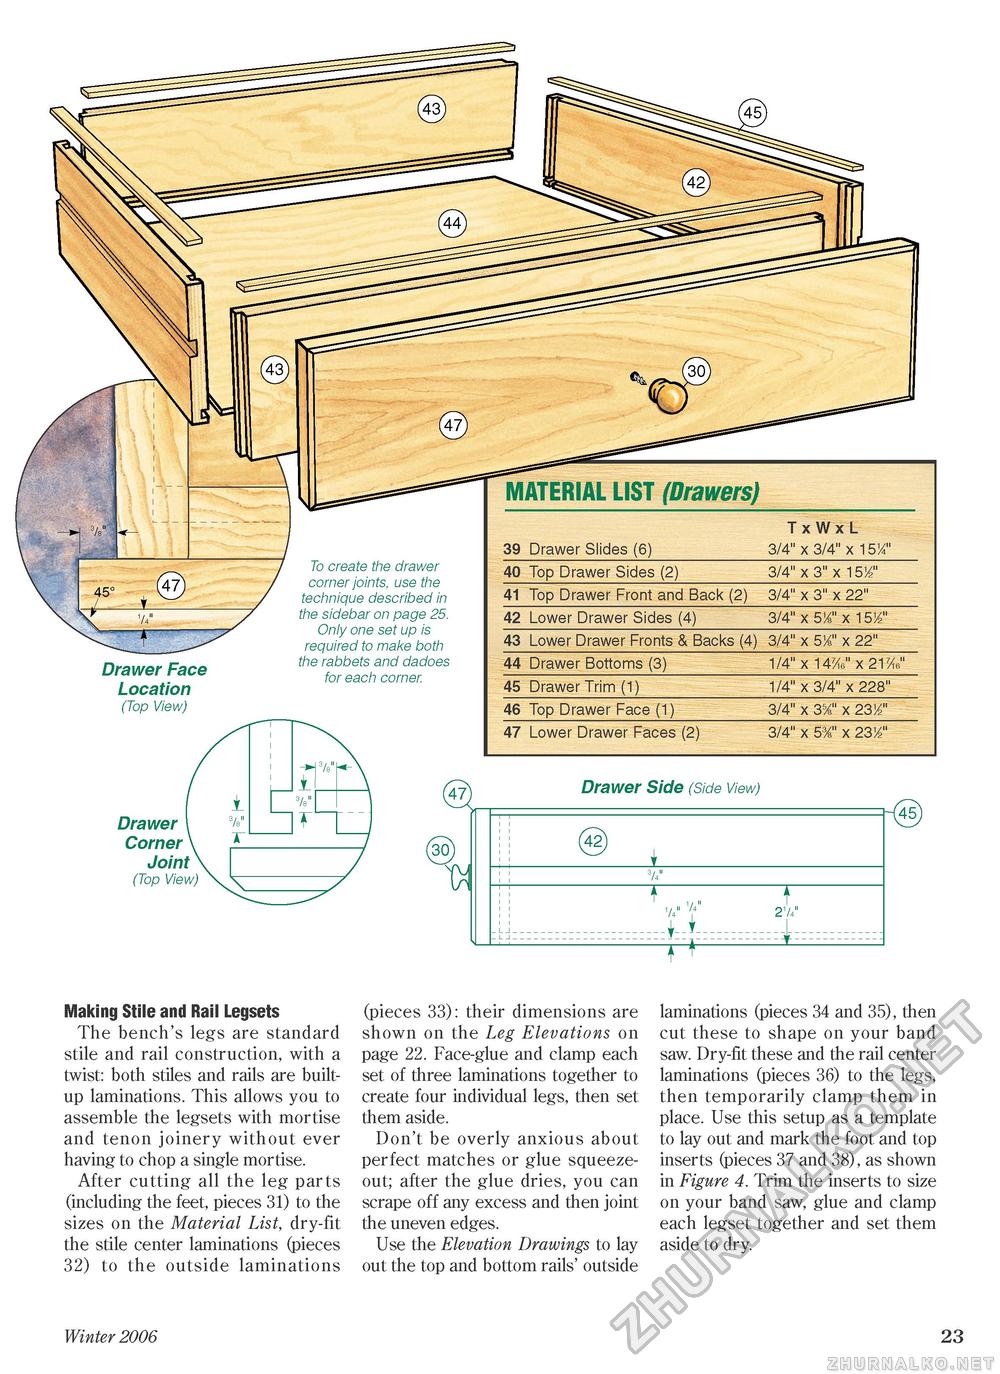
Drawer Face Location (Top View) To create the drawer corner joints, use the technique described in the sidebar on page 25. Only one set up is required to make both the rabbets and dadoes for each corner. Drawer Corner Joint (Top View) MATERIAL LIST (Drawers)
Drawer Side (Side View) <30), Drawer Side (Side View) ® T 1/4" 1/4" u 21/4" Making Stile and Rail Legsets The bench's legs are standard stile and rail construction, with a twist: both stiles and rails are built-up laminations. This allows you to assemble the legsets with mortise and tenon joinery without ever having to chop a single mortise. After cutting all the leg parts (including the feet, pieces 31) to the sizes on the Material List, dry-fit the stile center laminations (pieces 32) to the outside laminations (pieces 33): their dimensions are shown on the Leg Elevations on page 22. Face-glue and clamp each set of three laminations together to create four individual legs, then set them aside. Don't be overly anxious about perfect matches or glue squeeze-out; after the glue dries, you can scrape off any excess and then joint the uneven edges. Use the Elevation Drawings to lay out the top and bottom rails' outside laminations (pieces 34 and 35), then cut these to shape on your band saw. Dry-fit these and the rail center laminations (pieces 36) to the legs, then temporarily clamp them in place. Use this setup as a template to lay out and mark the foot and top inserts (pieces 37 and 38), as shown in Figure 4. Trim the inserts to size on your band saw, glue and clamp each legset together and set them aside to dry. Winter 2006 23 |
||||||||||||||||||||||||||||||


