Woodworker's Journal 2006-30-Winter, страница 21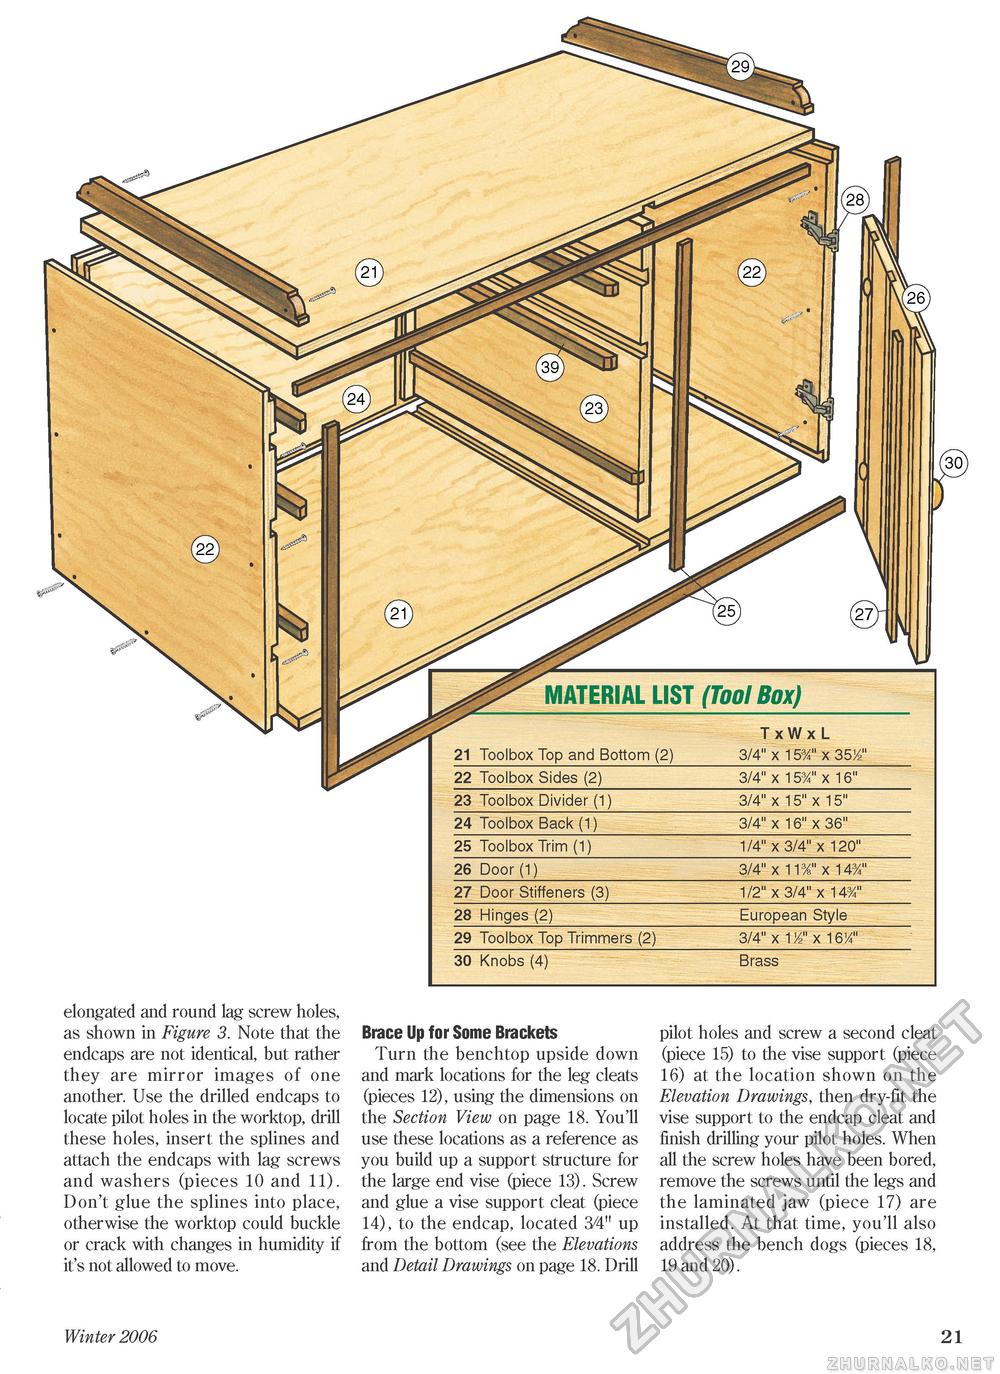
30
elongated and round lag screw holes, as shown in Figure 3. Note that the endcaps are not identical, but rather they are mirror images of one another. Use the drilled endcaps to locate pilot holes in the worktop, drill these holes, insert the splines and attach the endcaps with lag screws and washers (pieces 10 and 11). Don't glue the splines into place, otherwise the worktop could buckle or crack with changes in humidity if it's not allowed to move. Brace Up for Some Brackets Turn the benchtop upside down and mark locations for the leg cleats (pieces 12), using the dimensions on the Section View on page 18. You'll use these locations as a reference as you build up a support structure for the large end vise (piece 13). Screw and glue a vise support cleat (piece 14), to the endcap, located 3/4" up from the bottom (see the Elevations and Detail Drawings on page 18. Drill pilot holes and screw a second cleat (piece 15) to the vise support (piece 16) at the location shown on the Elevation Drawings, then dry-fit the vise support to the endcap cleat and finish drilling your pilot holes. When all the screw holes have been bored, remove the screws until the legs and the laminated jaw (piece 17) are installed. At that time, you'll also address the bench dogs (pieces 18, 19 and 20). Winter 2006 21 |
||||||||||||||||||||||


